
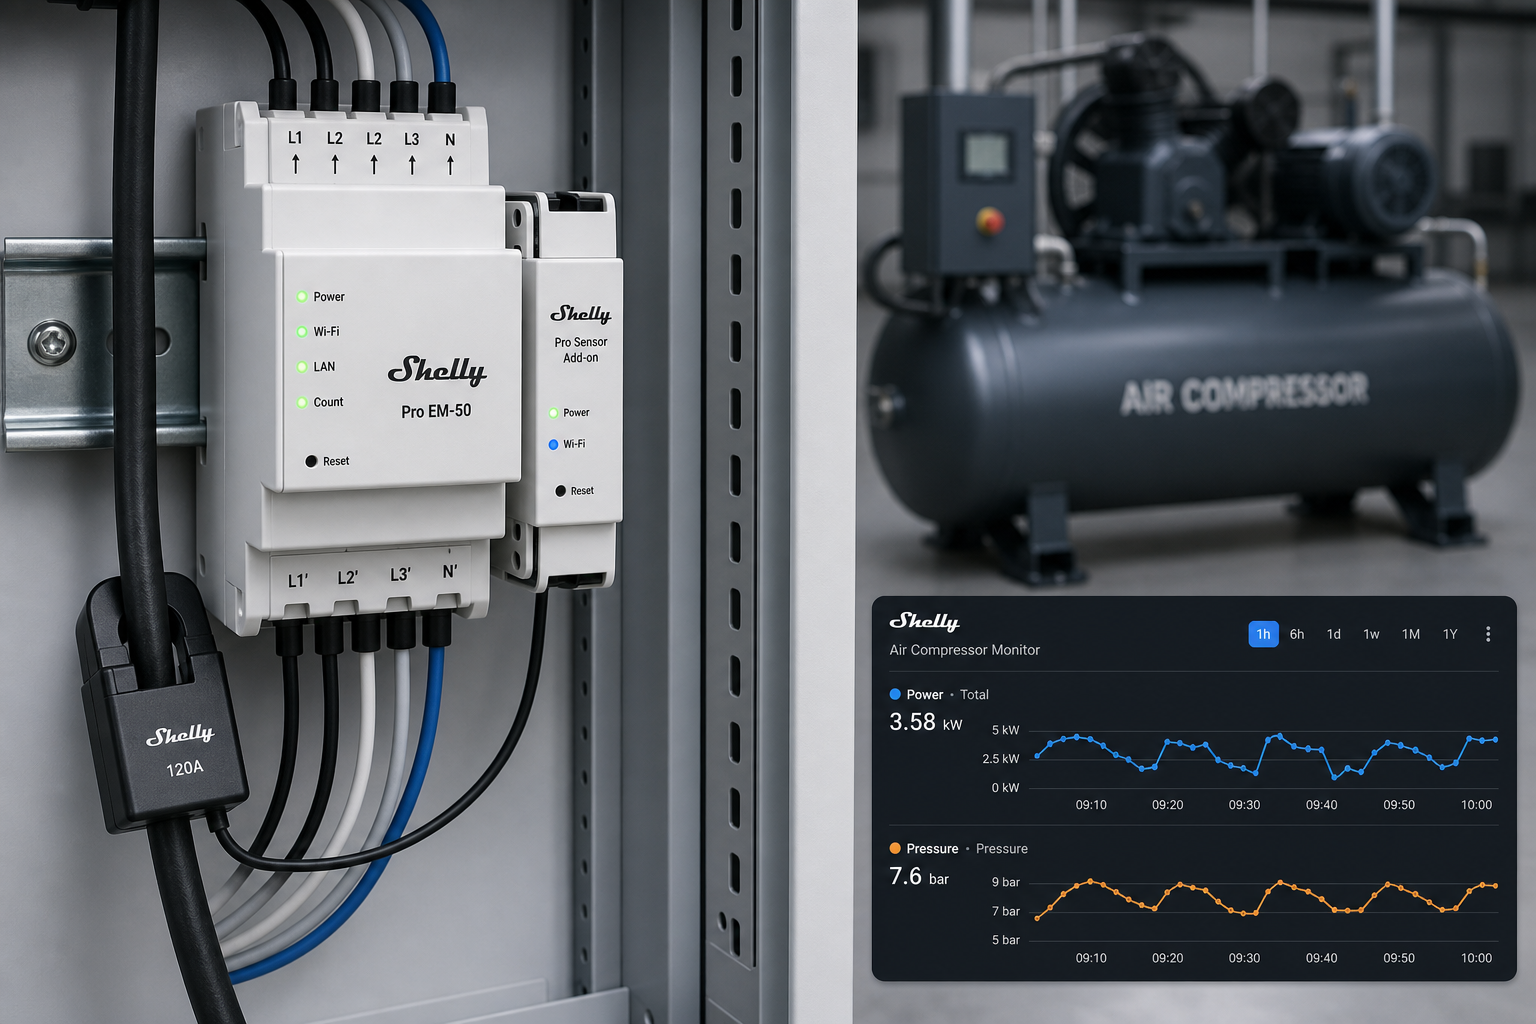
Power alone can't show whether a compressor is truly keeping up or just running flat-out without pressure recovering. Pairing Shelly Pro EM-50 with a pressure sensor watches both at once — monitoring only, no automatic shutoff.
Overview
A Shelly Pro EM-50, paired with a Pro Sensor Add-on and a CT clamp, turns a larger, hardwired shop compressor into something that reports on itself: how much power it's drawing, and what the actual line pressure is doing, both at once. Unlike a power-only reading, having pressure in the picture answers the harder question directly — is the compressor working hard because it's genuinely keeping up with demand, or because something's wrong and it's running flat-out without pressure ever recovering? This setup watches both signals continuously and can flag that difference — purely to monitor and notify, with no contactor, no automatic cutoff, nothing standing between the compressor and its own controls.
Important scope note: this is for a hardwired compressor. One CT clamp on one phase tracks current as a running indicator — it is not full three-phase power measurement (that would need a Shelly Pro 3EM instead).
Prerequisites
-
Shelly Pro EM-50 (DIN rail) with a CT clamp sized to the compressor's full-load amps
-
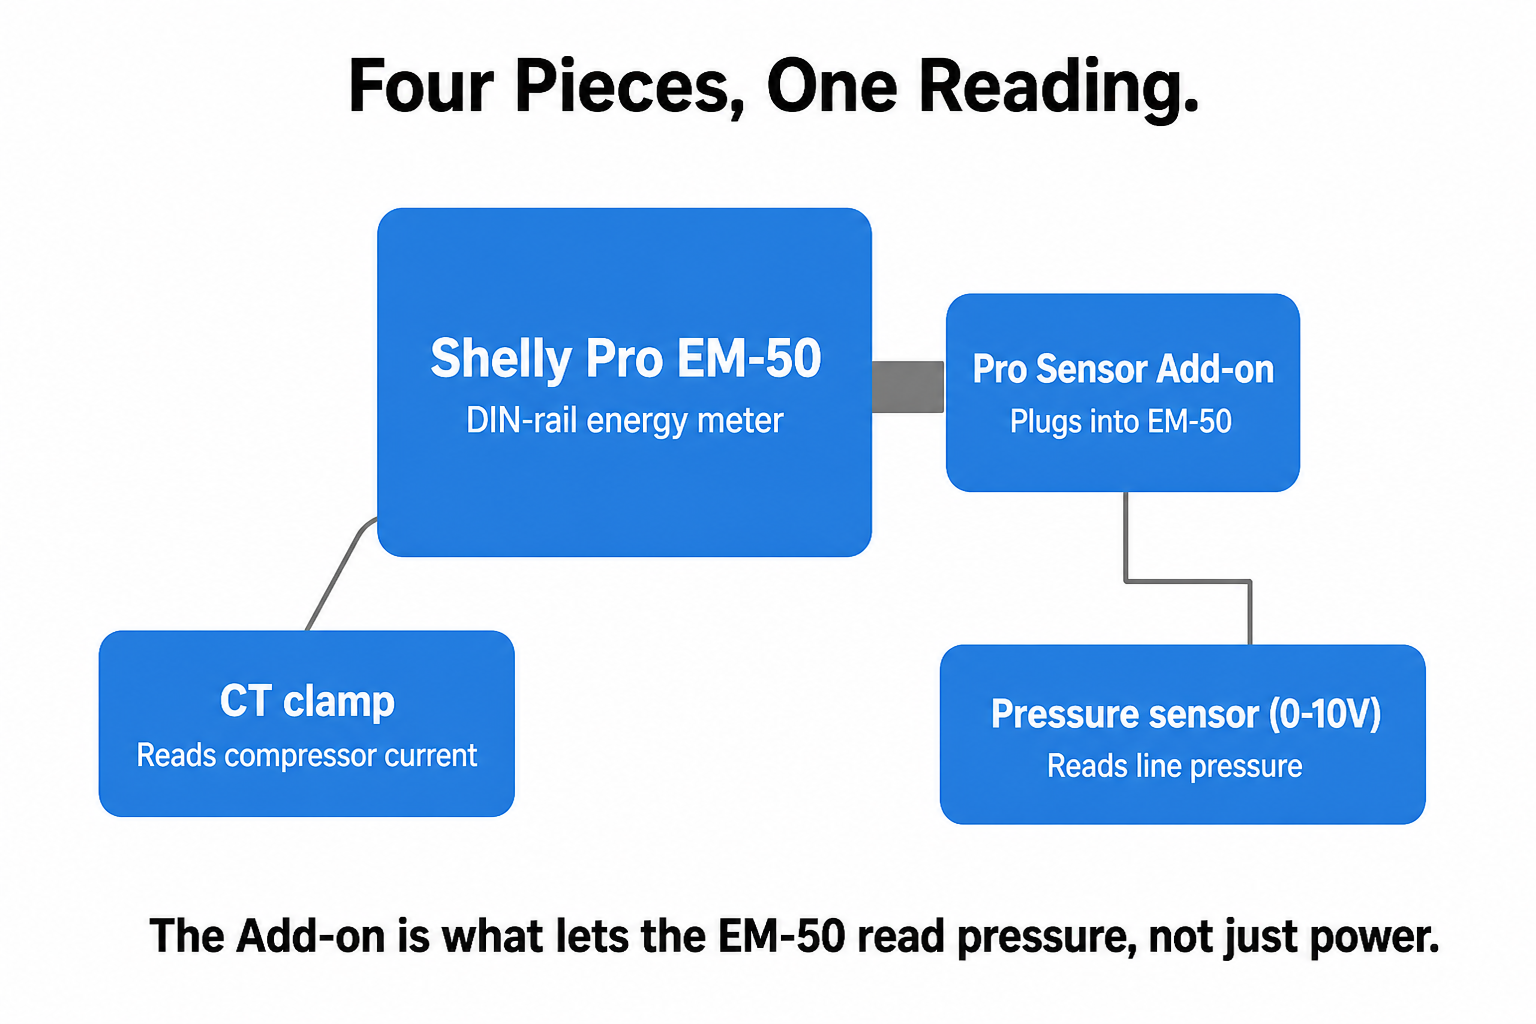
Shelly Pro Sensor Add-on — attaches to the EM-50 and provides the 0-10V analog input
-
A 0-10V pressure sensor (e.g. 0-10 bar, G1/4 thread) with its own 12-24VDC power supply — the Add-on's VCC output (10 mA) is too weak to power it. A 4-20mA sensor also works, but needs an added shunt resistor.
-
A hardwired compressor with a working pressure switch, unloader and motor protection — this setup rides on top of them and replaces none of them
-
An accessible tap point on the air line (a tee fitting matching the sensor's thread)
-
Usable Wi-Fi at the panel location, or an Ethernet connection — metal enclosures and motor EMI can weaken Wi-Fi
-
Shelly Smart Control app
-
Installation of Shelly Pro EM-50 must be performed by a qualified electrician — see the Shelly Pro EM-50 User and Safety Guide.
Steps
-
Safety first — disconnect all power sources (mains to the panel and the compressor's own supply) before wiring anything.
-
Mount the meter — fit the Shelly Pro EM-50 on a DIN rail inside a suitable enclosure and plug the Pro Sensor Add-on into its add-on port.
-
Power the meter — wire the EM-50's own L/N terminals to the panel's mains supply.
-
Fit the CT clamp — clip it around ONE phase conductor of the compressor's supply, between the breaker/contactor and the compressor, arrow pointing toward the compressor. Connect its two leads to the EM-50's "IA" input; leave "IB" unused.
-
Mount the pressure sensor — via a tee fitting on the air line, after the compressor's own check valve/unloader and before the main distribution point.
-
Wire the pressure sensor — 12-24VDC supply to the sensor's V+/V–; sensor signal (0-10V) to the Add-on's Analog Input 1 (AIN1); sensor GND to the Add-on's GND (common reference). Nothing is wired to the contactor coil or any relay output — the setup is monitoring-only.
-
Add the device — close the enclosure, restore power, add the device in the app, connect it to Wi-Fi (or Ethernet) and rename it (e.g. "Compressor Panel").
-
Scale the pressure reading — set the analog input's
range_mapto the sensor's actual range (e.g.[0, 10]for a 0-10 bar sensor), so the app shows bar instead of raw voltage/percent. -
Check live readings — confirm power (W) and pressure (bar) on Main Controls during a normal compressor cycle.
-
Set up monitoring — use one or more of these:
-
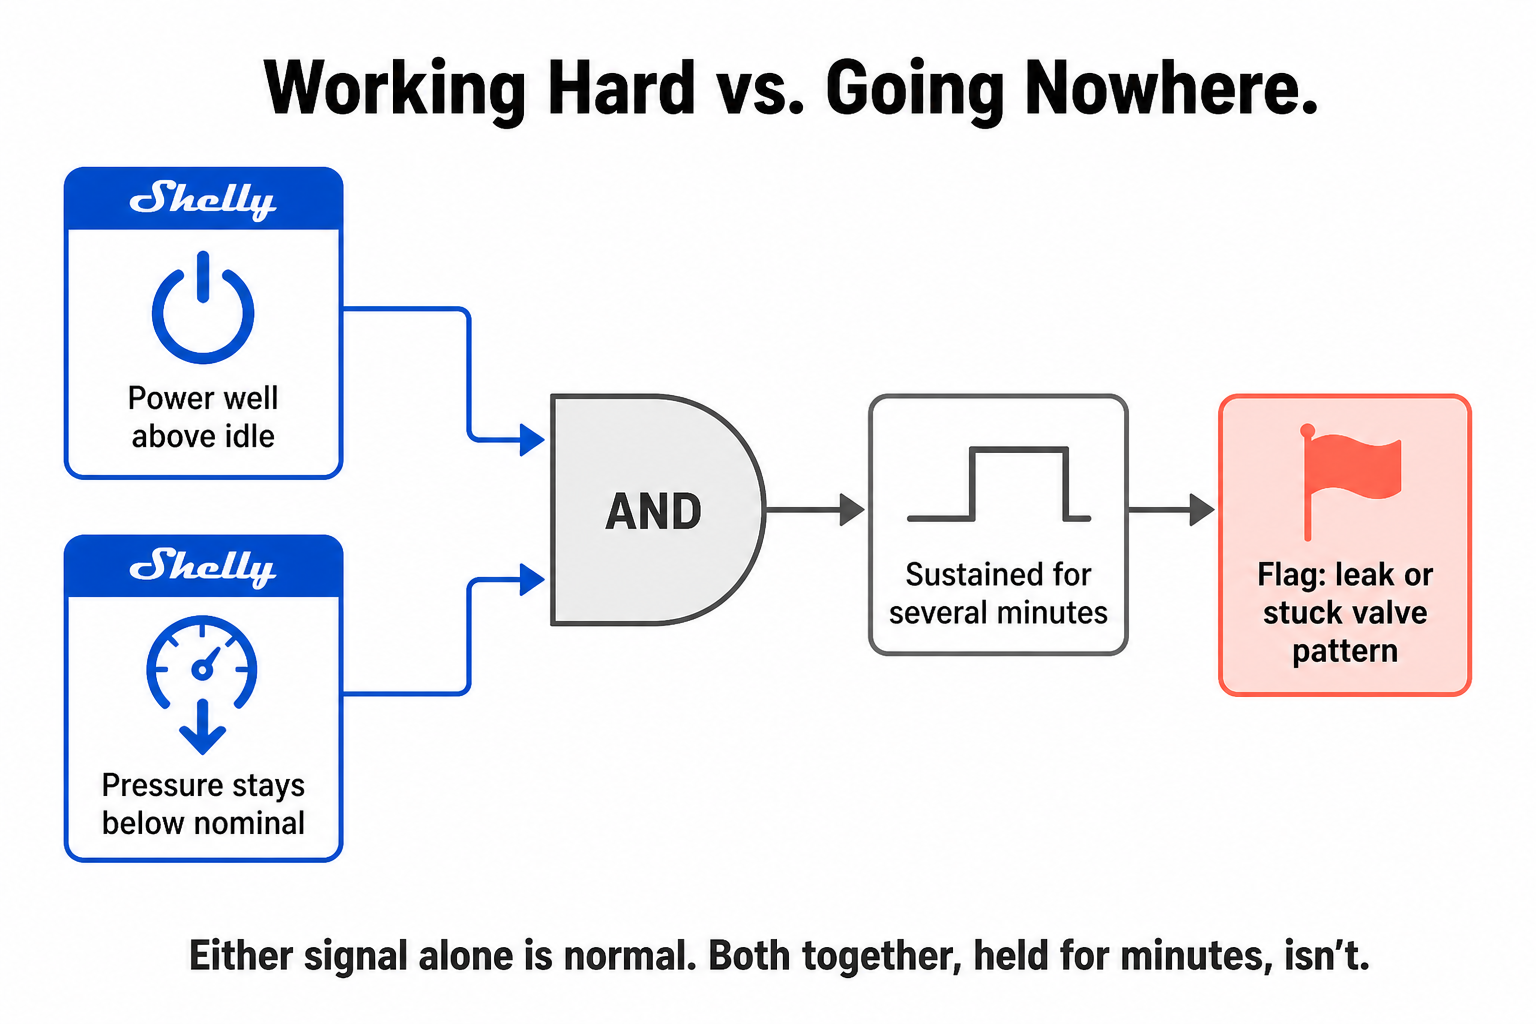
Running-hard, no-recovery alert — power well above idle while pressure stays below its nominal working level for more than a few minutes is not a normal fill cycle; it's the pattern a leak or stuck valve produces. The EM-50's built-in scripting combines both readings and flags it.
-
Idle pressure-decay leak check — during downtime (lunch, shift change, overnight) pressure should hold nearly flat; a decay that gets steeper month over month is measurable leak growth.
-
Efficiency/wear trend — once a normal power-per-cycle baseline is logged, a rising trend for the same duty cycle is an early sign of a clogging filter, worn piston rings or a sticking valve.
-
Troubleshooting
-
Pressure reads 0 or doesn't change → check the sensor's 12-24VDC supply and that the sensor's GND is tied to the Add-on's GND.
-
Pressure value is on the wrong scale → check that the analog input's
range_mapmatches the sensor's actual range. -
Power reading is near zero or negative while the compressor runs → check that the CT clamp is around one conductor only and its arrow points toward the compressor.
Tips
-
Log a few weeks of normal operation before setting alert thresholds — idle and loaded power differ from one compressor to another.
-
If Wi-Fi inside the metal panel is weak, connect the Pro EM-50 over Ethernet (it has an RJ45 port).
-
This setup only monitors — the compressor's own pressure switch and protection remain the safety devices.
Devices Used
-
Shelly Pro EM-50
-
Shelly Pro Sensor Add-on
Documentation & References
Why It's Worth It
It adds real diagnostics to an existing compressor without changing how it is controlled — nothing is switched off automatically, so there is no risk of interrupting work.
Conclusion
With the Shelly Pro EM-50 reading both power and line pressure, the compressor now reports on its own condition instead of simply running. You can tell a normal fill cycle from one that is working hard without recovering, and catch leaks or wear early from the logged trends — all without touching the compressor's own controls.
---
vertical: home-workshop
concept: compressor-power-pressure-monitoring
complexity: advanced
devices: [Shelly Pro EM-50, Shelly Pro Sensor Add-on]
---