Overview
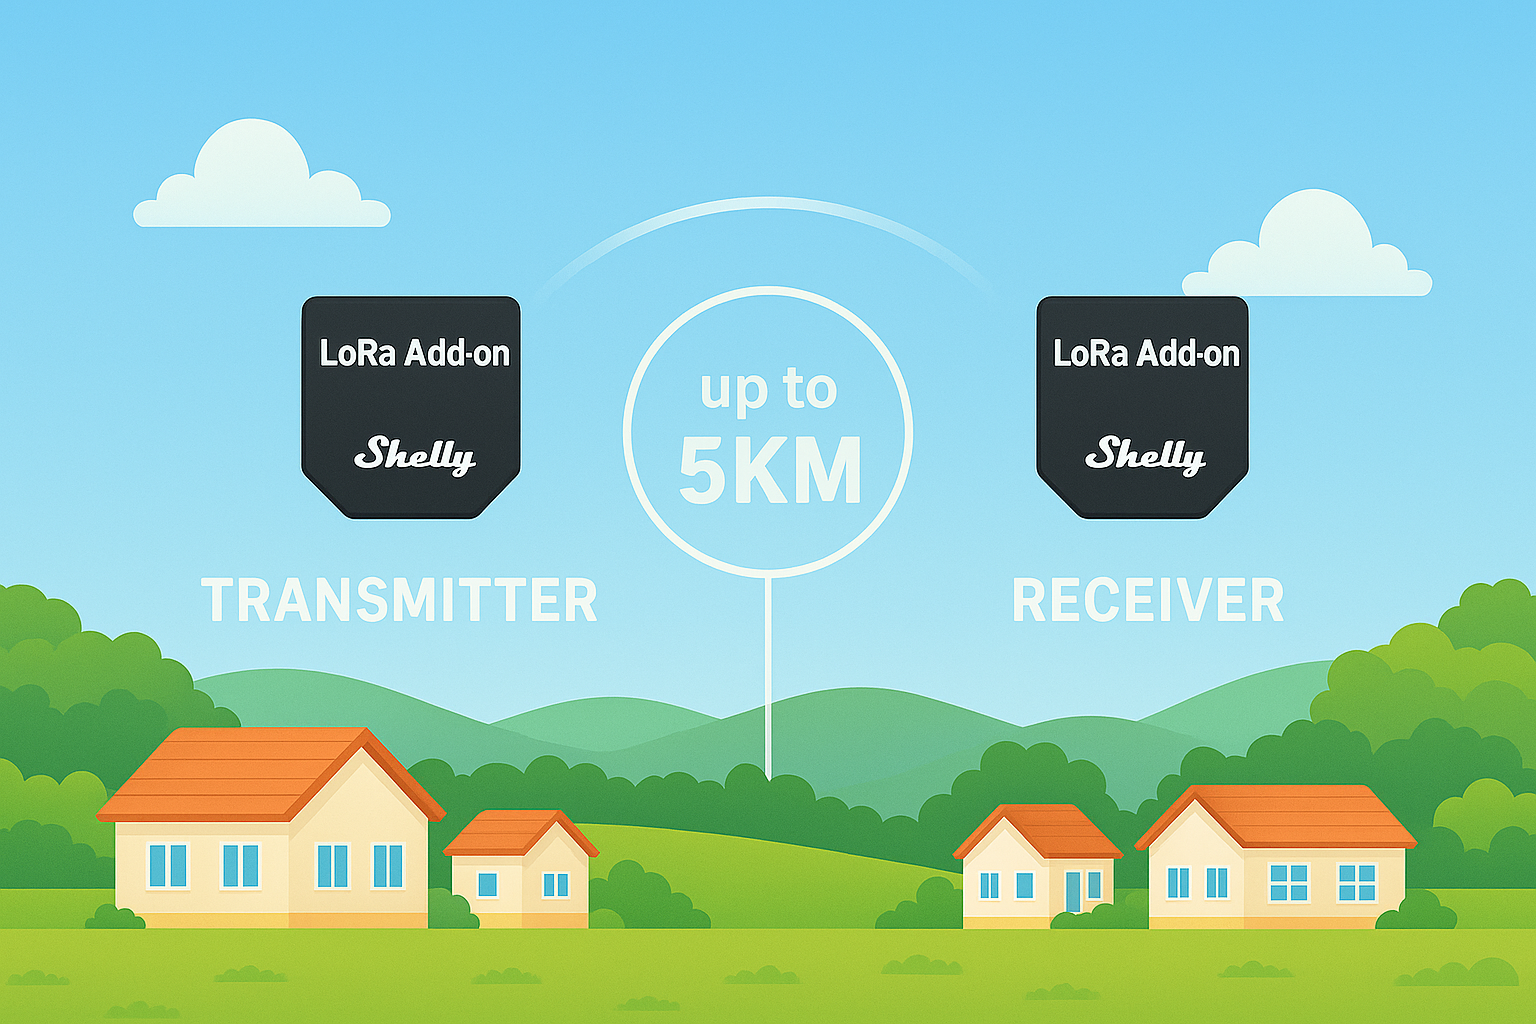
This Solution explains how to transmit the state of a BT Home / Virtual Component from one Shelly device (the Sender) to another (the Receiver) over long-range LoRa radio. By attaching a Shelly LoRa Add-on to each Gen 3 / Gen 4 device, you can push a virtual “open/closed”, “on/off”, or numeric value up to 5 km in open space, even where Wi-Fi or BLE are out of reach.
A Shelly Script on the Sender watches a Virtual Component and, whenever its value changes, encrypts the new state and broadcasts it over LoRa.
A companion script on the Receiver decrypts the packet and updates a local Virtual Component (or triggers any other logic you choose).
This setup allows a Virtual Component's state to be securely sent from one Shelly device to another over LoRa, simulating sensor data transmission such as door/window status using a custom Virtual Component and Shelly scripting.
Prerequisites
-
2× Shelly LoRa Add-ons (one for the Sender, one for the Receiver)
-
2× Shelly devices that support LoRa Add-ons
Step-by-Step Instructions
1. Create the Virtual Component on the Sender Device
-
Open the Local Web Interface of the Sender device.
-
Navigate to Components.
-
Create the desired BTHome / Virtual Component and attach the relevant reporting sensor.
Example: If you're simulating a Shelly BLU Door/Window sensor, the states will typically be "open" and "closed."
2. Set the Virtual Component Value
Use the following function to set the state of the Virtual Component:
Virtual.prototype.setValue(new_value);
Refer to the API documentation: https://shelly-api-docs.shelly.cloud/gen2/Scripts/ShellyScriptLanguageFeatures/#virtualprototypesetvaluenew_value
3. Install and Modify the Sender Script
Use the script available here:
Modify the script:
-
Add a Shelly.addStatusHandler() to monitor changes from the sensor.
-
Specify the correct component ID to track updates accurately. You can find this ID in the Local Web Interface under the respective component details.
4. Install and Modify the Receiver Script
Use the script available here:
Edit the following line in the receiver script to handle and log the received sensor state:
console.log("Message received: ", decryptedMessage);
This output will reflect the current state of the Virtual Component (e.g., "open" or "closed").
We Value Your Feedback!
Thank you for taking the time to read our article! Was it helpful or interesting?
Your insights can help us improve. We’d be grateful for any feedback. If you have a moment,
please share it with us at the following email: