
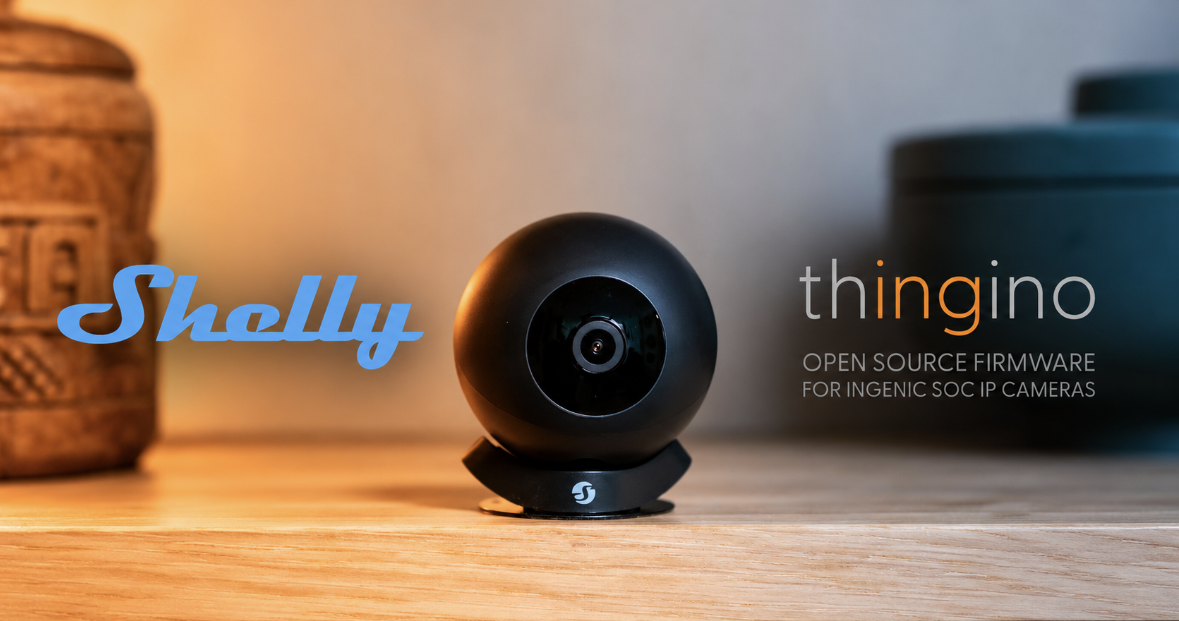
Installing Thingino on a Shelly Camera
This article explains how to replace the stock firmware on a Shelly Camera with Thingino, using nothing but an SD card.
Follow the steps in the order given. After each one you are told what you should see, so you can confirm you are on the right track before moving to the next. Do not skip the checks at the start; they are what make this work on the first attempt.
All the log output, hashes and timings below come from a real installation on macOS. Where a value is specific to that camera or that computer, it is written as a placeholder and listed below. Substitute your own.
Article explains how to perform the installation on both Windows and MacOS.
Products used
-
MacOS GoldenGate 27.0.1
-
MicroSD card, 32 GB recommended. A 128 GB card was used here.
-
On card size: use 32 GB or smaller. A 128 GB card worked fine on macOS, which will put FAT32 on a card of any size. Windows will not: its own tools refuse FAT32 above 32 GB. Staying at or below 32 GB avoids the whole question on either system.
-
Placeholders used throughout
/dev/diskN is the SD card's device on macOS. Here it was /dev/disk4.
<CARD>: is the SD card's drive letter on Windows, something like D:.
<IMAGE> is the firmware file for your camera. Here it was thingino-shelly_s1_t23n_mis20c1_atbm6132cu.bin.
<HOSTNAME> is the camera's hostname once you have set it, such as ing-shelly-s1-e4a5.
<IP> is the camera's IP address once it has joined your network.
<ID> is the backup id the installer generates, such as 7482bbf896a4.
SHELLY is the volume label the commands below set on the card. Keep it as it is, or change it everywhere if you prefer another.
Before you start, read these three things
The factory partition cannot be replaced. Partition mtd7 holds the camera's MAC address, model and device keys. The installer never writes to it, but Thingino's data partition formats over that area on its first boot. From that moment, the copies on your SD card are the only copies that exist anywhere. There is no download that can replace them.
So copy the backup onto your computer before you flash, and keep it.
This guide only goes one way. The installer makes a full restore image every time it runs, but it can never write one back. Returning the camera to Shelly firmware is a separate and harder job, and it is not covered here. There is a note at the end explaining what it involves, and you should read it before you decide to go ahead.
You need a healthy SD card. This is not a formality. A failing card is the most likely reason this procedure fails, it fails silently, and the camera tells you nothing useful. Step 1 is testing the card, and it takes a minute.
Step 1: Test the SD card
Do this first, before you download anything. You are checking whether the card gives the same answer twice.
On macOS, format it and then run the same check ten times:
diskutil list external
diskutil eraseDisk FAT32 SHELLY MBRFormat /dev/diskN

for i in $(seq 1 10); do
  diskutil verifyVolume /dev/diskNs1 2>&1 | grep "exit code"
done
diskutil list external shows you which device the card is; check the size and be certain, because the next command erases whatever you point it at.
You should see File system check exit code is 0, ten times out of ten, on a filesystem that is empty and that nothing has touched between runs.
If the answers vary, the card is bad. The one that failed during this installation returned 0, 201, 0, 201, 201, 201, 201, 201, 206 across nine runs on unchanged data. Get a different card; this one will not get you through.
On Windows, and as a stronger check on either system, write real data and read it back. This assumes the card is already formatted and has a drive letter, which a new card normally does; if it does not, do Step 4 first and come back.
$f = "<CARD>:\testdata.bin"
$buf = New-Object byte[] (200MB)
(New-Object Random).NextBytes($buf)
[IO.File]::WriteAllBytes($f, $buf)
Get-FileHash $f -Algorithm SHA256
Now eject the card, put it back in, and run:
Get-FileHash <CARD>:\testdata.bin -Algorithm SHA256
Remove-Item <CARD>:\testdata.bin
You should see exactly the same hash both times.
The eject and reinsert are not optional. Without them you may be reading the file back out of the system's cache instead of off the card, and a bad card passes.
Step 2: Download the installer and the firmware
Go to the releases of thingino/shelly-installer at https://github.com/thingino/shelly-installer/releases and download shelly-installer-sdcard.zip together with its .sha256.
Then download the full flash image for your camera, not an update image, and its .sha256 as well. For this camera it was thingino-shelly_s1_t23n_mis20c1_atbm6132cu.bin, from https://thingino.com/cameras/232 , referred to below as <IMAGE>. The name tells you the hardware it is for: shelly_s1 is the model, t23n the SoC, atbm6132cu the WiFi chip.
You should see four files in your downloads folder, and the firmware image should be exactly 33,554,432 bytes, which is 32 MiB, the full size of the camera's flash. If it is smaller, the download was truncated.
Step 3: Check that both downloads are intact
Do this before anything touches the camera. The installer checks the firmware image itself and will refuse a bad one, but it is better to find a broken download now than three minutes into a flash.
On macOS:
cd ~/Downloads
shasum -a 256 shelly-installer-sdcard.zip
cat shelly-installer-sdcard.zip.sha256

shasum -a 256 <IMAGE>
cat <IMAGE>.sha256
On Windows, in PowerShell:
cd ~\Downloads
Get-FileHash .\shelly-installer-sdcard.zip -Algorithm SHA256
Get-Content .\shelly-installer-sdcard.zip.sha256

Get-FileHash .\<IMAGE> -Algorithm SHA256
Get-Content .\<IMAGE>.sha256
You should see the hash you calculated matching the one in the .sha256 file, for both downloads. In this installation they were:
9cc726f72f076ac71046427a3385fa728406257f8ea749923c07a5902f413e1a  shelly-installer-sdcard.zip
6f331d476e995e8ecf684d58e5bf355b6b2dce2b138d747bf793f79e00f34970  thingino-shelly_s1_t23n_mis20c1_atbm6132cu.bin
Two things that will confuse you if nobody warns you. On Windows Get-FileHash prints the hash in capitals; that does not matter. And the installer archive's .sha256 holds the full build path from the CI machine rather than a plain filename, so an automatic -c check will say it cannot find the file. Compare the two hashes by eye instead.
The firmware image's .sha256 does carry a plain filename. That matters later, because the camera runs sha256sum -c on it internally.
Step 4: Format the card as FAT32 on MBR
If you tested the card on macOS in Step 1, you have already run this command and the card is ready. Read on anyway if you are on Windows, or if you want to know why FAT32 and MBR both matter.
The card must be FAT32. That is the only requirement the installer's own documentation states.
It says nothing about the partition table, and this installation used MBR, which worked. Whether GPT also works was not tested, so the commands below produce MBR. If you want to stay on the path that is known to work, use them as written.
Either way, the graphical tools on both systems like to give you something other than FAT32, so do not use them.
On macOS:
Disk Utility defaults to ExFAT on GUID, which will not work. Use the command line:
diskutil list external
diskutil eraseDisk FAT32 SHELLY MBRFormat /dev/diskN
You should see:
Started erase on diskN
Creating the partition map
Formatting diskNs1 as MS-DOS (FAT32) with name SHELLY
Mounting disk
Finished erase on diskN
If instead you get Could not mount diskNs1 after erase, stop. The card did not pass Step 1 or should not have. Use another one.
On Windows, card of 32 GB or smaller:
Open an administrator command prompt and run diskpart. Read the disk list twice before you select, because clean destroys whatever you point it at.
diskpart
list disk
select disk N
clean
convert mbr
create partition primary
format fs=fat32 quick label=SHELLY
assign
exit
Replace N with your card's number; list disk shows the size of each, which is how you tell them apart.
You should see a new drive appear in Explorer, named SHELLY.
Windows, card larger than 32 GB
Short answer: use a smaller card. Explorer will not offer FAT32 and diskpart answers The volume size is too big for FAT32. That ceiling is a limit of the Windows tools, not of FAT32, so the card is fine, but getting around it means a third-party formatter such as Rufus or guiformat, and it is not worth the trouble when a 32 GB card costs nothing.
Step 5: Put the installer on the card, and leave the firmware off
Unpack the archive to the root of the card. Only Camera-fw.zip is strictly needed, but the READMEs do no harm.
On macOS:
cd /Volumes/SHELLY
unzip -q -o ~/Downloads/shelly-installer-sdcard.zip -d .
find . -name "._*" -delete
find . -name ".DS_Store" -delete
Those last two lines matter. The Finder scatters ._ files next to real ones, and later the installer expects exactly one firmware image in thingino/. A stray ._thingino-....bin can be counted as a second one.
On Windows, in PowerShell, with the card as <CARD>:
Expand-Archive -Path ~\Downloads\shelly-installer-sdcard.zip -DestinationPath <CARD>:\ -Force
Windows does not create ._ files, so there is nothing to clean up unless the card has been on a Mac. It does create System Volume Information and sometimes $RECYCLE.BIN at the root; leave them, the installer only looks inside thingino/.
You should see this on the card:
Camera-fw.zip
README.txt
thingino/
Leave thingino/ empty. That is deliberate, and the next step explains why.
Step 6: Run it once with no firmware, to get a backup
Do not flash yet.
With thingino/ empty, the installer takes a full backup of the camera, verifies it, puts the stock firmware back and reboots the camera to normal. Nothing is written. You come out of it with the backup, and with proof that the whole chain works on your camera and your card, at no risk at all.
Eject the card properly first. Pulling it out without ejecting can leave the last writes unflushed, and a half-written Camera-fw.zip is one of the quiet ways this goes wrong.
On macOS:
sync && diskutil eject /dev/diskN
On Windows: use Safely Remove Hardware in the notification area, or right-click the drive in Explorer and choose Eject. Wait for the confirmation.
Then, in this order:
-
Disconnect the camera from power.
-
Insert the card.
-
Connect power.
-
You should see the LED do this:
-
Blinking slowly means it is working.
-
Blinking fast means it is writing, or that something has gone wrong.
-
Solid means it has finished.
-
Expect roughly one to two minutes in total. On this camera the run took 105 seconds, of which the backup and its verification were the first 56.
You will know it is done when the LED goes solid, the camera reboots, and it plays the Shelly startup sound. The sound is correct here: the camera is back on stock firmware, which is exactly what this run is supposed to leave you with.
-
Now disconnect power and take the card out.
Step 7: Read the log and copy the backup off the card
Take the card straight to your computer. Do not put it back in the camera first. The stock firmware mounts the card for its own recordings and reformats it, and the installer's log goes with it. During this installation that is exactly how one log was lost.
You should see these on the card, where NN is 01 for the first run, 02 for the second, and so on:
install.log
shelly-backup-<ID>-NN/
shelly-factory-<ID>-NN.bin
shelly-factory-<ID>-NN.bin.sha256
Camera-fw.zip.done
Notice that Camera-fw.zip has become Camera-fw.zip.done. The stock firmware renames it so it does not apply it again on every boot. You will need to rename it back later.
Now read the log. The install.log at the root of the card only holds the header; the full one is inside the backup folder.
On macOS:
cat /Volumes/SHELLY/shelly-backup-*/install.log
On Windows:
Get-Content <CARD>:\shelly-backup-*\install.log
You should see a last line beginning with RESULT:, and it should say this:
[56.35] backup verified
[56.36] stage 5: looking for payload in /mnt/sd/thingino/
[56.37] no payload found, backup-only run
[56.38] renamed Camera-fw.zip -> Camera-fw.zip.done
[104.67] RESULT: BACKUP OK, returned to stock: shelly-backup-260436b06023-02
Above that you should see every partition dumped and then checked back against the flash, each one ending in ok:
[53.26]   mtd7 (shelly) ok 260436b06023fa8eb9cddc1da06553aa313834ec95923ad58cf9fbd7c54a324e
[56.34]   shelly-stock-restore-32M.bin ok 4c7b655fa79724a64d02b32127a413dde818d89c0f46eb3199fd270191bae113
If the last line says FAILED instead, go to the troubleshooting section and do not continue.
Now copy the backup to your computer and confirm the hashes survived the copy.
On macOS:
mkdir -p ~/Desktop/shelly-camera-backup
cp -R /Volumes/SHELLY/shelly-backup-* /Volumes/SHELLY/shelly-factory-* \
      ~/Desktop/shelly-camera-backup/
cd ~/Desktop/shelly-camera-backup/shelly-backup-*/
shasum -a 256 shelly-factory-*.bin shelly-stock-restore-32M.bin
cat shelly-factory-*.bin.sha256 shelly-stock-restore-32M.bin.sha256
On Windows:
$dest = "$HOME\Desktop\shelly-camera-backup"
New-Item -ItemType Directory -Force -Path $dest
Copy-Item -Recurse <CARD>:\shelly-backup-* $dest
Copy-Item <CARD>:\shelly-factory-* $dest
cd (Get-ChildItem "$dest\shelly-backup-*" -Directory)[0].FullName
Get-FileHash shelly-factory-*.bin, shelly-stock-restore-32M.bin -Algorithm SHA256
Get-Content shelly-factory-*.bin.sha256, shelly-stock-restore-32M.bin.sha256
You should see each calculated hash matching the one in the matching .sha256 file. Those files were written by the camera, before the copy, so a match means the copy is clean.
You should also see a folder of about 64 MB holding all eight raw partitions and one 32 MiB restore image:
raw/mtd0-uboot.bin          524,288
raw/mtd1-kernel.bin       3,145,728
raw/mtd2-root0.bin        7,864,320
raw/mtd3-shellyfs0.bin    1,048,576
raw/mtd4-root1.bin        7,864,320
raw/mtd5-shellyfs1.bin    1,048,576
raw/mtd6-streamer.bin    11,927,552
raw/mtd7-shelly.bin         131,072
shelly-stock-restore-32M.bin  33,554,432
There is also an info.txt recording the kernel version, the partition table and the stock build identifier. Keep it. It is how you later work out which firmware version a backup came from.
Step 8: Add the firmware and flash
Put the card back in the reader and copy the image and its checksum into thingino/.
On macOS:
cd /Volumes/SHELLY
cp ~/Downloads/<IMAGE> ~/Downloads/<IMAGE>.sha256 thingino/
mv Camera-fw.zip.done Camera-fw.zip
rm -f thingino/README.txt
find . -name "._*" -delete
On Windows:
Copy-Item ~\Downloads\<IMAGE>, ~\Downloads\<IMAGE>.sha256 -Destination <CARD>:\thingino\
Rename-Item <CARD>:\Camera-fw.zip.done Camera-fw.zip
Remove-Item <CARD>:\thingino\README.txt -ErrorAction SilentlyContinue
Get-ChildItem <CARD>:\ -Recurse -Force -Filter "._*" | Remove-Item -Force
If Explorer is hiding file extensions, Camera-fw.zip.done looks like Camera-fw.zip already and the rename appears to do nothing. Turn extensions on first: View, then Show, then File name extensions.
Three things the installer insists on, and each one silently stops the run if you get it wrong:
Exactly one image in thingino/. Nothing else that could be mistaken for one, which is why you delete README.txt and any ._ files.
The .sha256 must be one sha256sum line with a plain filename, not a path. The one from the release is already correct.
Camera-fw.zip must be named exactly that, not .done, or the stock firmware ignores it and nothing at all happens.
Before ejecting, check the image on the card, not the one in your downloads:
On macOS:
shasum -a 256 /Volumes/SHELLY/thingino/*.bin
cat /Volumes/SHELLY/thingino/*.sha256
On Windows:
Get-FileHash <CARD>:\thingino\*.bin -Algorithm SHA256
Get-Content <CARD>:\thingino\*.sha256
You should see them match. This catches a bad copy onto the card, which the earlier check in Step 3 cannot.
Now eject the card, and then: camera off, card in, power on.
Do not interrupt the power during this run. The installer writes mtd1 through mtd6 first and leaves mtd0, the bootloader, for last, specifically so that an interruption still leaves the camera able to boot. That ordering is your safety net and there is no reason to spend it.
You should see roughly this:
-
About a minute of slow blinking, the backup and its verification
-
Then two to three minutes of faster blinking, the actual writing
-
The LED going solid
-
The camera rebooting
The whole run finished and the reboot after a successful flash is silent. If you hear the Shelly startup sound, the camera went back to stock and something failed. Go to troubleshooting.
Step 9: Read the log again
Card out, straight to the computer, before anything else. Same rule as before.
On macOS:
cat /Volumes/SHELLY/shelly-backup-*/install.log
On Windows:
Get-Content <CARD>:\shelly-backup-*\install.log
You should see this, ending in FLASHED OK:
[68.01] backup verified
[68.03] stage 5: looking for payload in /mnt/sd/thingino/
[71.26]   payload carries data in the factory area; not written, mtd7 kept
[71.26]   payload thingino-... ok, 33554432 bytes
[71.28] stage 6: flashing
[71.29] FLASH: writing thingino-... (33423360 bytes), mtd1..mtd6 then mtd0
[87.62]   mtd1 (kernel): 3145728 bytes ok
[124.87]  mtd2 (root0): 7864320 bytes ok
[129.17]  mtd3 (shellyfs0): 1048576 bytes ok
[161.31]  mtd4 (root1): 7864320 bytes ok
[165.60]  mtd5 (shellyfs1): 1048576 bytes ok
[214.69]  mtd6 (streamer): 11927552 bytes ok
[219.72]  mtd0 (uboot): 524288 bytes ok
[219.73] flash complete
[219.73] RESULT: FLASHED OK: thingino-..., backup in shelly-backup-7482bbf896a4-01
Two lines in there are worth understanding.
The image is 33,554,432 bytes, but the log says 33,423,360 were written. The difference is exactly 131,072 bytes, the size of mtd7. That is the line payload carries data in the factory area; not written, mtd7 kept: the installer refusing to overwrite your camera's identity with whatever the generic image happens to carry there.
Note also that the backup id in this log is different from the one in Step 7. That is expected, and the troubleshooting section explains why.
And this run made a second, newer backup. Copy that one off too. It is the authoritative one, because it was taken immediately before the write.
Step 10: First boot and WiFi setup
Power the camera on without the card. Give it a minute or two, because Thingino formats its data partition on the first boot.
You should see a new WiFi network appear, named THINGINO-XXXX, where XXXX is the last four characters of the camera's MAC address. It is open and needs no password.
Connect your computer or phone to it. In most cases you do not have to type anything: the operating system notices the captive portal and opens the setup page by itself, in a window of its own. macOS, Windows, Android and iOS all do this.
If it does not appear, open it manually on your browser:
http://172.16.0.1/
Either way you land on the Initial Configuration screen. Fill it in like this:
-
Hostname comes already filled in, something like
ing-shelly-s1-e4a5. Keep it. This is how you will reach the camera afterwards. -
Password for user root: set one, and write it down. There is no easy way to recover it.
-
Public SSH key is optional. Skip it.
-
Wi-Fi Network Name/SSID: pick yours from the list rather than typing it. It is case-sensitive.
-
Wi-Fi Network Password: also case-sensitive.
-
Act as a Wi-Fi Access Point: leave it off. If you turn it on, the camera stays an access point instead of joining your network.
-
Save, confirm the reboot, and put your computer back on your own network.
Step 11: Find the camera and open it
Expect a new IP address. The old one will not work. Under Thingino the camera in this installation came up with the MAC 02:52:ea:0c:e4:a6, and the 02 in the first octet marks that as a locally administered address rather than a factory-assigned one, which fits with the factory partition having been formatted over. Either way, your router sees a new device and gives it a new lease.
You already chose the hostname on the setup screen, so the simplest way in is:
http://<HOSTNAME>.local/
That is mDNS. macOS resolves it out of the box. Windows 10 and later usually do too, but less reliably; if it does not work, find the IP instead.
If you need the IP, your router's DHCP lease list is the most dependable place.
On macOS:
curl -s -o /dev/null -w "%{remote_ip}\n" http://<HOSTNAME>.local/
arp -an | grep -i <first three MAC octets>
On Windows:
ping <HOSTNAME>.local
arp -a | Select-String "<first three MAC octets>"
ping prints the resolved address on its first line even if the camera does not answer the ping itself, which is all you need.
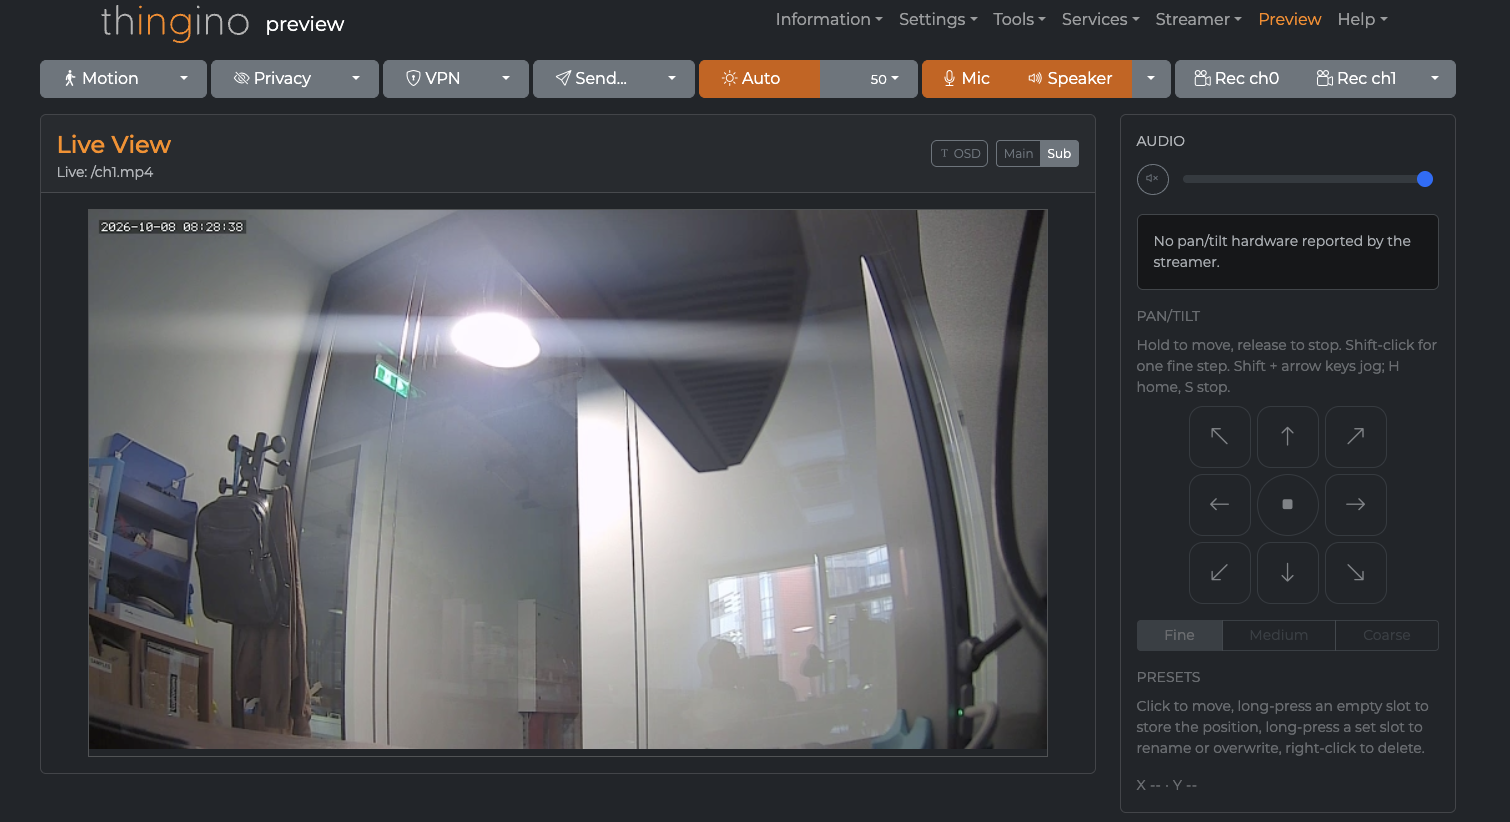
You should see the Thingino web interface. Log in with root and the password you set in Step 10. SSH works with the same credentials.
The two video streams are:
rtsp://thingino:thingino@<IP>/ch0     1080p
rtsp://thingino:thingino@<IP>/ch1     360p
The RTSP server answers on port 554 with digest authentication, so a player that only speaks basic auth will fail against it. VLC, ffplay and mpv all handle it.
The web interface's own live view is at /preview.html, which is where the browser lands after login.
There is no working snapshot URL on this build. Thingino's documentation lists one at http://<IP>/image.jpg, but on this camera it returns an HTML redirect to / instead of a JPEG, with or without credentials and from an already logged-in browser alike. The other documented paths behave the same.
If you need a single still image, for a dashboard, a notification or a time-lapse, pull one frame out of the stream instead:
ffmpeg -rtsp_transport tcp -i rtsp://thingino:thingino@<IP>/ch1 -frames:v 1 snap.jpg
For ONVIF clients, including tinyCam Monitor on Android, use (ONVIF) with Profile S, port 80 rather than the usual ONVIF port, username thingino, password thingino. The username is fixed; the password can be changed.
The port is the part people get wrong, and it was confirmed here: a SOAP GetSystemDateAndTime sent to http://<IP>/onvif/device_service came back as a valid ONVIF response.
That is the installation complete. You now have a camera running Thingino, reachable at http://<HOSTNAME>.local/, serving RTSP and ONVIF on your own network, with a verified backup of its original firmware on your computer. Keep that backup.
Troubleshooting
The flash failed and the camera came back on stock firmware
This is the installer working as designed, not a bug. It hashes every partition, writes it to the card, reads it back and compares. If anything does not match it stops and puts the stock root back. From the outside all you see is that it did not work.
The log tells you why. A real example from the first installation:
[49.30]   mtd3 (shellyfs0): card 5106090bb2d8... != flash e34e7cca1e56...
[49.31] ERROR: backup verification failed
[97.72] RESULT: FAILED (device returned to stock): backup verification failed
What that says is that the data read back from the card did not match what was in the flash. In this case the cause was a failing SD card, which is why Step 1 exists.
The device id changed between two runs
The README calls it "first 12 hex of sha256(mtd7), stable per device". In practice it is not, so do not conclude you are holding a different camera.
It is a hash of a partition, and mtd7 turns out to contain some mutable state. During this installation it went from 260436b06023 to 7482bbf896a4 between two runs on the same camera, with only 396 bytes out of 131,072 different. The camera had updated its own firmware over the air in between, which also changed the hashes of kernel, root0 and streamer.
If you see this, compare the two factory partitions before concluding anything.
On macOS, this counts how many bytes differ:
cmp -l old-factory.bin new-factory.bin | wc -l
On Windows, this lists them:
fc /b old-factory.bin new-factory.bin
A handful of differing bytes means one camera whose state changed. A completely different file means a different camera.
Nothing happens at all when you power the camera on
Check the name of the file on the card. It must be Camera-fw.zip, not Camera-fw.zip.done. The stock firmware renames it after applying it, exactly so it does not run again, and you have to rename it back for each run.
The installer refuses to start
It accepts only the known 8-partition, 32 MiB layout and nothing else. When it starts correctly the log begins:
[1.92] stage 1: checking flash layout
[1.93] layout ok, erase size 32768
About going back to stock
This guide covers the installation only. Restoring the camera to Shelly firmware is a separate and harder job, and you should know what it involves before you start rather than after.
The installer makes a full 32 MiB restore image every run, but it can never write one back. There is no restore-from-card mode, and the only stock-firmware write it performs is the abort path above, which refuses to run once flashing has started. Writing the image back needs Thingino's own flash tooling, a U-Boot console, bootrom USB, or a programmer.
Sources
https://thingino.com/cameras/232
https://github.com/thingino/shelly-installer
https://www.shelly.com/products/shelly-camera-black
We Value Your Feedback!
Thank you for taking the time to read our article! Was it helpful or interesting?
Your insights can help us improve. We'd be grateful for any feedback. If you have a moment, please share it with us at the following email: