Using Shelly DALI Dimmer to expand existing KNX installation
Introduction
Withing this example we’ll describe the benefits of choosing Shelly DALI Dimmer GEN3 when expanding an existing KNX installation by adding DALI controlled lights to it.
For those of you who are not familiar with how such combination of two individual communication interfaces is done we have to say that so far one had to add an extra KNX to DALI Gateway in order to be able to control DALI devices through KNX. The cost of such gateways is high which made adding only few DALI controlled lights not cost effective.
Prerequisites
Shelly devices are able to communicate with other KNX devices using KNXnet/IP communication. Assuring the necessary equipment is a must in order to use our devices. For more detailed information on using Shelly devices with KNX read the documentation provided.
Get to know the Shelly DALI Dimmer GEN3 and its specifications by reading and understanding the User manual provided with your device.
Case description
In this case we will show you how easy is to configure Shelly DALI Dimmer GEN3 and to use it in existing KNX installations.
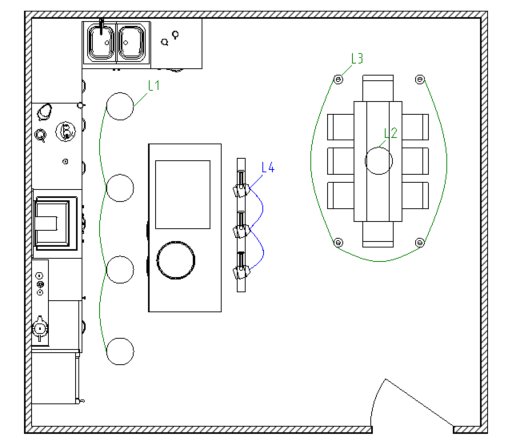
Here we will review a case where we have a kitchen combined with a dining area, initially designed and controlled using KNX lighting control system. At later stage the owner decided to add an additional lighting circuit (L4) providing more light over the cooking island.

Fig. 1 Kitchen area with shared KNX and DALI lighting control
Lighting circuits description | |||
|---|---|---|---|
Name | Description | Control system | Control device |
L1 | Kitchen Lights | KNX | Use existing |
L2 | Dining chandelier | KNX | Use existing |
L3 | Dining spots | KNX | Use existing |
L4 | Island track light | DALI | Shelly DALI Dimmer GEN3 |
This case does not focus on the means of control of the lighting circuits, i.e. switches, push-buttons or other, but its main focus is to show the ability of two controls systems (KNX and DALI) to exchange information one to another without the use of expensive gateways.
Configuration
Some important things to have in mind for Shelly DALI Dimmer GEN3 are:
All connected DALI control gear devices are added in one group only. No separation into two or more groups is possible.
All commands received either by the provided inputs or by the received KNX telegrams are transmitted onto the DALI bus as broadcast telegrams.
It’s recommended to connect up to five DALI drivers if no external supply is provided.
Prior to any change consult with your KNX integrator and assure witch Group addresses are going to be used (existing or newly created ones) for controlling the newly added DALI lighting control circuit - shown as L4 on Fig. 1.
Electrical installations are not part of this guide. Proper installation and all involved electrical connections are an absolute must not only to assure proper operation, but also to provide safety operation and user protection. All of the required operations must be dealt by an experienced technician according to the provided documentation.
DALI
Initial installation
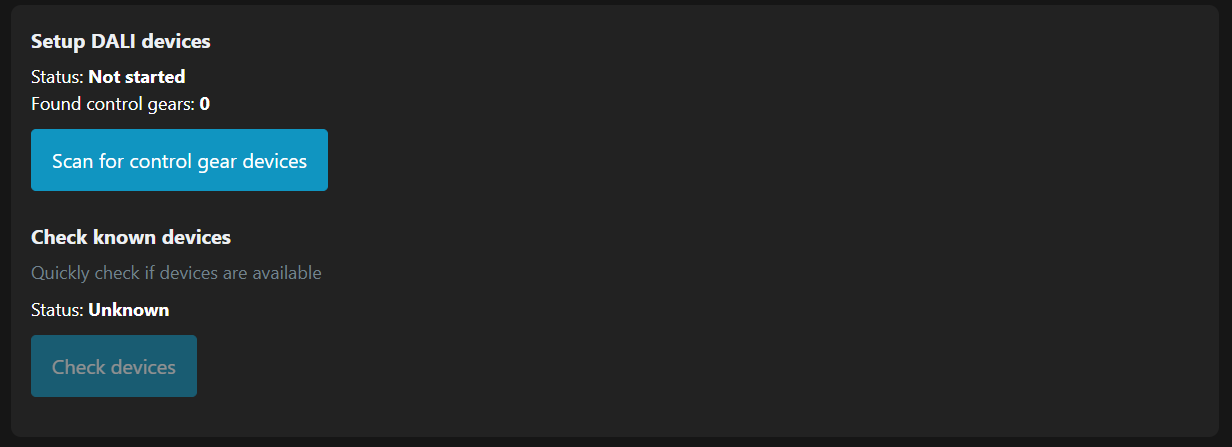
Open the device’s embedded web interface and navigate to Settings -> DALI Configuration. The following interface appears on screen.

DALI configuration, initial installation
Like in any other DALI control gear device, here too the first thing to be done is to scan for connected devices, to do so click on “Scan for control gear devices”. Wait for the process to complete and verify that the number of discovered devices is the same the number of connected devices.
If there are no wiring issues and/or faulty DALI drivers the number of devices found shall be equal to the number of connected devices.
Note that Shelly DALI Dimmer GEN3 is capable to supply up to five DALI drivers if no external power supply is connected.
Post installation
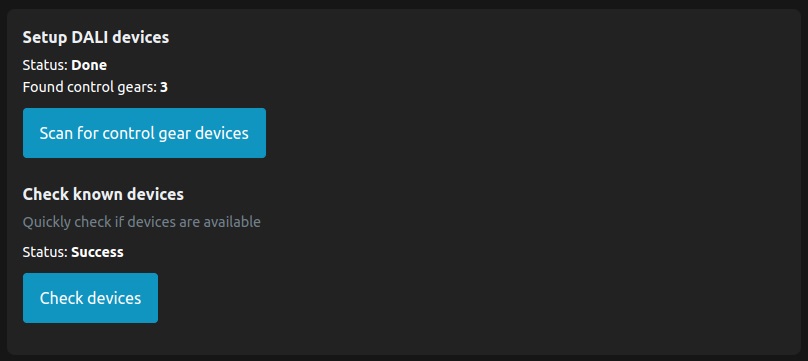
Shelly DALI Dimmer GEN3 offers simplified diagnostics check which is recommended for post installation use. In case of any problems found, once the first installation process is successfully completed, you may check the status of all connected devices by pressing “Check devices” button.

DALI configuration, post installation
KNX
General configuration
As with every KNX device, Shelly devices too need to be properly configured in order to be able to exchange data with other KNX devices. You’ll need to coordinate this information with your KNX integrator.
Detailed walk through of this configuration is described in provided documentation found here.
Control commands
As already mentioned above, the installer must be aware of the KNX Group addresses which are going to be used for DALI controls. In our case these information is provided in the table below:
| ||
|---|---|---|
DALI function | KNX | KNX Length & Encoding |
ON/OFF switching command | 1/1/8 | 1 bit, DPT 1.001 (switch) |
ON/OFF feedback status | 1/2/8 | 1 bit, DPT 1.001 (switch) |
Relative dimming control | 1/3/8 | 4 bit, DPT 3.007 (dimming) |
Absolute dimming control | 1/4/8 | 1 byte, DPT 5.001 (percentage) |
Dimming feedback status | 1/5/8 | 1 byte, DPT 5.001 (percentage) |
Detailed description and configuration of all supported objects follows:
Switch object- provide theGroup addressused for switching control, i.e. ON/OFF. Assure it has the same DPT length. In this example that is GA 1/1/8. Enter it in the provided fields and pressSavebutton.

Switch object configuration
Relative dimming object- provide theGroup addressused for 4-bit dimming control, i.e. DIM UP/DIM DOWN. Assure it has the same DPT length. In this example that is GA 1/3/8. Enter it in the provided fields and pressSavebutton.

Relative dimming object configuration
Absolute dimming object- provide theGroup addressused for 1-byte dimming control, i.e. PRECISE DIMMING control. Assure it has the same DPT length. In this example that is GA 1/4/8. Enter it in the provided fields and pressSavebutton.

Absolute dimming object configuration
Feedback status
Feedback object- notifies all other devices sharing the sameGroup addressprovided about DALI Dimmer GEN3 switching status, i.e. ON/OFF. Assure it has the same DPT length. In this example that is GA 1/2/8. Enter it in the provided fields and pressSavebutton.

Feedback object configuration
Lighting level object- notifies all other devices sharing the sameGroup addressprovided about DALI Dimmer GEN3 dimming level in percentage (0-100%). Assure it has the same DPT length. In this example that is GA 1/5/8. Enter it in the provided fields and pressSavebutton.

Lighting level object configuration
Conclusion
Once all of the necessary Group addresses are entered Shelly’s DALI Dimmer GEN3 and all of the connected to it DAL control gear may be controlled via KNX network.
