Getting started
Setting up the Add-on
To get started with using the Shelly Plus Add-on and the settings inside of its embedded web interface, you will need to, after you have properly installed the device and connected it to your Plus device, add it through the web interface of your Plus device. Under the Add-on setting, you can add your Add-on so you can control it. For more information about the device itself, you can see the Add-on device page and the installation guides linked at the end of it.
Adding peripherals
Adding peripherals is done by going to the Peripherals setting in the web UI of your device and clicking the + button. You will then be prompted to pick the type of peripheral you’d like to add. If you have properly connected your peripheral(s) and have selected the correct type of peripheral from the menu that pops up, your peripheral will appear under the name of the type of peripheral you’ve selected. You can click Rescan under the selected peripheral type to scan for that type again. Tick the peripheral you’d like to add and click the Add button to add it or click Add and reboot to trigger a device reboot after adding your peripheral.
The list of peripherals includes:
-
Temperature and Humidity (DHT22)
-
Temperature (DS18B20)
-
Digital Input
-
Analog Input
-
Voltmeter
A message notifying you if your device needs to reboot will pop up on the top part of your screen with a Reboot button.
Settings
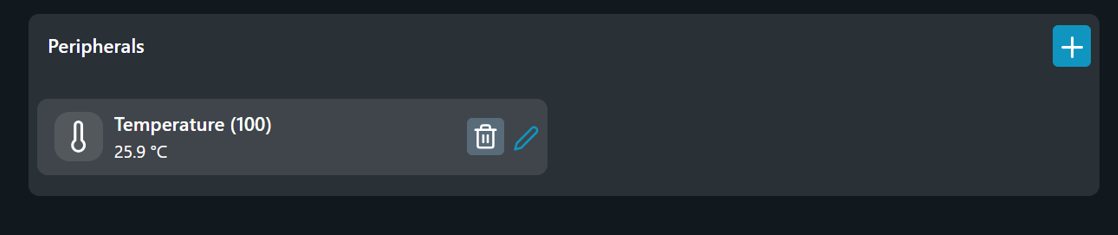
If you have successfully added all of your peripherals, your Add-on menu should display them. It should look similiar to the image below, except instead of the temperature sensor, your added peripherals should be displayed in this page. There is a trash can icon next to each peripheral, which will remove the peripheral and all of its actions. You can add it again, but you cannot retrieve the actions or the customised settings you may have had before. The pencil icon allows you to edit the peripheral.
Each peripheral has a unique set of settings, explained below. You can access them by clicking on the peripheral in the Add-on menu. For each sensor, N/A will be displayed for readings when the sensor cannot retrieve a value, or is not working properly.
Temperature and Humidity (DHT22)
Temperature settings
-
Name - Set the peripheral’s name, which you’d like it to be displayed with.
-
Delta Threshold - Temperature change with more than the specified value in Celsius triggers sensor data report. The minimum is 0.1℃ and the maximum is 5℃.
-
Offset - A value, which will be added (if positive) and subtracted (if negative) from the temperature readings to make them more accurate.
Humidity settings
-
Name - Set the peripheral’s name, which you’d like it to be displayed with.
-
Delta Threshold - Relative Humidity change with more than the specified value triggers sensor data report. The minimum is 1% and the maximum is 20%.
-
Offset - A value, which will be added (if positive) and subtracted (if negative) from the humidity readings to make them more accurate.
Actions
Create and edit actions. When creating an action, there are a few things you will be asked to specify:
-
Active time - A period of time in the 24 hours of the day that the action is allowed to be triggered.
-
Execute when - Only after a temperature change or every 60 seconds.
-
Condition - Specify when you’d want the action to occur. You can choose less than or greater than a certain value to make the action occur when the temperature drops below or rises above the value depending on what you choose.
-
Then do - Using URLs and local actions, specify what you want the device to do when the condition is met. You can send internal or external URLs, which means you can send URLs to this device, or to another device.
Make sure to press the Save action button if you’re editing or creating an action.
Temperature(DS18B20)
Overview - displays the sensor’s readings (the temperature).
Temperature settings
-
Name - Set the peripheral’s name, which you’d like it to be displayed with.
-
Delta Threshold - Temperature change with more than the specified value in Celsius triggers sensor data report. The minimum is 0.1℃ and the maximum is 5℃.
-
Offset - A value, which will be added (if positive) and subtracted (if negative) from the temperature readings to make them more accurate.
Actions
Create and edit actions. When creating an action, there are a few things you will be asked to specify:
-
Active time - A period of time in the 24 hours of the day that the action is allowed to be triggered.
-
Execute when - Only after a temperature change or every 60 seconds.
-
Condition - Specify when you’d want the action to occur. You can choose less than or greater than a certain value to make the action occur when the temperature drops below or rises above the value depending on what you choose.
-
Then do - Using URLs and local actions, specify what you want the device to do when the condition is met. You can send internal or external URLs, which means you can send URLs to this device, or to another device.
Make sure to press the Save action button if you’re editing or creating an action.
Digital input
Overview - displays the readings.
Input settings
-
Name - Change the name of the input.
-
Mode - Select Switch or Button.
-
Invert - Enable invert input. On state is considered off and vice versa.
-
Factory reset - Enable your device to be factory reset through the Add-on’s digital input.
Actions
Create and edit actions. When creating an action, there are a few things you will be asked to specify:
-
Active time - A period of time in the 24 hours of the day that the action is allowed to be triggered.
-
Execute when - You can either execute the action when the input is toggled on or off.
-
Then do - Using URLs and local actions, specify what you want the device to do when the condition is met. You can send internal or external URLs, which means you can send URLs to this device, or to another device.
Make sure to press the Save action button if you’re editing or creating an action.
Analog input
Overview - displays the readings of the Analog input in percentage.
Settings
-
Name - Set the peripheral’s name, which you’d like it to be displayed with.
-
Delta Threshold - The input percentage change with more than a specified value, which triggers a data report. The minimum is 1% and the maximum is 50%.
Actions
Create and edit actions. When creating an action, there are a few things you will be asked to specify:
-
Active time - A period of time in the 24 hours of the day that the action is allowed to be triggered.
-
Execute when - The only possibility for an action to be executed is when there's an analog state change.
-
Condition - Specify when you’d want the action to occur. You can choose less than or greater than a certain value to make the action occur when the percentage drops below or rises above the value depending on what you choose.
-
Then do - Using URLs and local actions, specify what you want the device to do when the condition is met. You can send internal or external URLs, which means you can send URLs to this device, or to another device.
Make sure to press the Save action button if you’re editing or creating an action.
Voltmeter
Overview - displays the voltage.
Settings
-
Name - Set the peripheral’s name, which you’d like it to be displayed with.
-
Delta Threshold - The voltage change with more than a specified value, which triggers a data report. The minimum is 0.1 and the maximum is 5.
Actions
Create and edit actions. When creating an action, there are a few things you will be asked to specify:
-
Active time - A period of time in the 24 hours of the day that the action is allowed to be triggered.
-
Execute when - Execute every 60 seconds or when the state of the voltmeter has changed.
-
Condition - Specify when you’d want the action to occur. You can choose less than or greater than a certain value to make the action occur when the voltage drops below or rises above the value depending on what you choose.
-
Then do - Using URLs and local actions, specify what you want the device to do when the condition is met. You can send internal or external URLs, which means you can send URLs to this device, or to another device.
Make sure to press the Save action button if you’re editing or creating an action.
Local actions
Depending on the state of your device, a menu will pop up when you go to add a local action.
For a device in Switch mode:
Action:
-
Control Output → Select the target components (the switch) and the output state (on or off). Set a time in seconds, after which the device will be returned to its previous state.
-
Toggle Output → Select the target components.
For a device in Cover mode:
Action:
-
Open Cover
-
Close Cover
-
Move Cover to a specific position → Select the target position through the slider. Underneath you can check the value you’ve selected from 0 to 100, where 0 is fully closed and 100 is fully open.