
IMPORTANT: After you power on your Shelly device, its access point and Bluetooth connectivity remain active for 15 minutes. You can connect your device to the Shelly Smart Control application during this time frame. To reactivate the access point after the time frame, follow the instructions in the device's user guide: Knowledge Base Devices
Prerequisites
-
Shelly Smart Control app installed on your mobile device
-
Active account in Shelly cloud. For more information on how to create an account, go to Account registration.
-
Bluetooth connectivity enabled on your mobile device
-
Granted Permission for Shelly Smart Control to use Bluetooth
Adding devices via Bluetooth
-
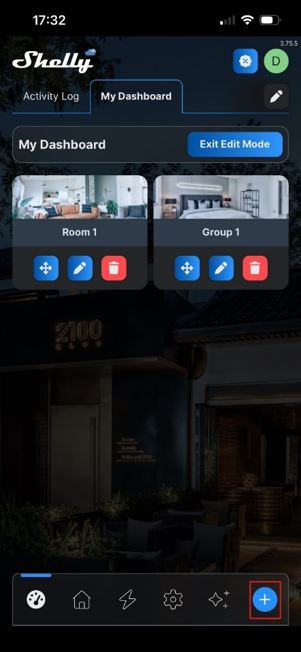
In your Shelly Smart Control application, tap the Add Device button or the plus sign (Fig. 1).
-
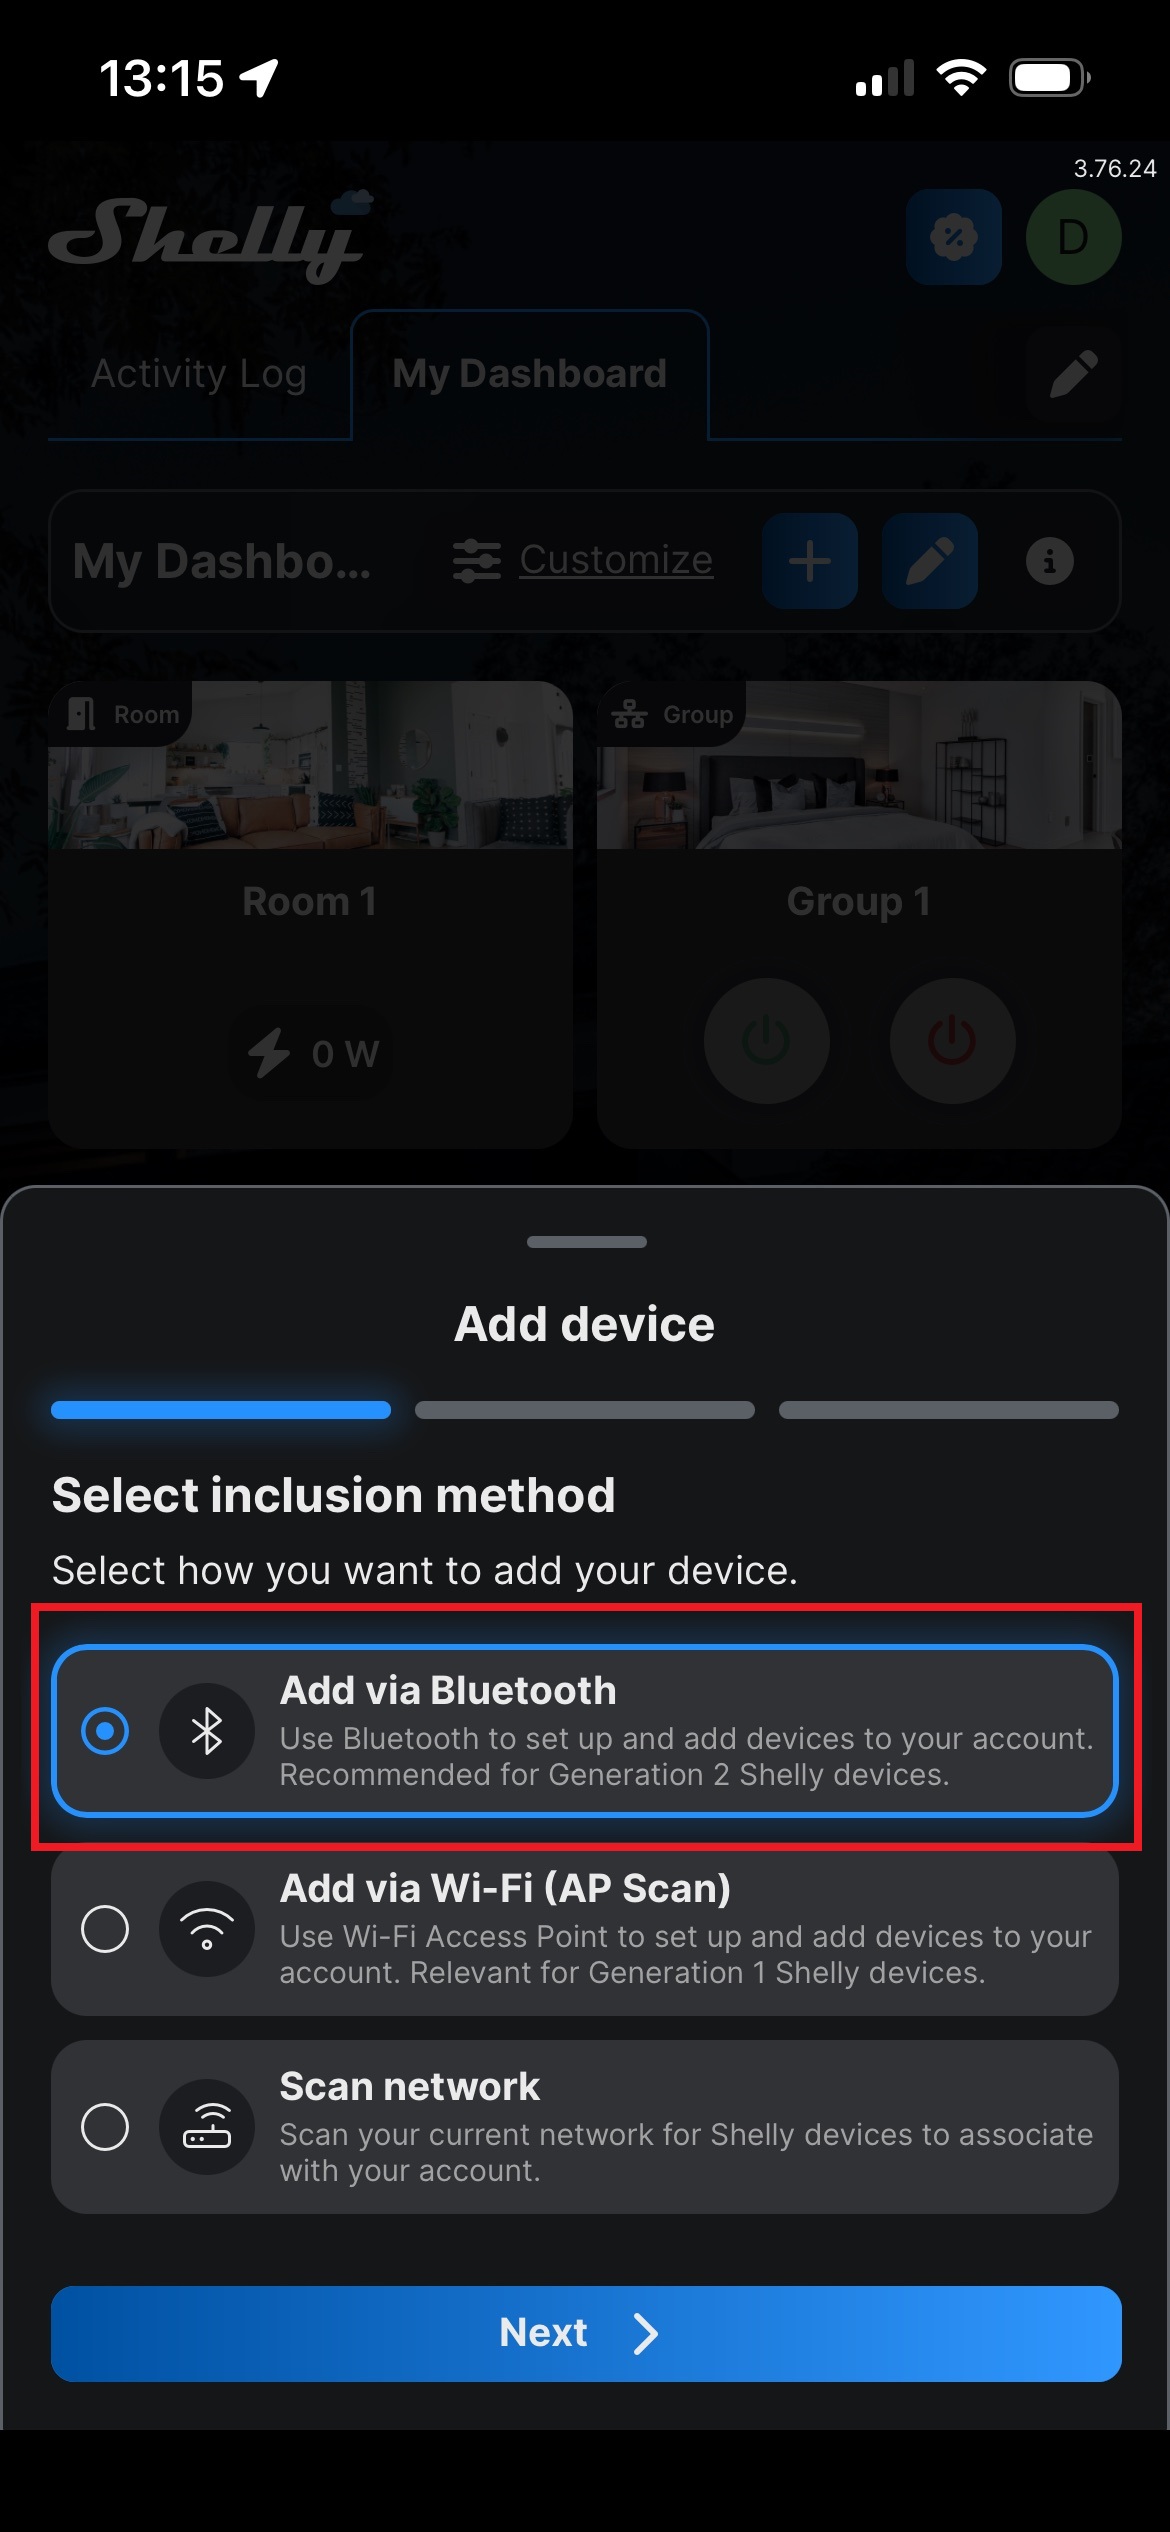
Select the Add via Bluetooth option (Fig. 2).
-
In the next screen, select the device that you want to add and tap Next.
-
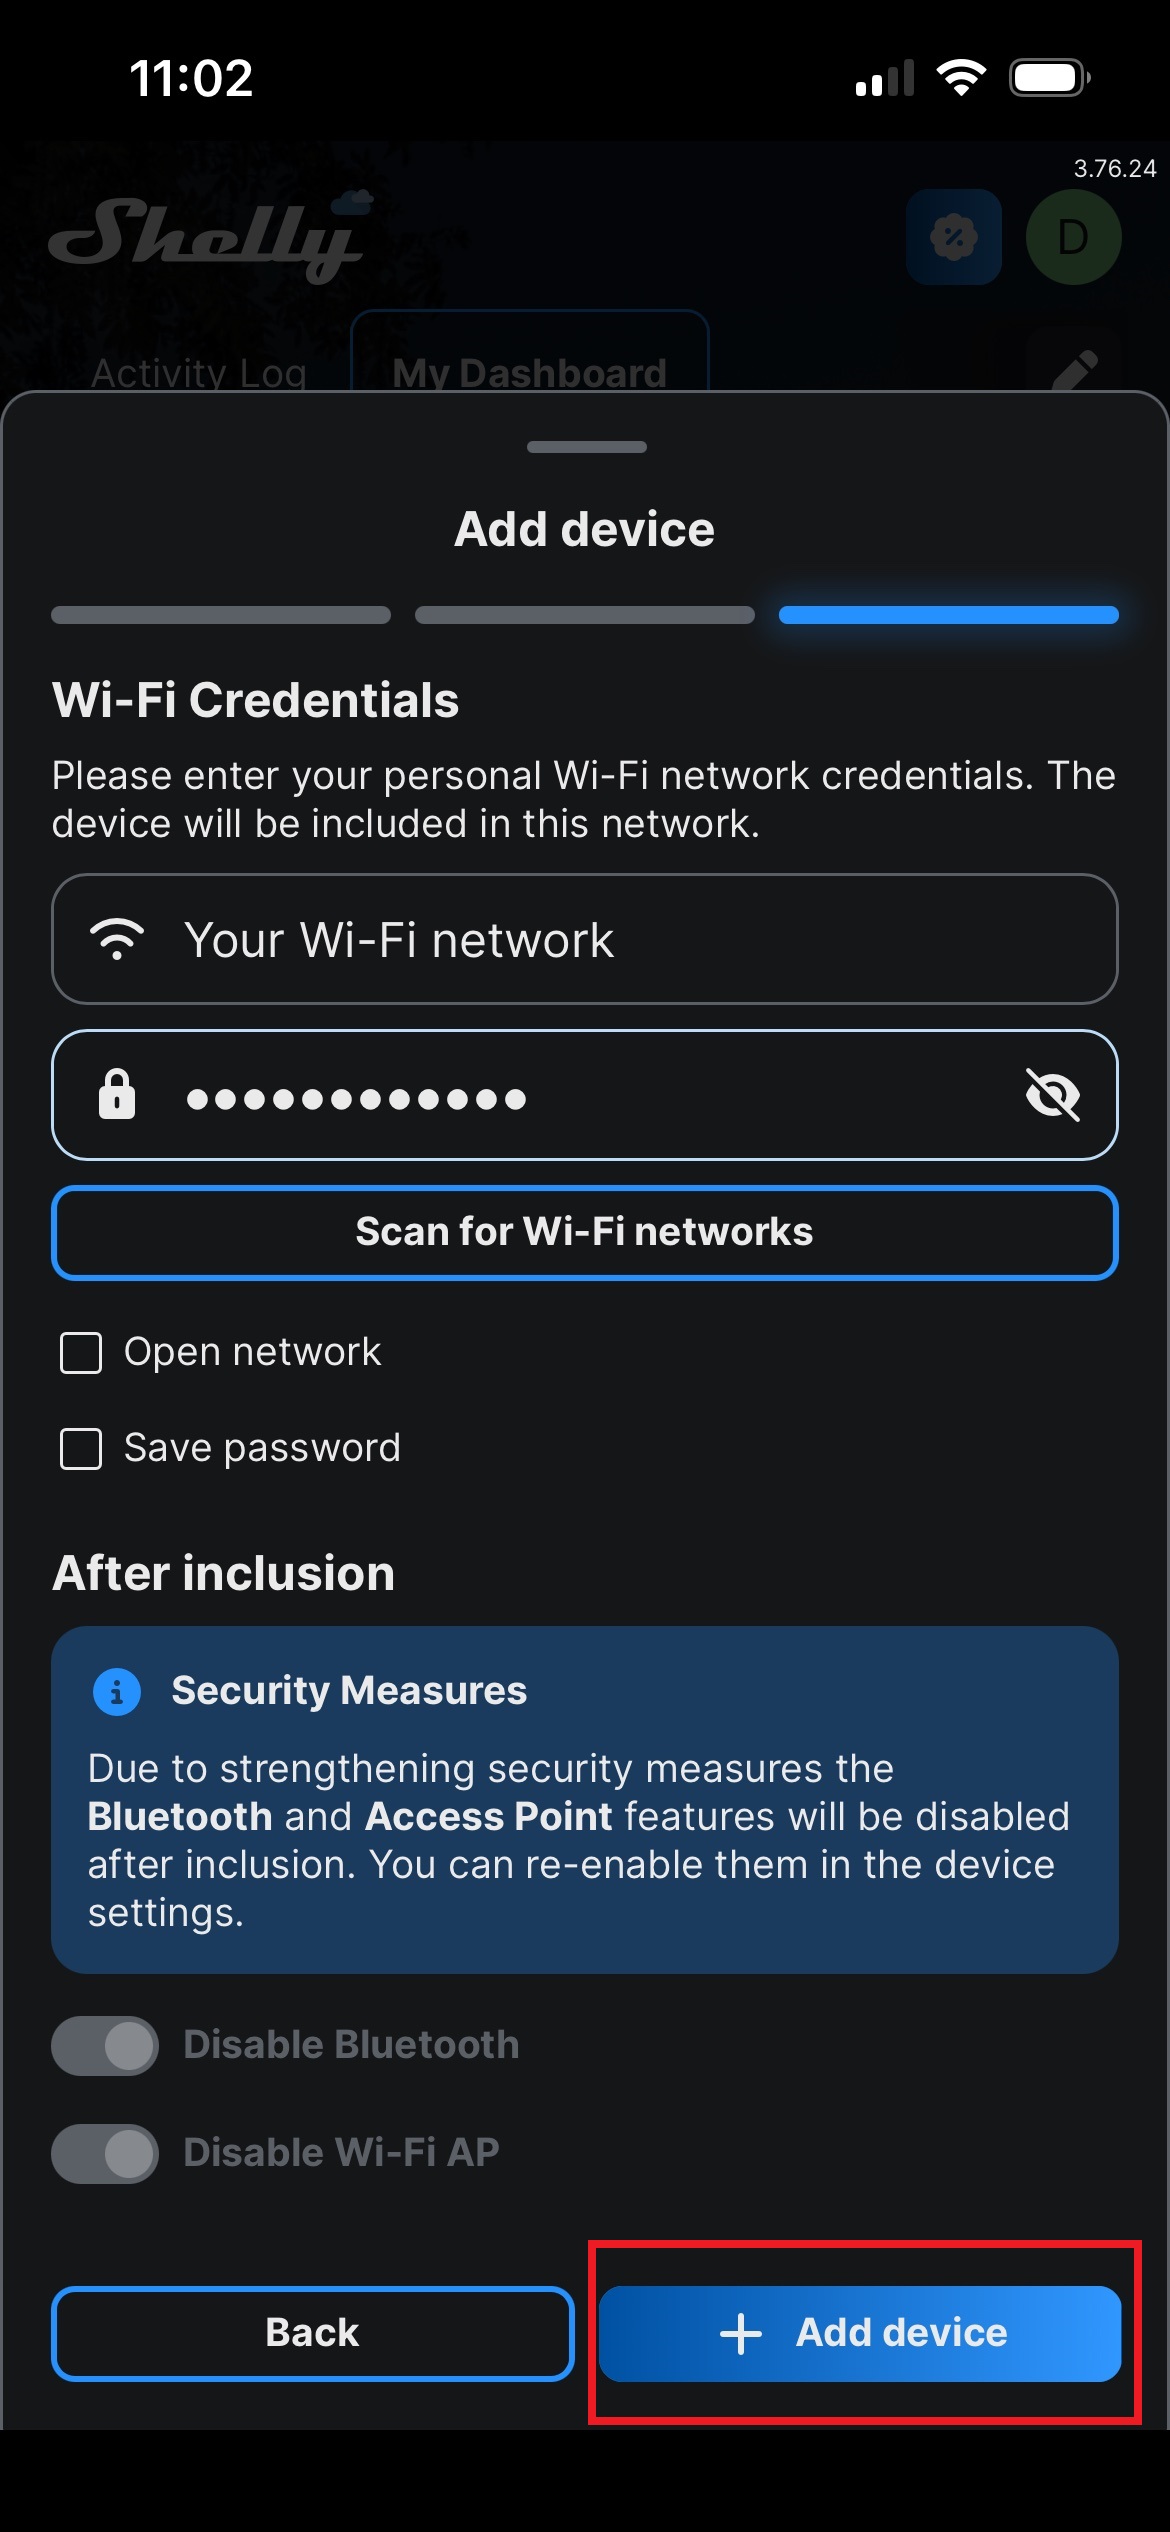
Enter your Wi-Fi credentials to add the device to your network and tap + Add device (Fig. 3).
-
Wait until your application finds the device. Be aware that it might take a few minutes. Once the process is complete, a success message appears.
-
Enter the device name and select its picture. Enter a clear and unique name to ensure that you can easily identify the device in the application.
-
Choose from the following options to proceed:
-
-
From the list of existing rooms, select the room where you want to place the device, or find it by entering its name in the Search bar.
-
Create a new room by tapping + Add room.
-
-
Tap Save. The device is added to the application.