Smart Control for Heater / Convector using Shelly
Overview
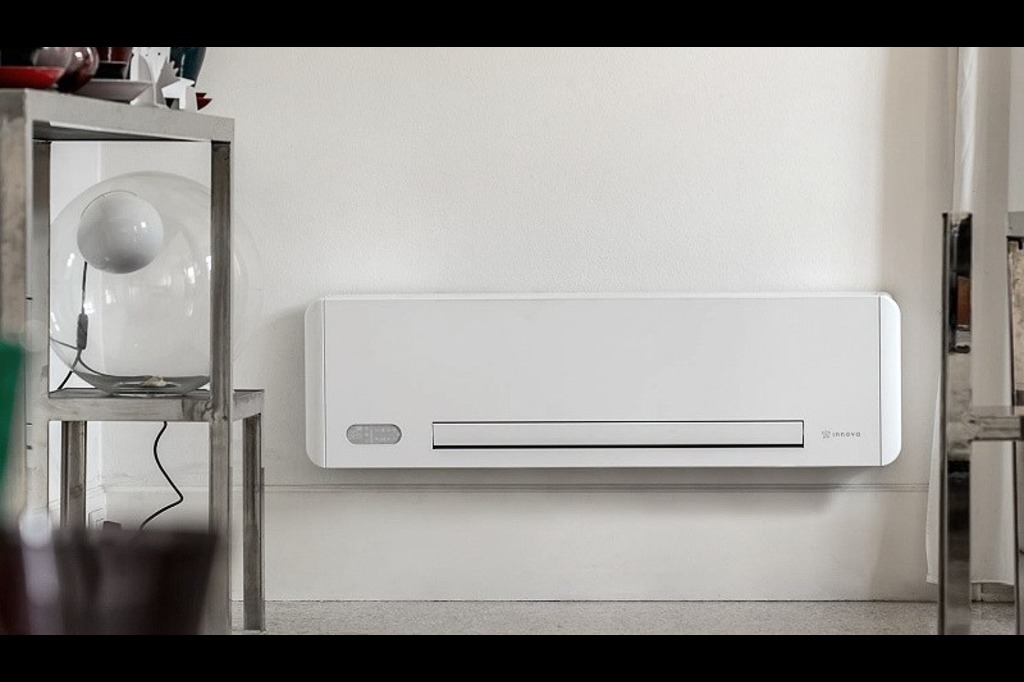
This solution outlines how to upgrade a traditional heater into a smart heater using Shelly 1PM Gen 3 for intelligent control and energy monitoring paired with the Shelly BLU H&T sensor for precise temperature and humidity detection. By integrating these devices, users can remotely control, monitor energy consumption, and automate their heater for better comfort and energy efficiency.
Convectional heaters are preferred by some users due to their silent operation compared to noisy air conditioners. By using scheduling, the heater can operate only during nighttime, when electricity costs are lower, providing both comfort and cost savings.
Prerequisites
Before starting, ensure you have the following:
Shelly Devices:
Shelly 1PM Gen 3: Provides on/off control and power monitoring.
Shelly BLU H&T: Bluetooth sensor for temperature and humidity monitoring.
Tools: Screwdrivers, insulated pliers and wire cutters.
Stable Wi-Fi Connection: Shelly 1PM Gen 3 requires a 2.4GHz Wi-Fi network for remote control.
Wiring Diagram:
We will use the following wiring diagram example to describe this solution. See attached PDF file below where “before“ and “after“ diagrams are depicted.
Smart Heater.pdf
Reference the "Before" and "After" diagrams in the wiring diagram to ensure proper installation.
Certified Electrician (recommended): If unsure, seek professional assistance for safety and compliance.
Step-by-Step Instructions
Disassembly
Disconnect (unplug) the Heater during installation.
Locate and open the Heater’s control box, note that in some cases may be places internally.
Be aware that by doing any interventions by yourself would void the Warranty of the equipment!
Pre-Wiring
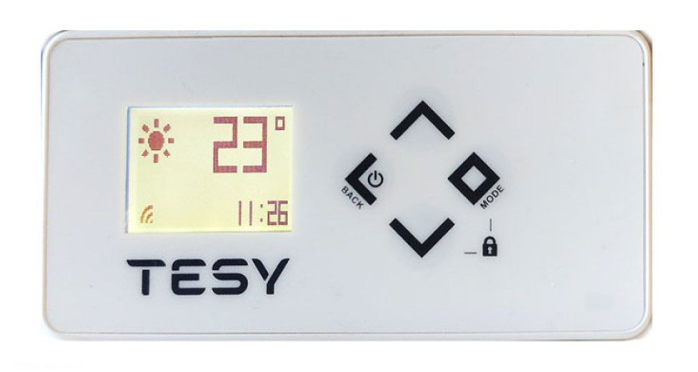
All of the Heaters / Convertors manufactured now-a-days include means of controlling the “heat” output. Such control is achieved either via Manual Thermostat or Digital Thermostat. Our example describes a case in which a Heater with Manual Thermostat is used.
Examples of both types of thermostats may be observed below:
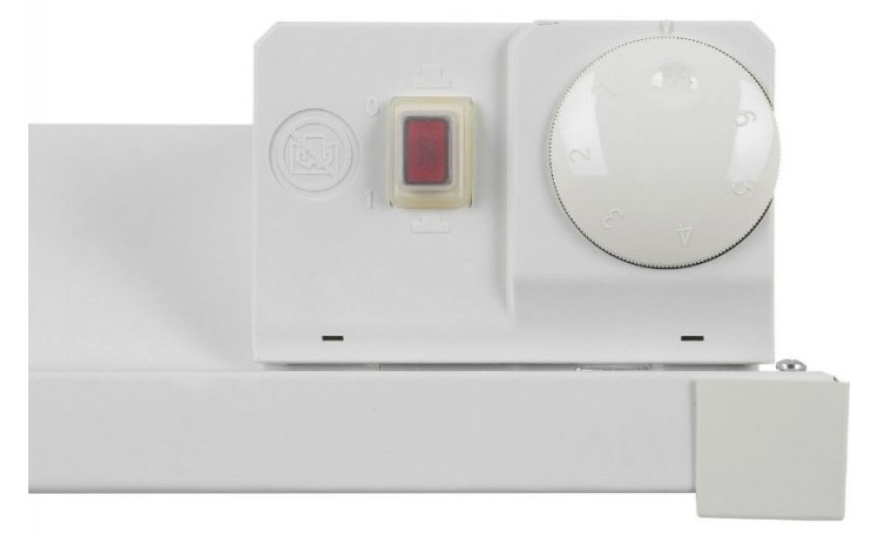
Note the existing protections (a must in such appliances) like an Overheating protection thermal relay and a Vertical position sensor.
Once you’ve located all of the above equipment check whether is the same or similar to the one shown in the “Before” section in the attached wiring diagram.
Wiring
Identify the live wire (L), neutral wire (N), and the heater connections.
Follow the "After" wiring diagram to integrate the Shelly 1PM Gen 3 into the circuit:
The Manual Thermostat may be completely removed since a better temperature measurement and heating control will be provided by the newly added Shelly devices. In case the Manual Thermostat is not removed, it can be used as an additional overheating safety protection. Its temperature control setting should not interfere with the temperature setting provided at later stage by Shelly 1PM Gen 3.
Shelly 1PM Gen 3 wiring: Connect the outgoing live wire (L) from the Manual on/off switch to the supply terminal (L) and to the input terminal (SW). The latter will provide direct Heater operation with its Manual on/off switch even without having an access to the Shelly Control App.
Connect the outgoing neutral wire (N) from the Manual on/off switch to the neutral terminal (N) on the Shelly device. Keep the neutral wire (N) connection to the heating element.
Connect the rest of the live wire (L) leading to the heating element and the provided protections in series to it to the output terminal (O).
Double-check all connections to ensure they match the "After" diagram.
Restore Power and Add Devices to the Network
Connect (Plug In) back the power cord of the Heater and turn its Main switch on.
Use the Shelly Smart Control App to discover and add both devices into your account:
Shelly BLU H&T: Pair the Bluetooth sensor with the Shelly app and place it in a remote location in the room, away from the heater. This ensures accurate temperature readings by measuring the room's ambient temperature rather than the heater's immediate output.
Shelly 1PM Gen 3: Use the app to discover the device (via Wi-Fi or Bluetooth) and connect it to your network.
Rename the devices for easy identification (e.g., “Smart Heater” and “Room Sensor”).
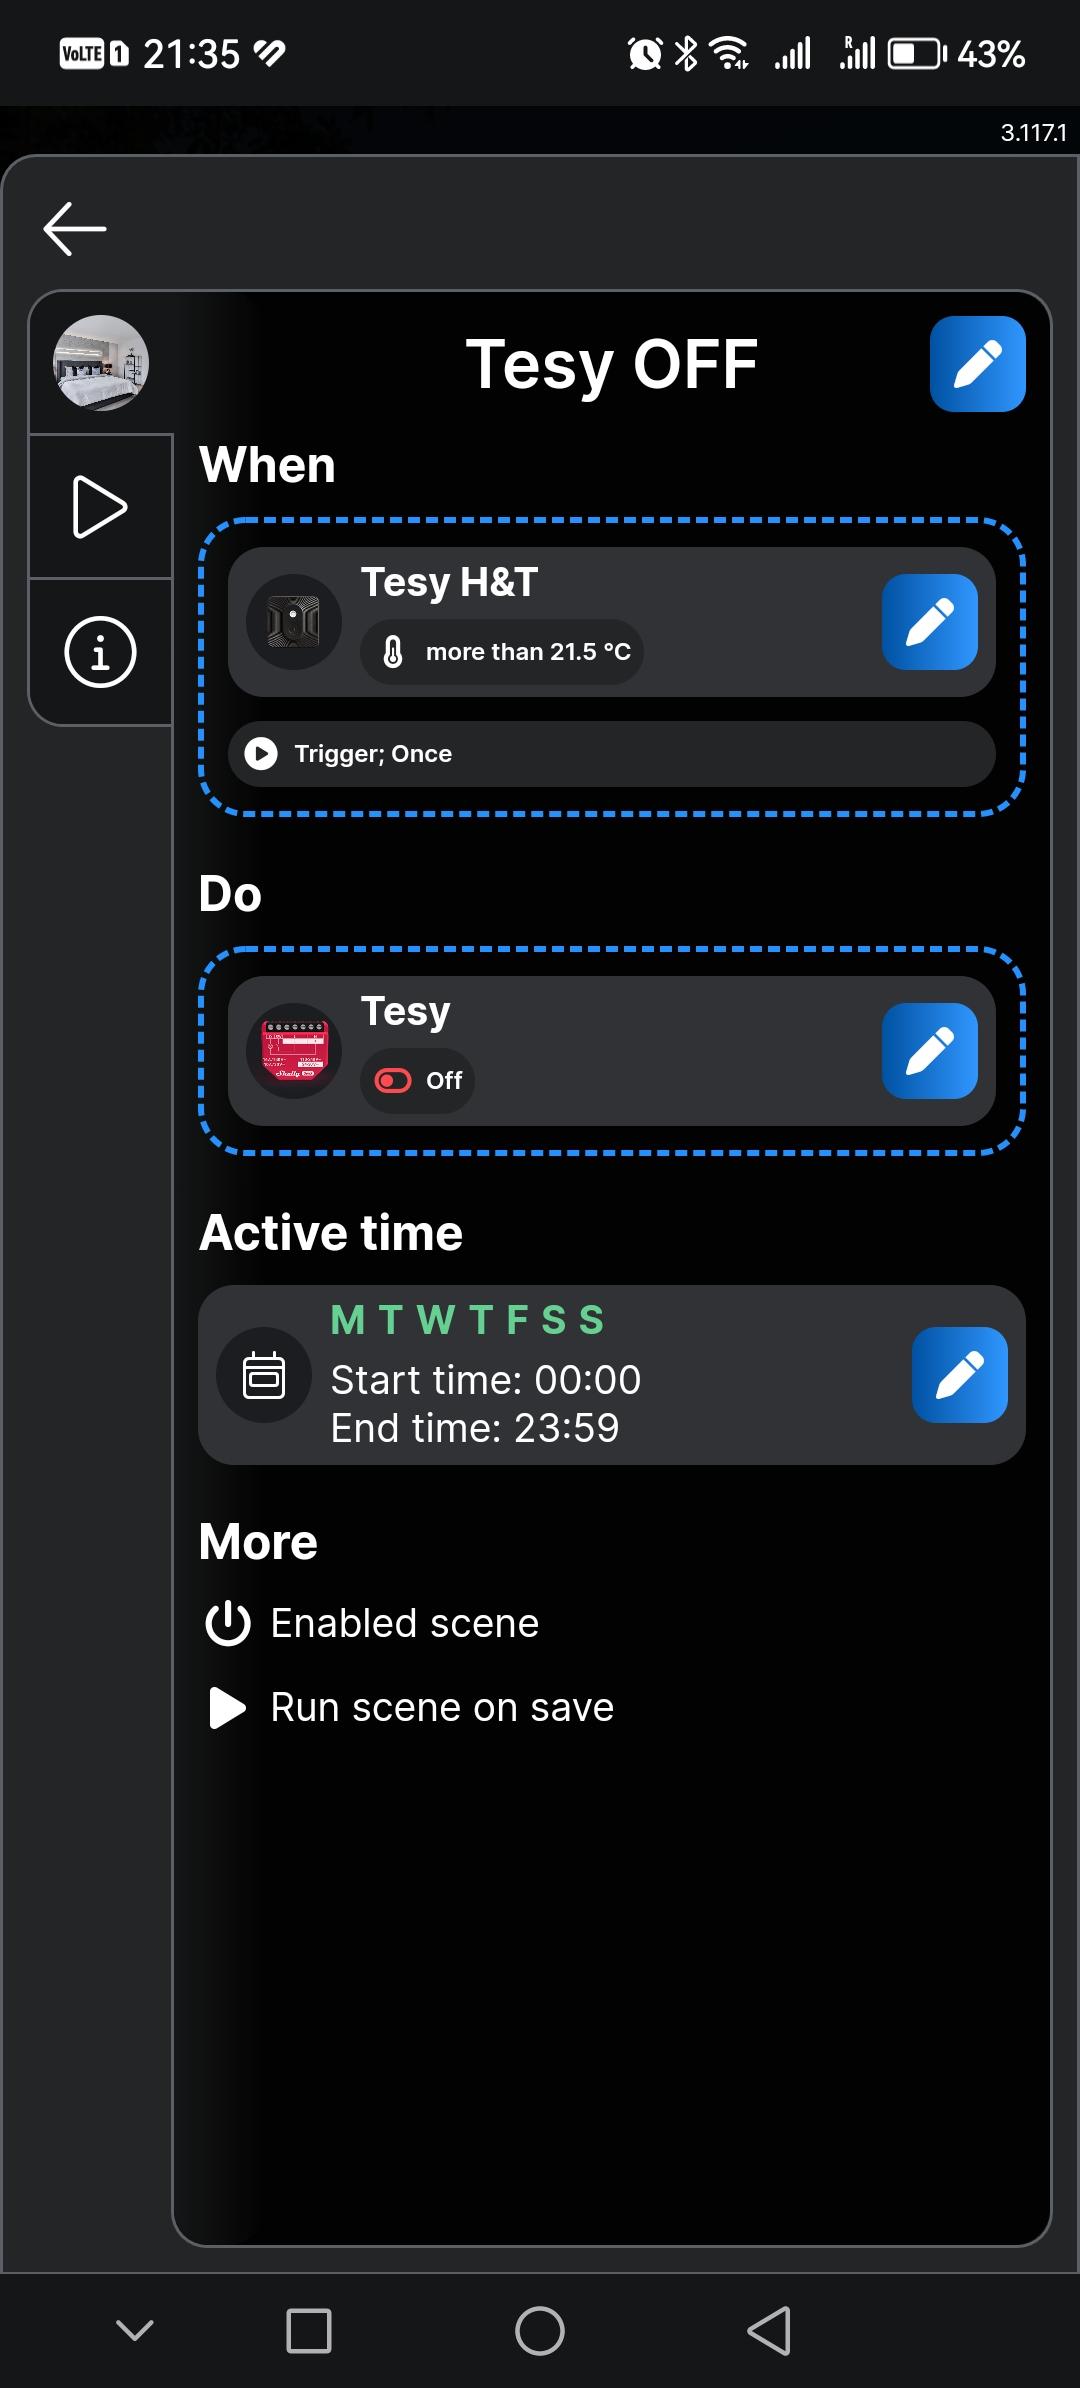
Configure Automation and Control logic In the Shelly app:
Manual Control: Turn the heater on/off either via its Main switch or remotely via the app.
Scenes:
Set up the heater to operate only during nighttime hours, when electricity rates are lower.
Example: Enable time based Scene which will turn on the heater at 10:00 PM and off at 6:00 AM.
Temperature-Based Control: Use the temperature readings from the Shelly BLU H&T sensor to automate the heater:
Example: If the room temperature drops below 20°C, the Shelly 1PM Gen 3 turns on the heater.
Example: If the temperature exceeds 22°C, the heater turns off automatically.
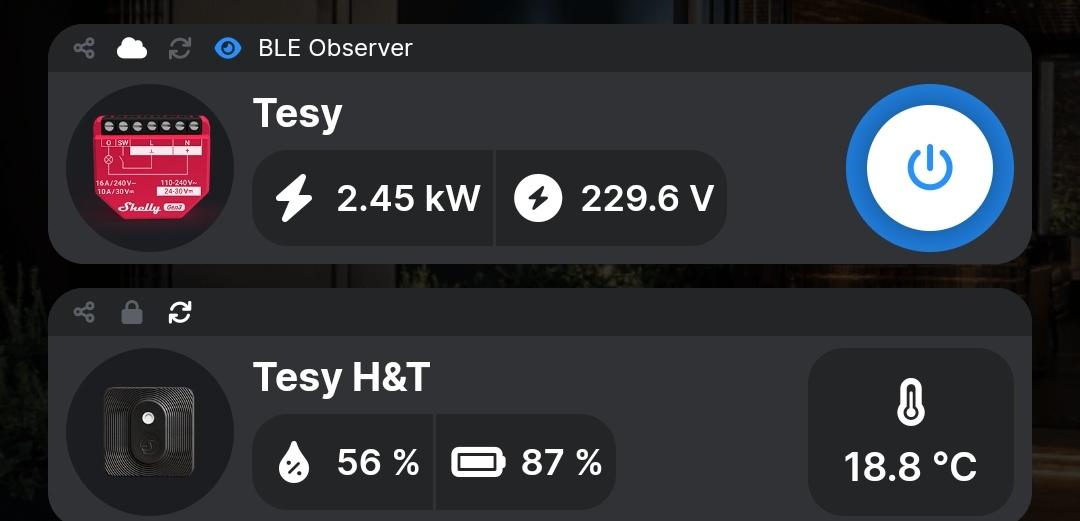
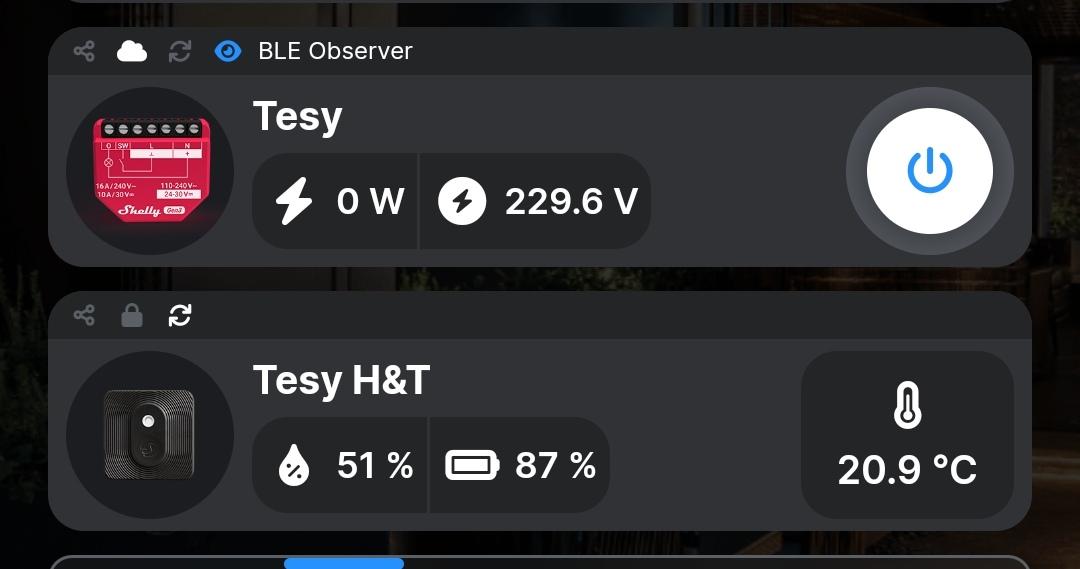
Energy Monitoring: Track power consumption through Shelly 1PM Gen 3 to optimize heating efficiency.
Detailed information regarding How to configure Scenes in Shelly Control App may be found in the links below:
Link 1: How to add Scenes in Shelly Cloud app?
Link 2: Scenes
Link 3: How to create Shelly scenes and schedules /an external guide from our friends from SmartHome/
Test the System
Verify that the heater turns on/off based on manual control, schedules, and temperature automation.
Test the accuracy of the Shelly BLU H&T temperature readings and adjust its placement if needed.
Monitor energy usage to ensure proper operation.
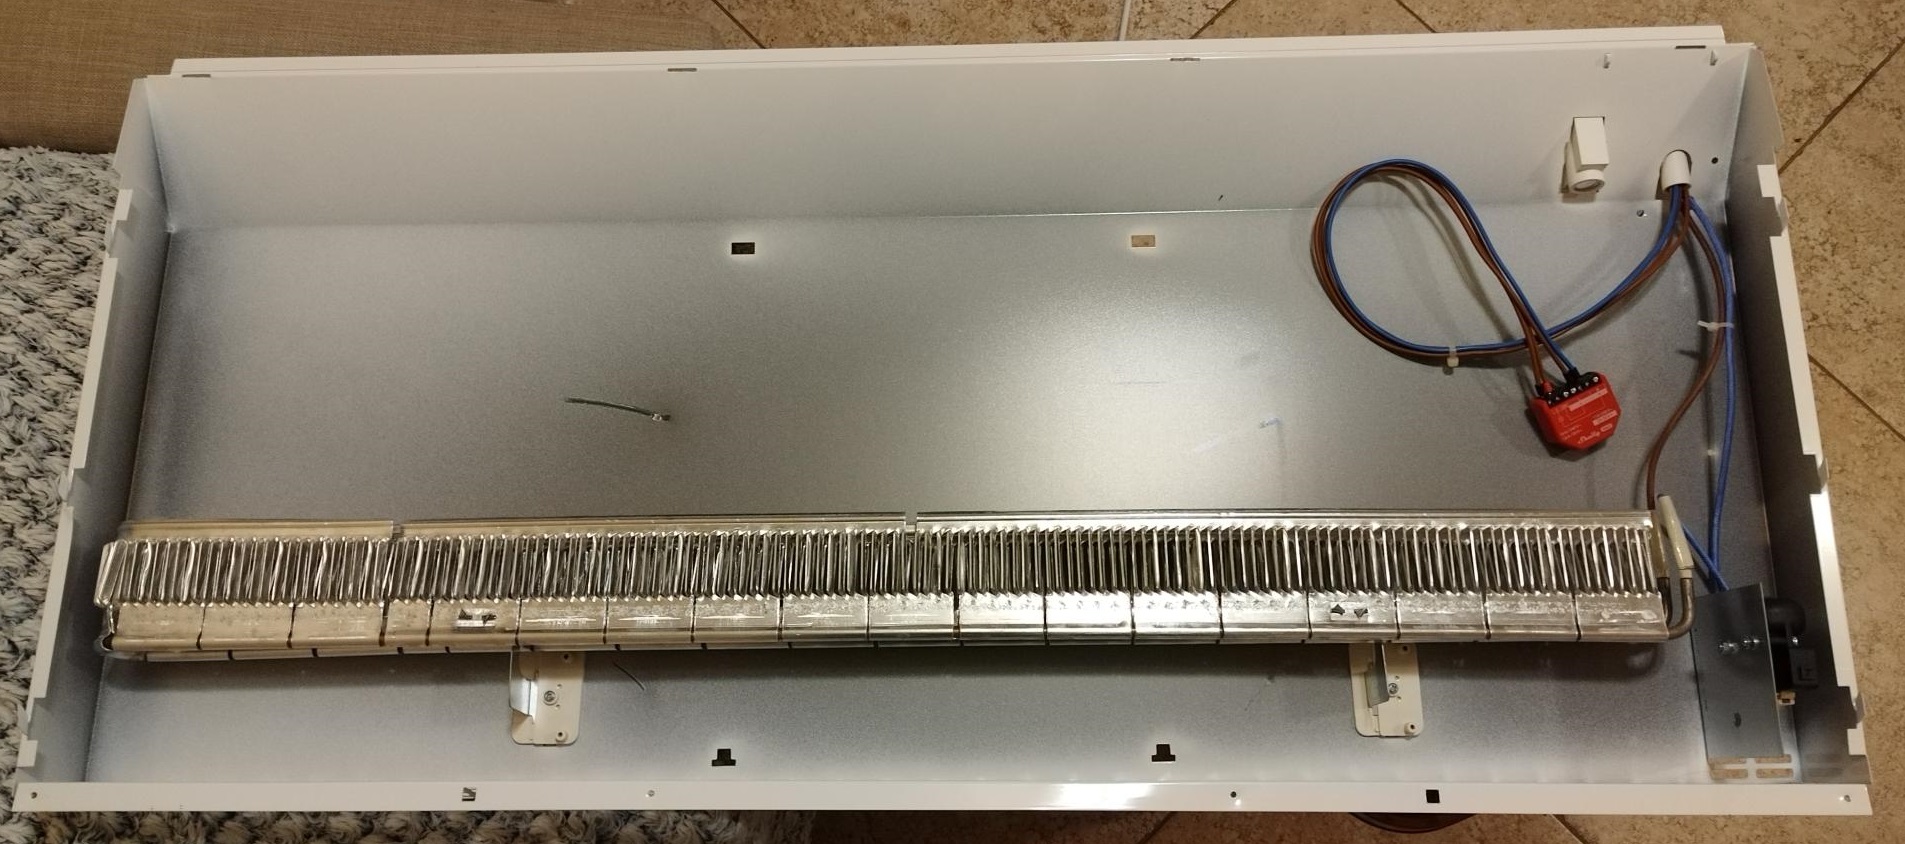
Project photos
 | 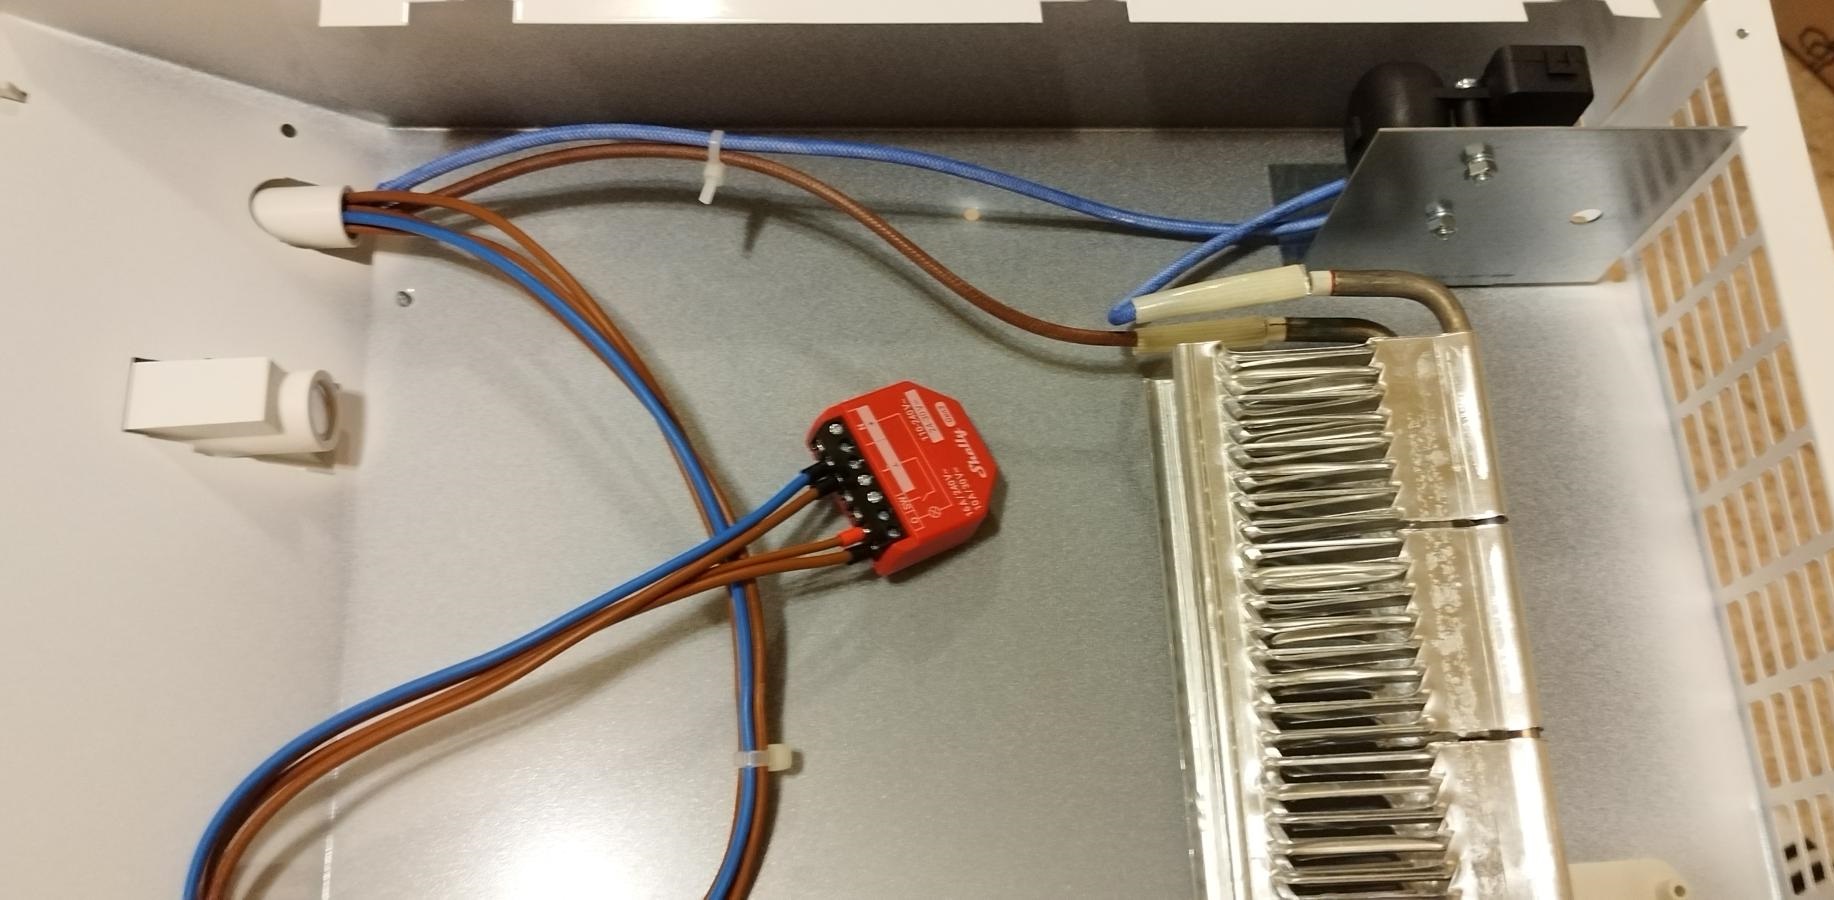 | 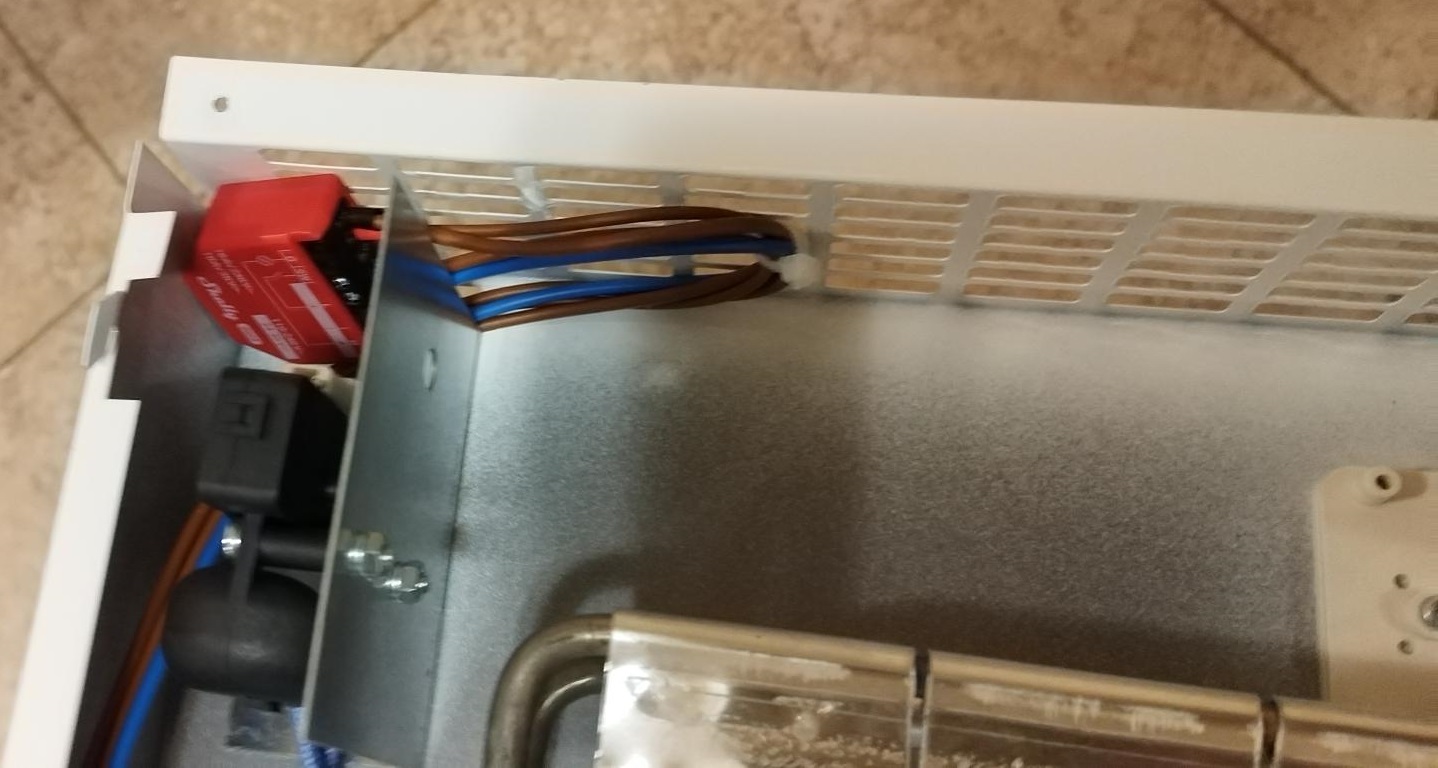 | 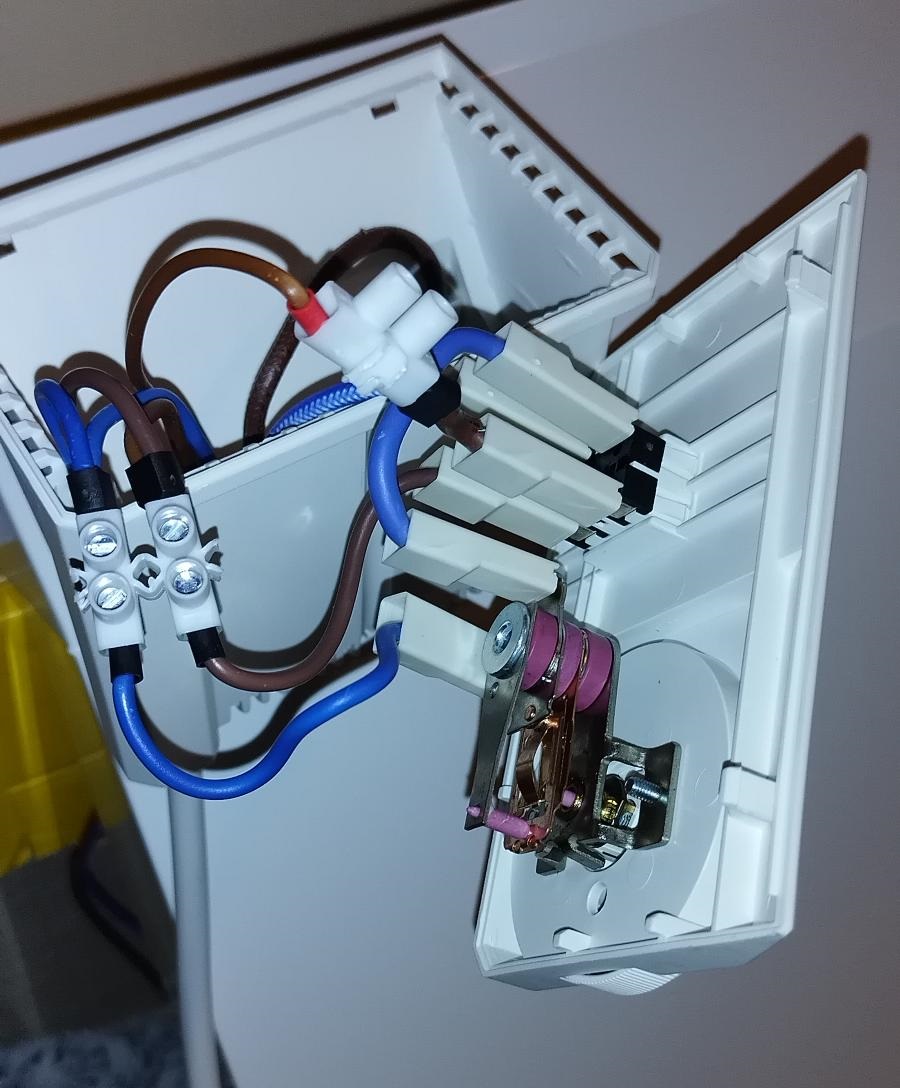 |
|---|---|---|---|
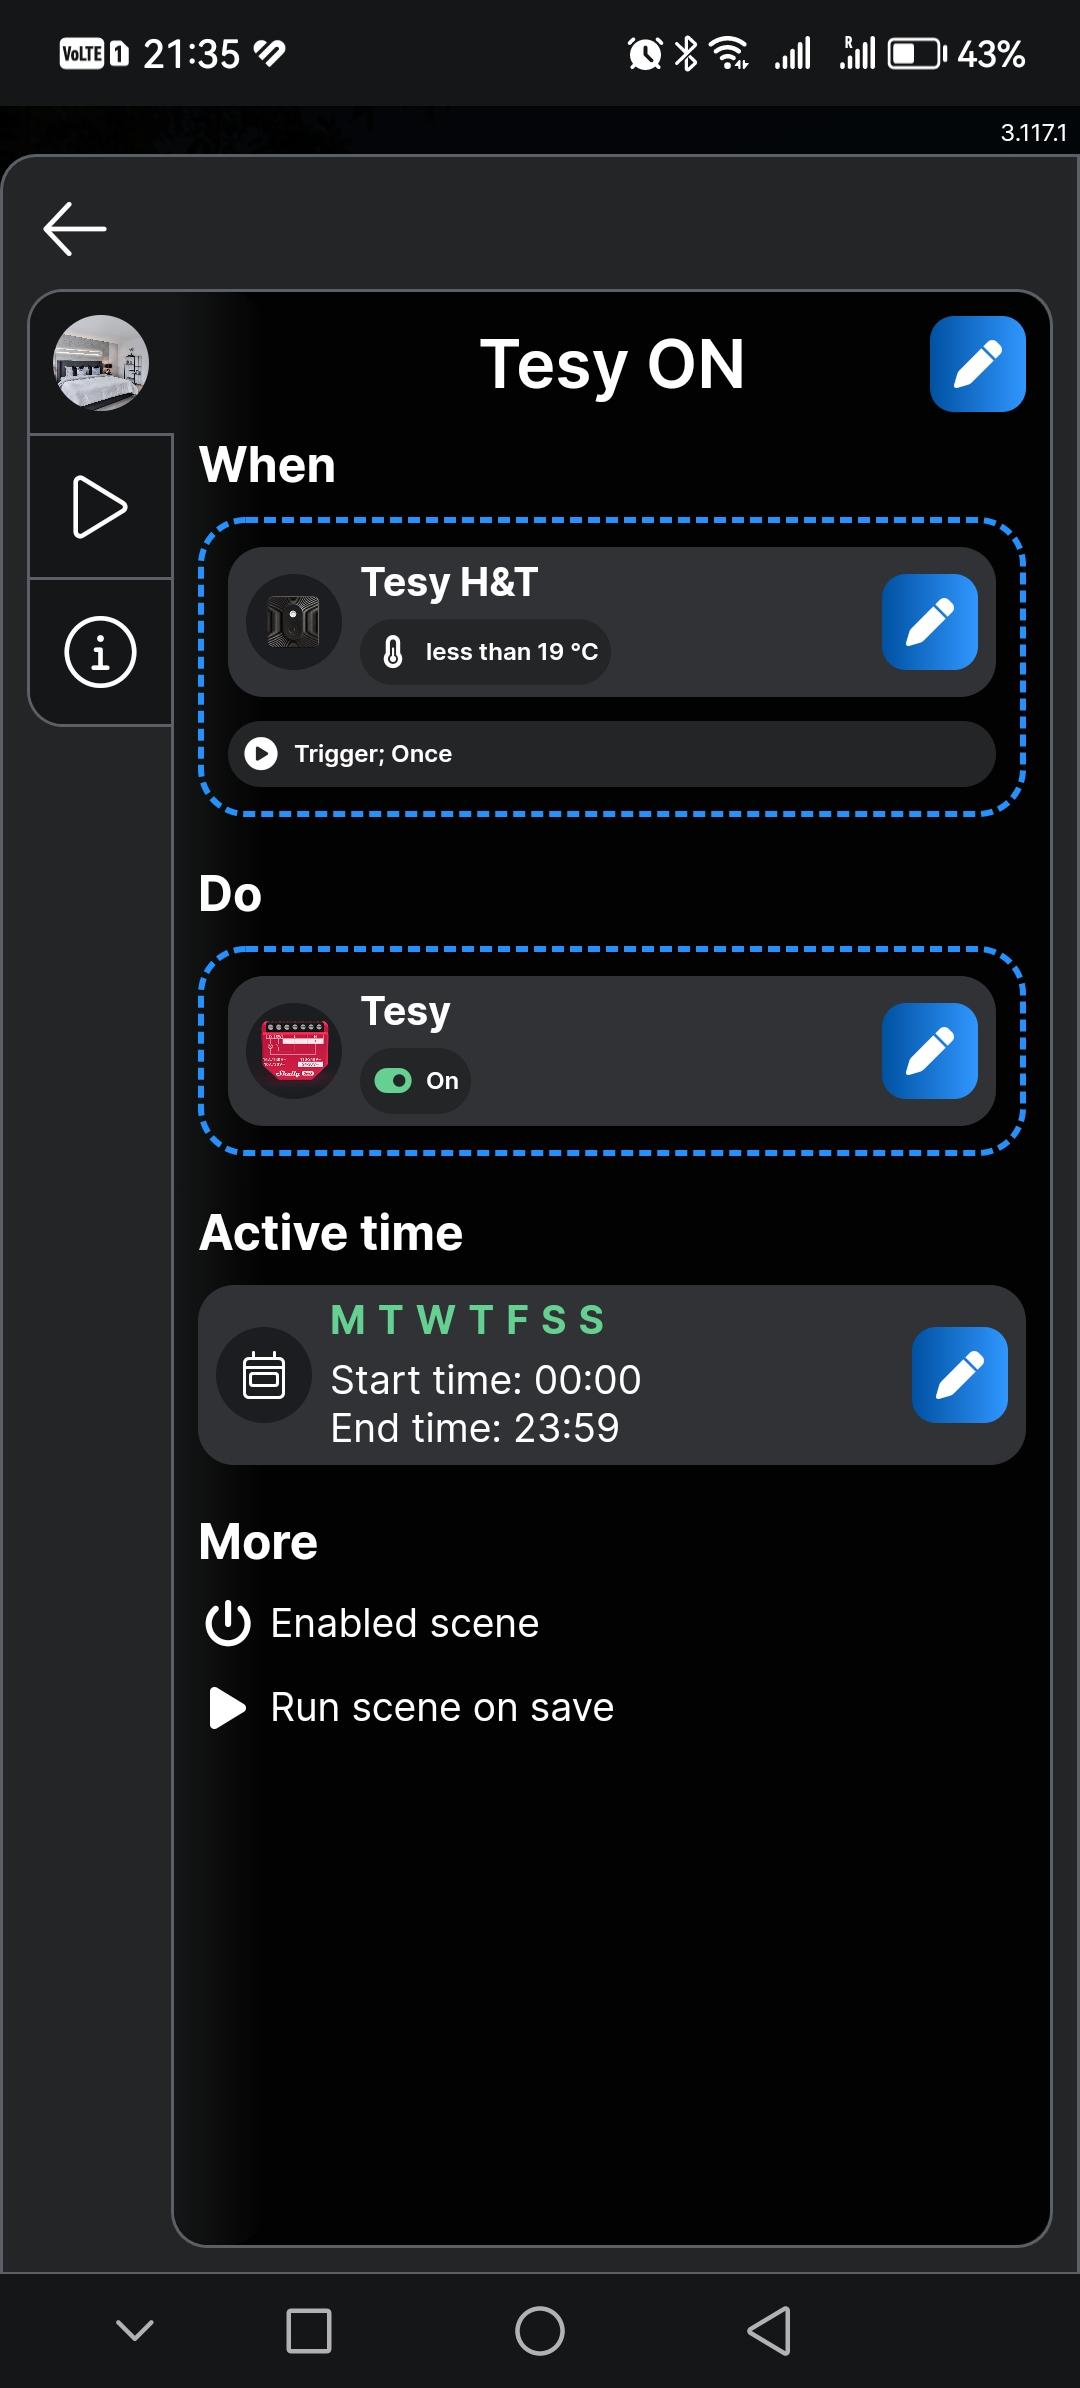 |  |  |  |
Conclusion
By integrating Shelly 1PM Gen 3 with a Shelly BLU H&T sensor, the heater becomes a fully automated smart appliance. Convectional heaters, known for their quiet operation, benefit significantly from this solution, especially when scheduled to run during nighttime hours with lower electricity costs. Placing the BLU H&T sensor in a proper location ensures accurate temperature readings, enabling better control, enhanced comfort, and optimized energy efficiency.
We Value Your Feedback!
Thank you for taking the time to read our article! Was it helpful or interesting?
Your insights can help us improve. We’d be grateful for any feedback. If you have a moment,
please share it with us at the following email: