ShellyBLU Motion short mobile application guide
Shelly Smart Control app inclusion process
The following guide explains how to include your ShellyBLU Motion in the Shelly Smart Control app. You will need Shelly Plus or Pro devices to act as gateways for your sensor.
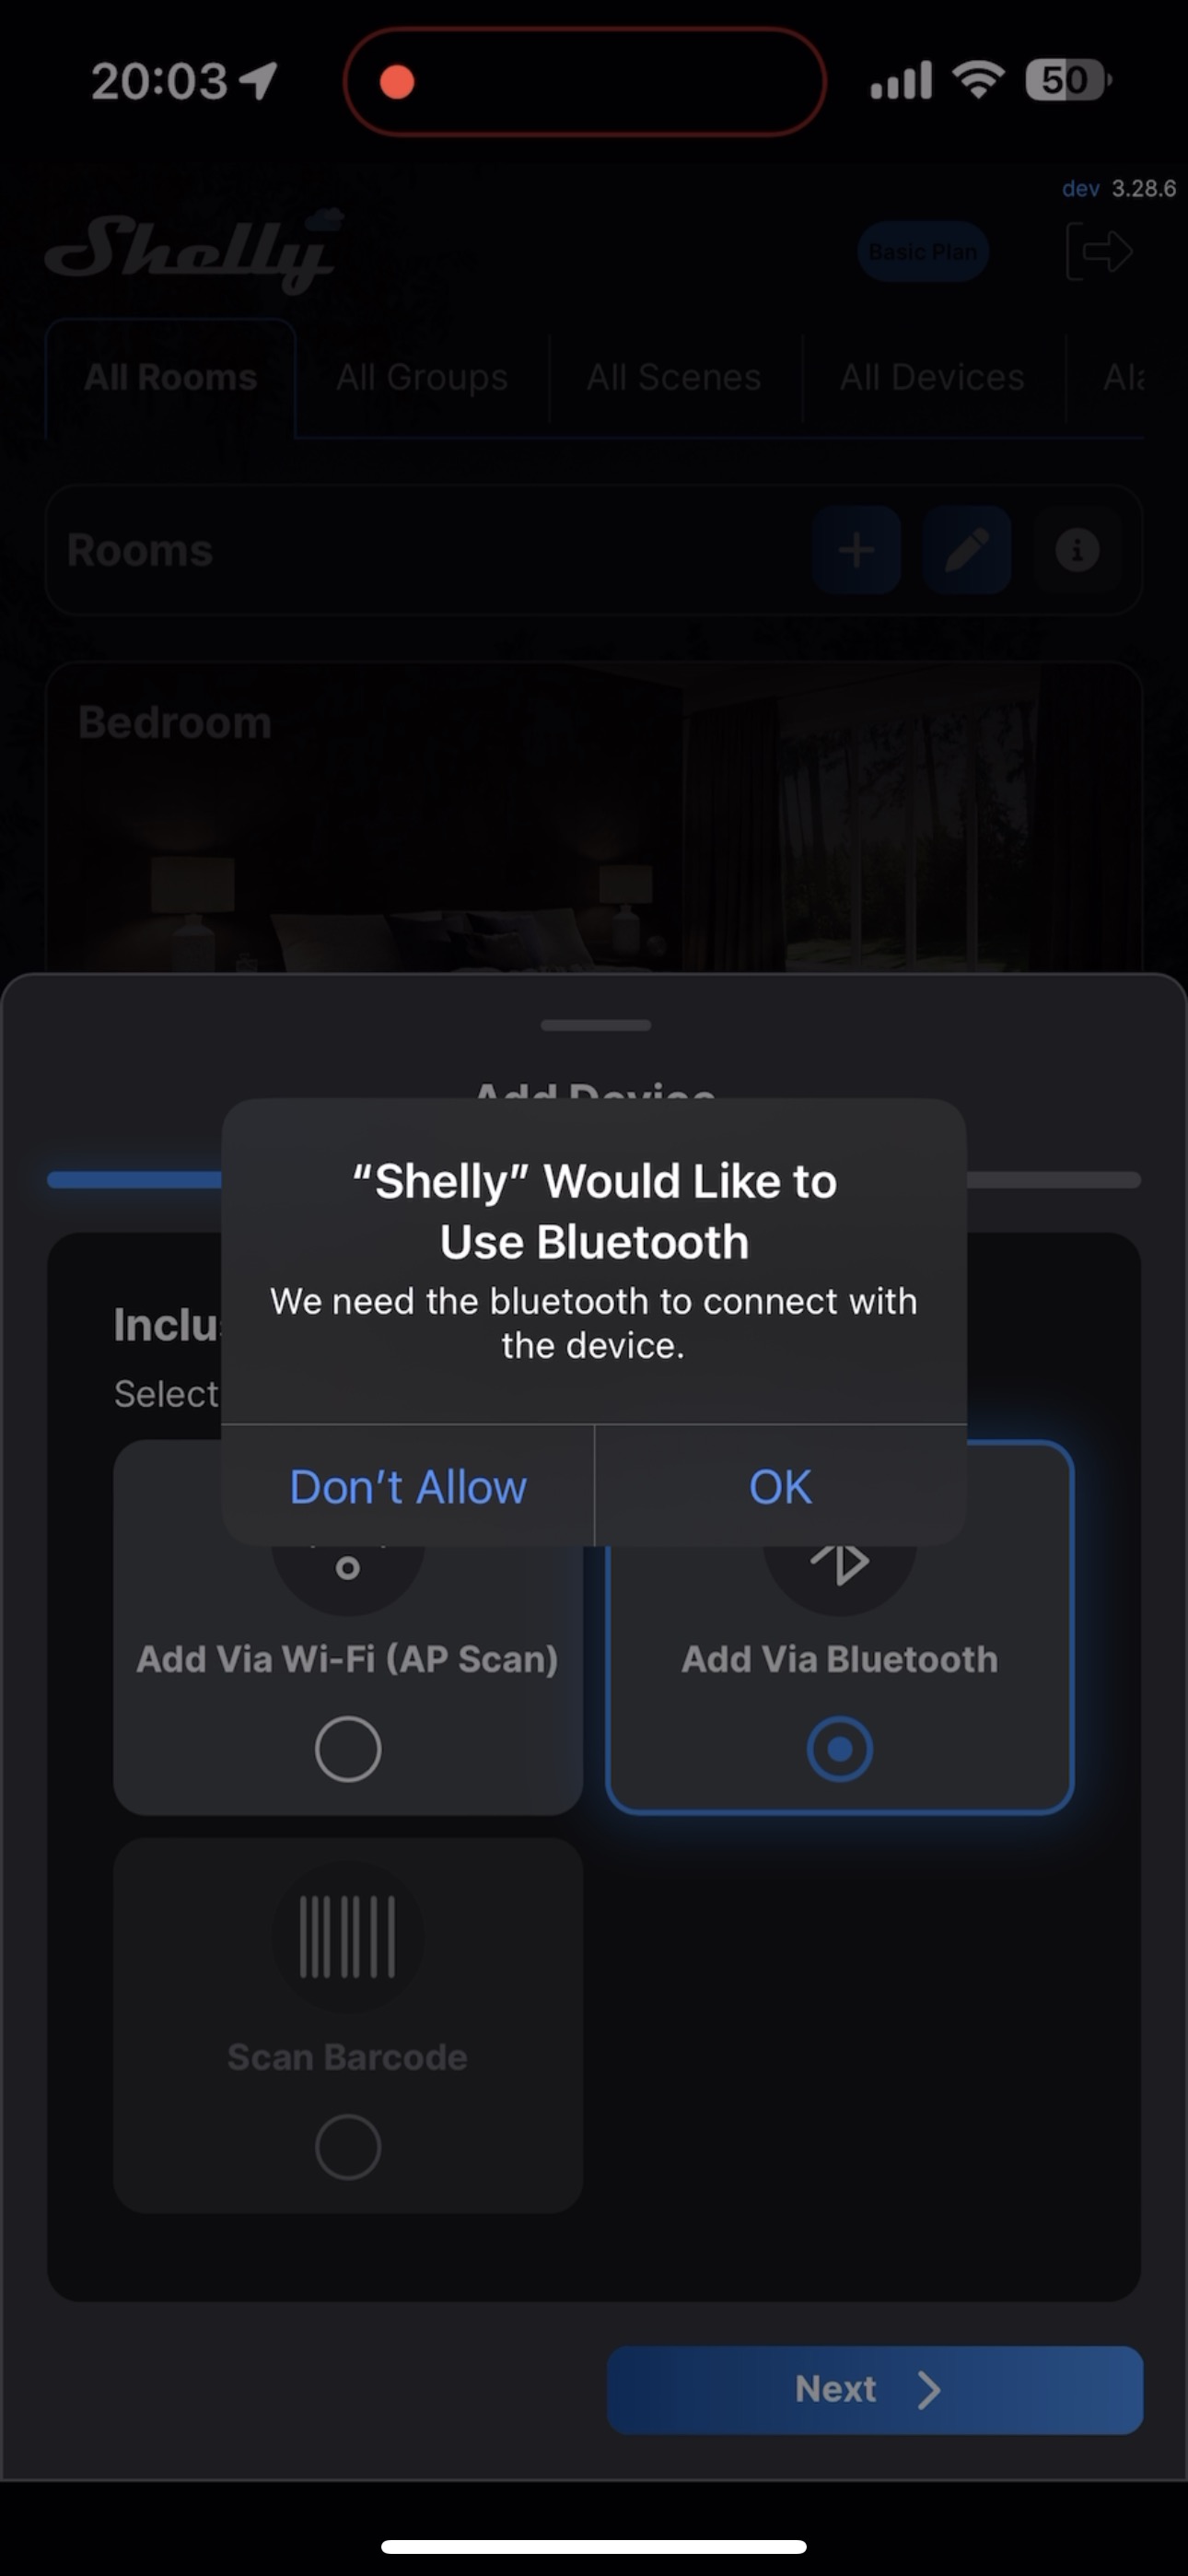
Step 1: Make sure Bluetooth is enabled on your phone and the Shelly Smart Control app is allowed to use it. The pop-up in the following image will appear on your screen and ask you for permission to use Bluetooth.
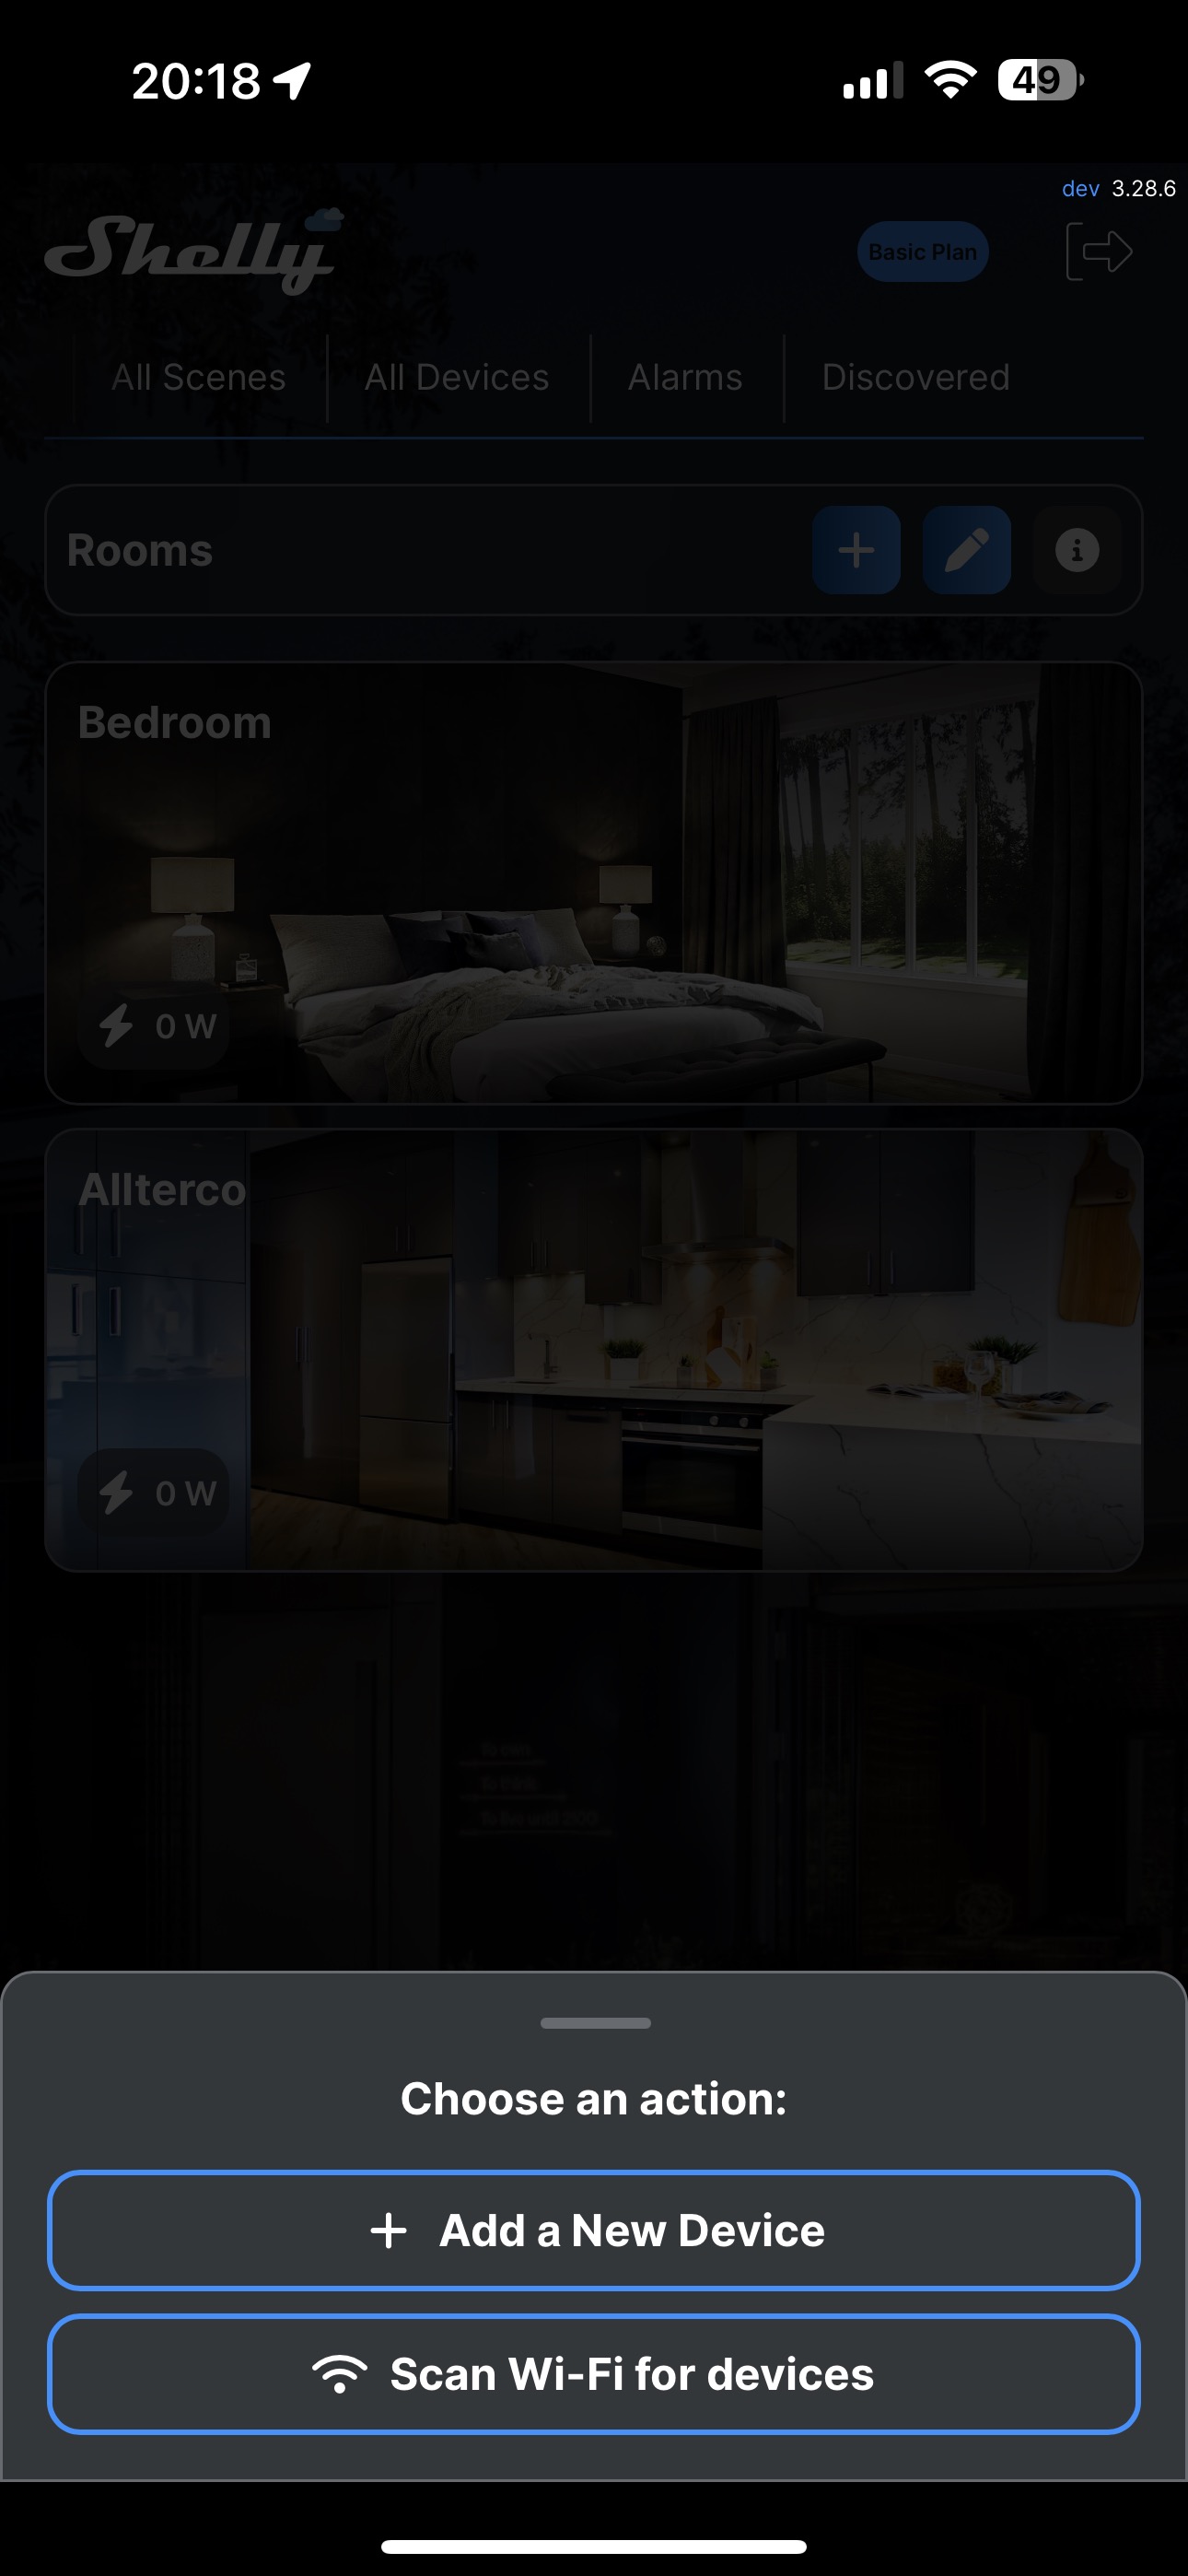
Step 2: On the Shelly Smart Control app home screen, tap the + icon at the bottom right corner, then Add a new device.
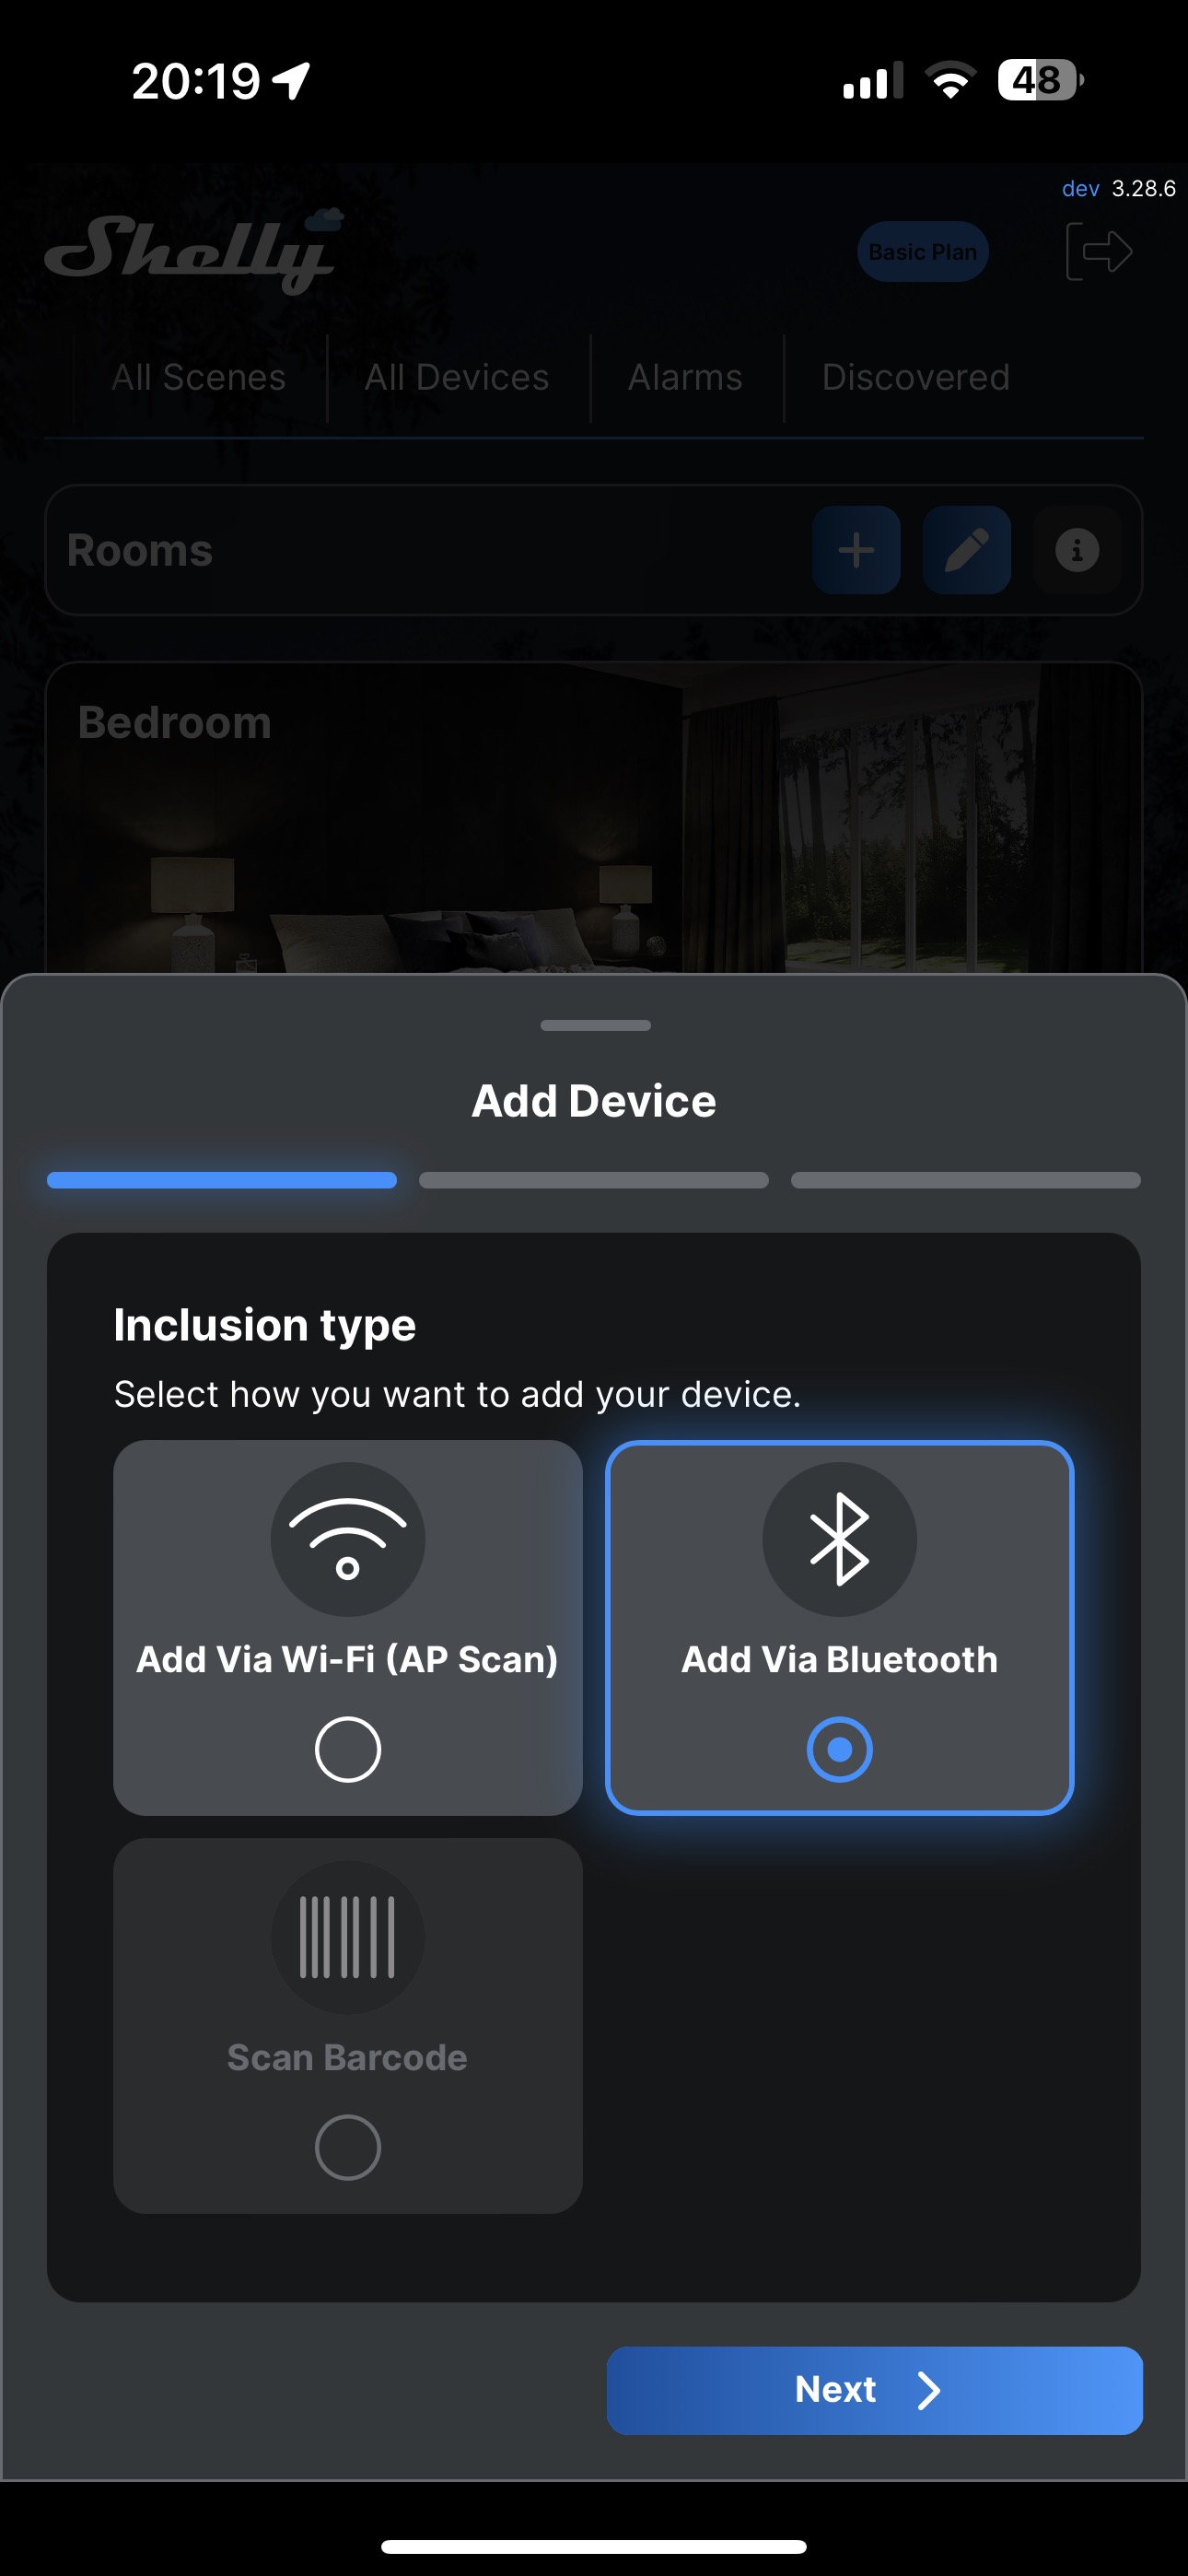
Step 3: Choose Add via Bluetooth.
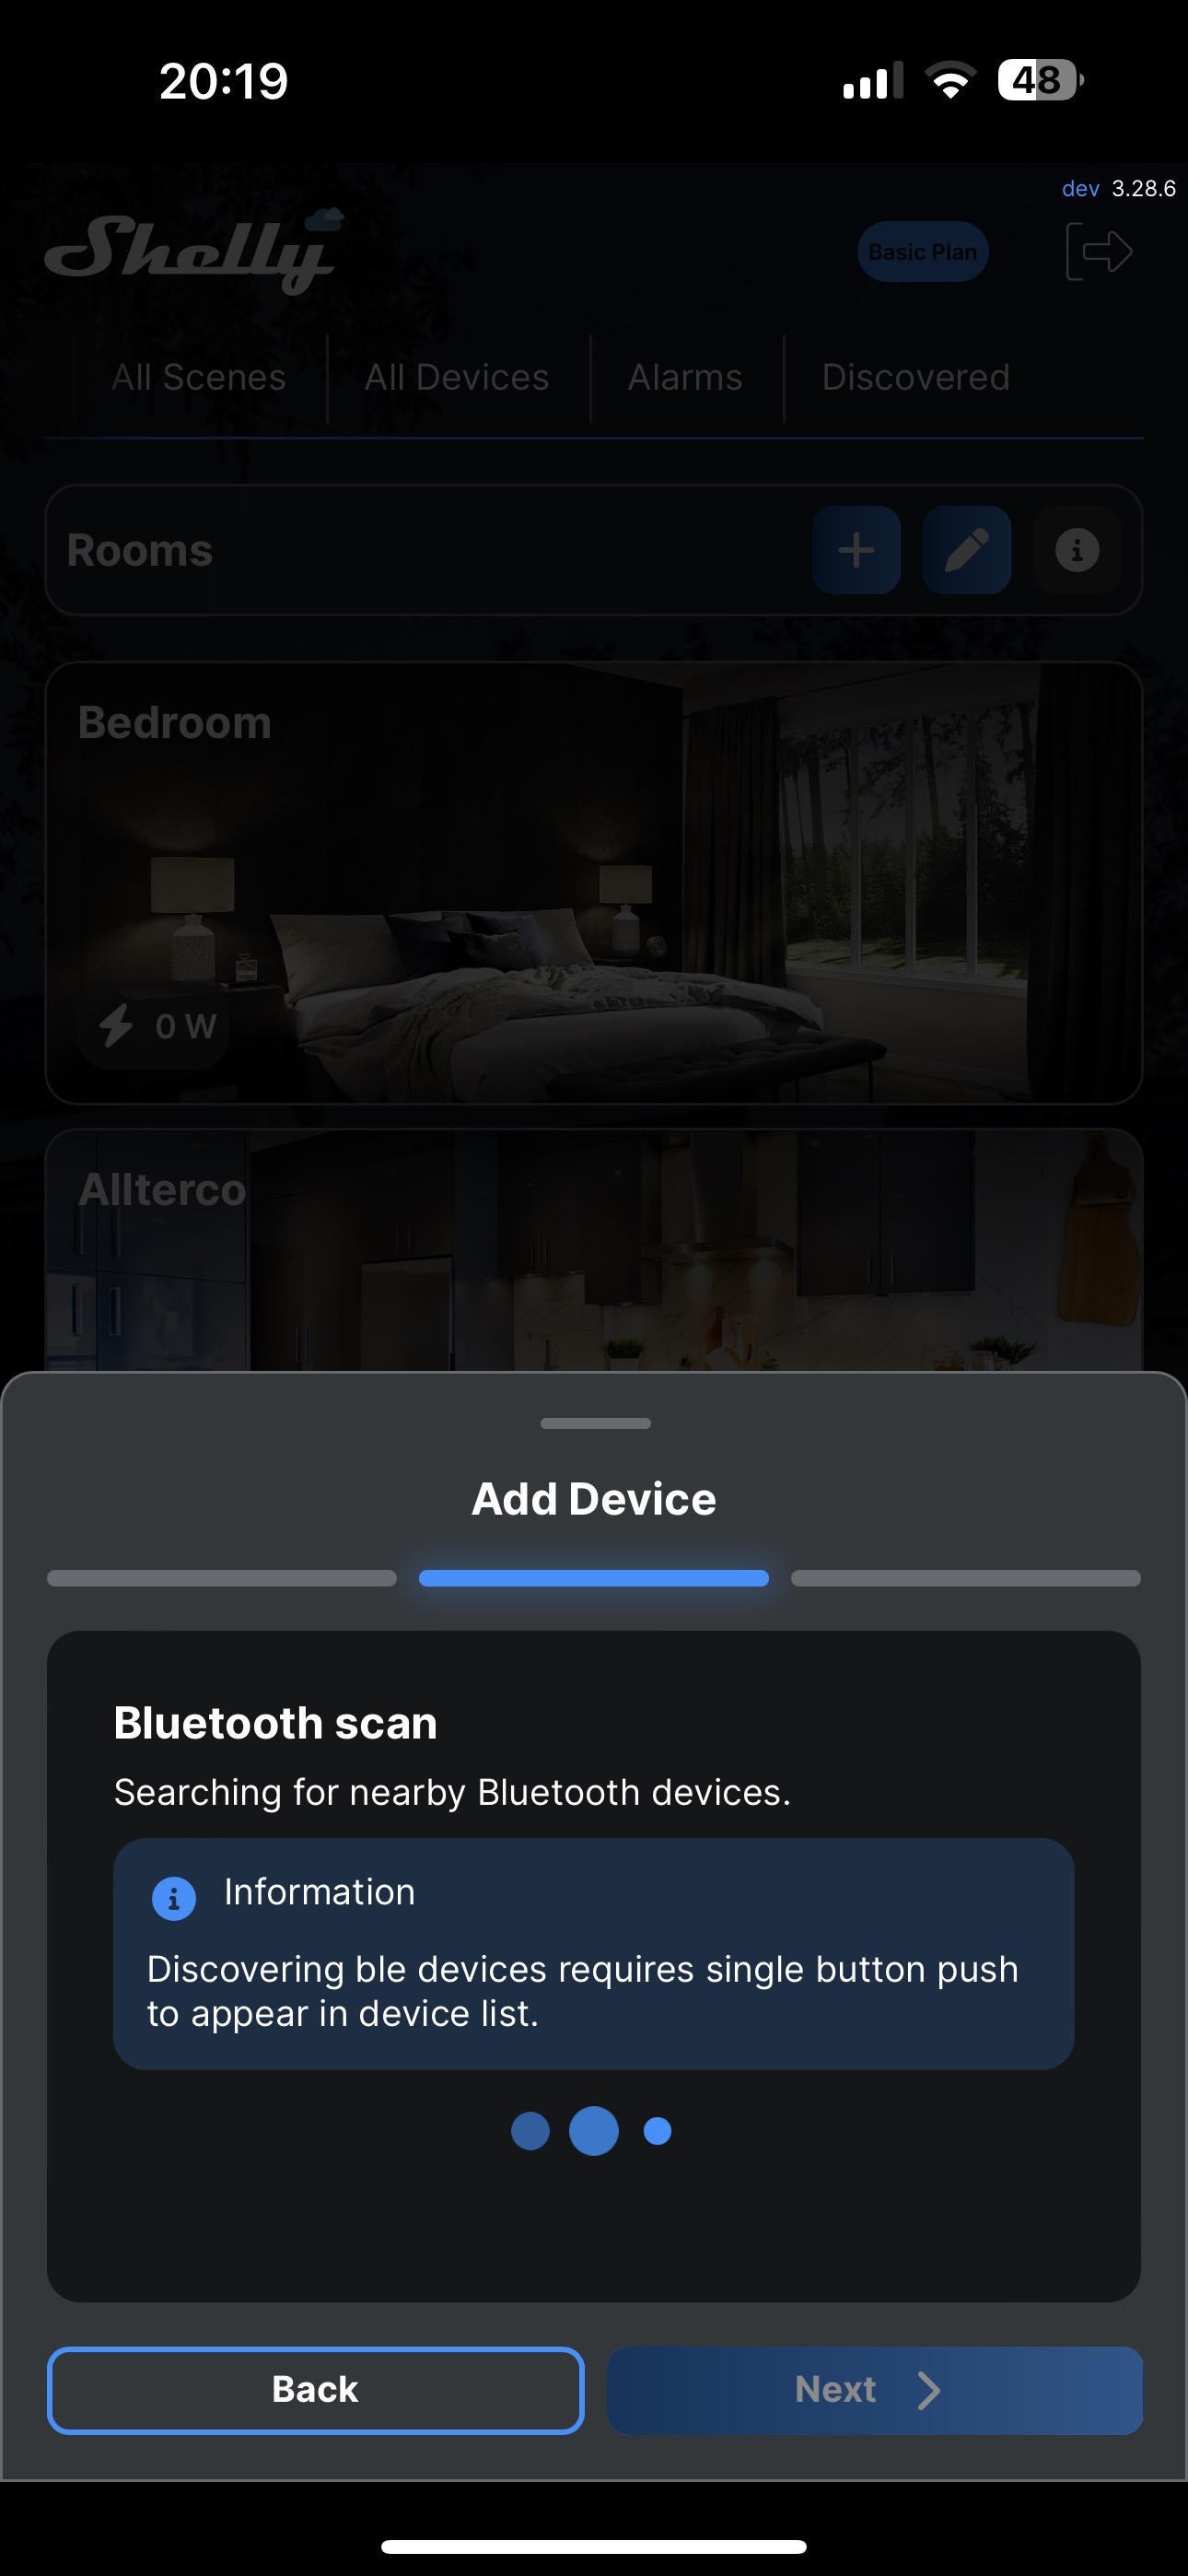
Step 4: Once the Bluetooth device scan has started, you will need to press the device button once for it to appear in the list of devices.
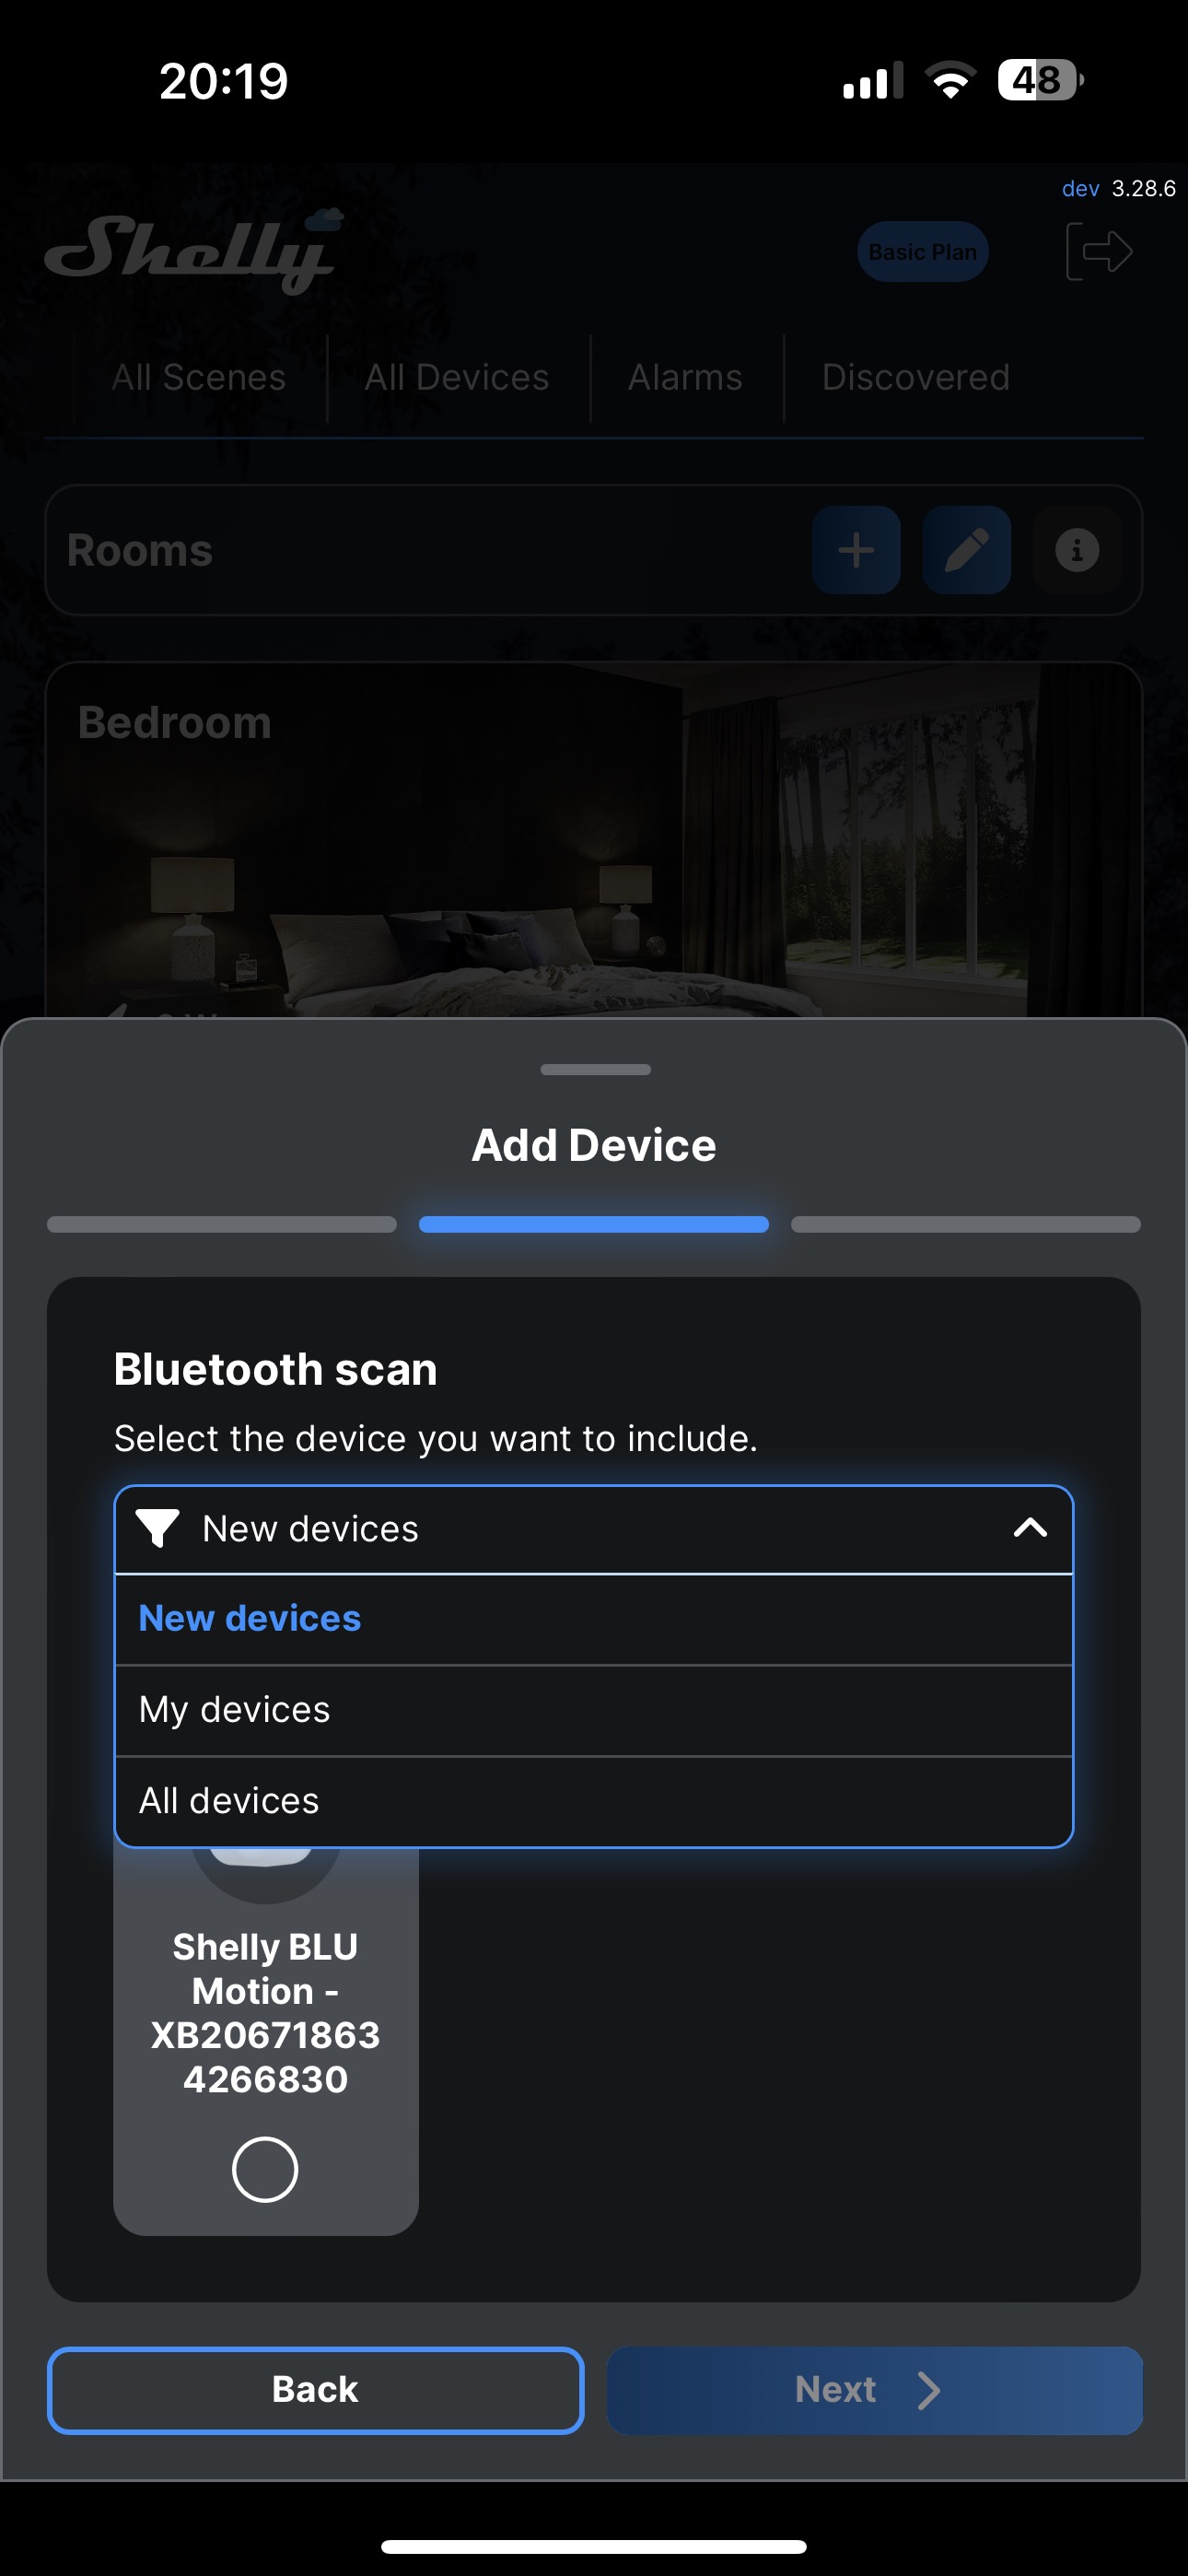
Additionally, you can filter the list of devices shown by clicking on the drop-down and selecting either New devices (the default), My devices, or All devices.
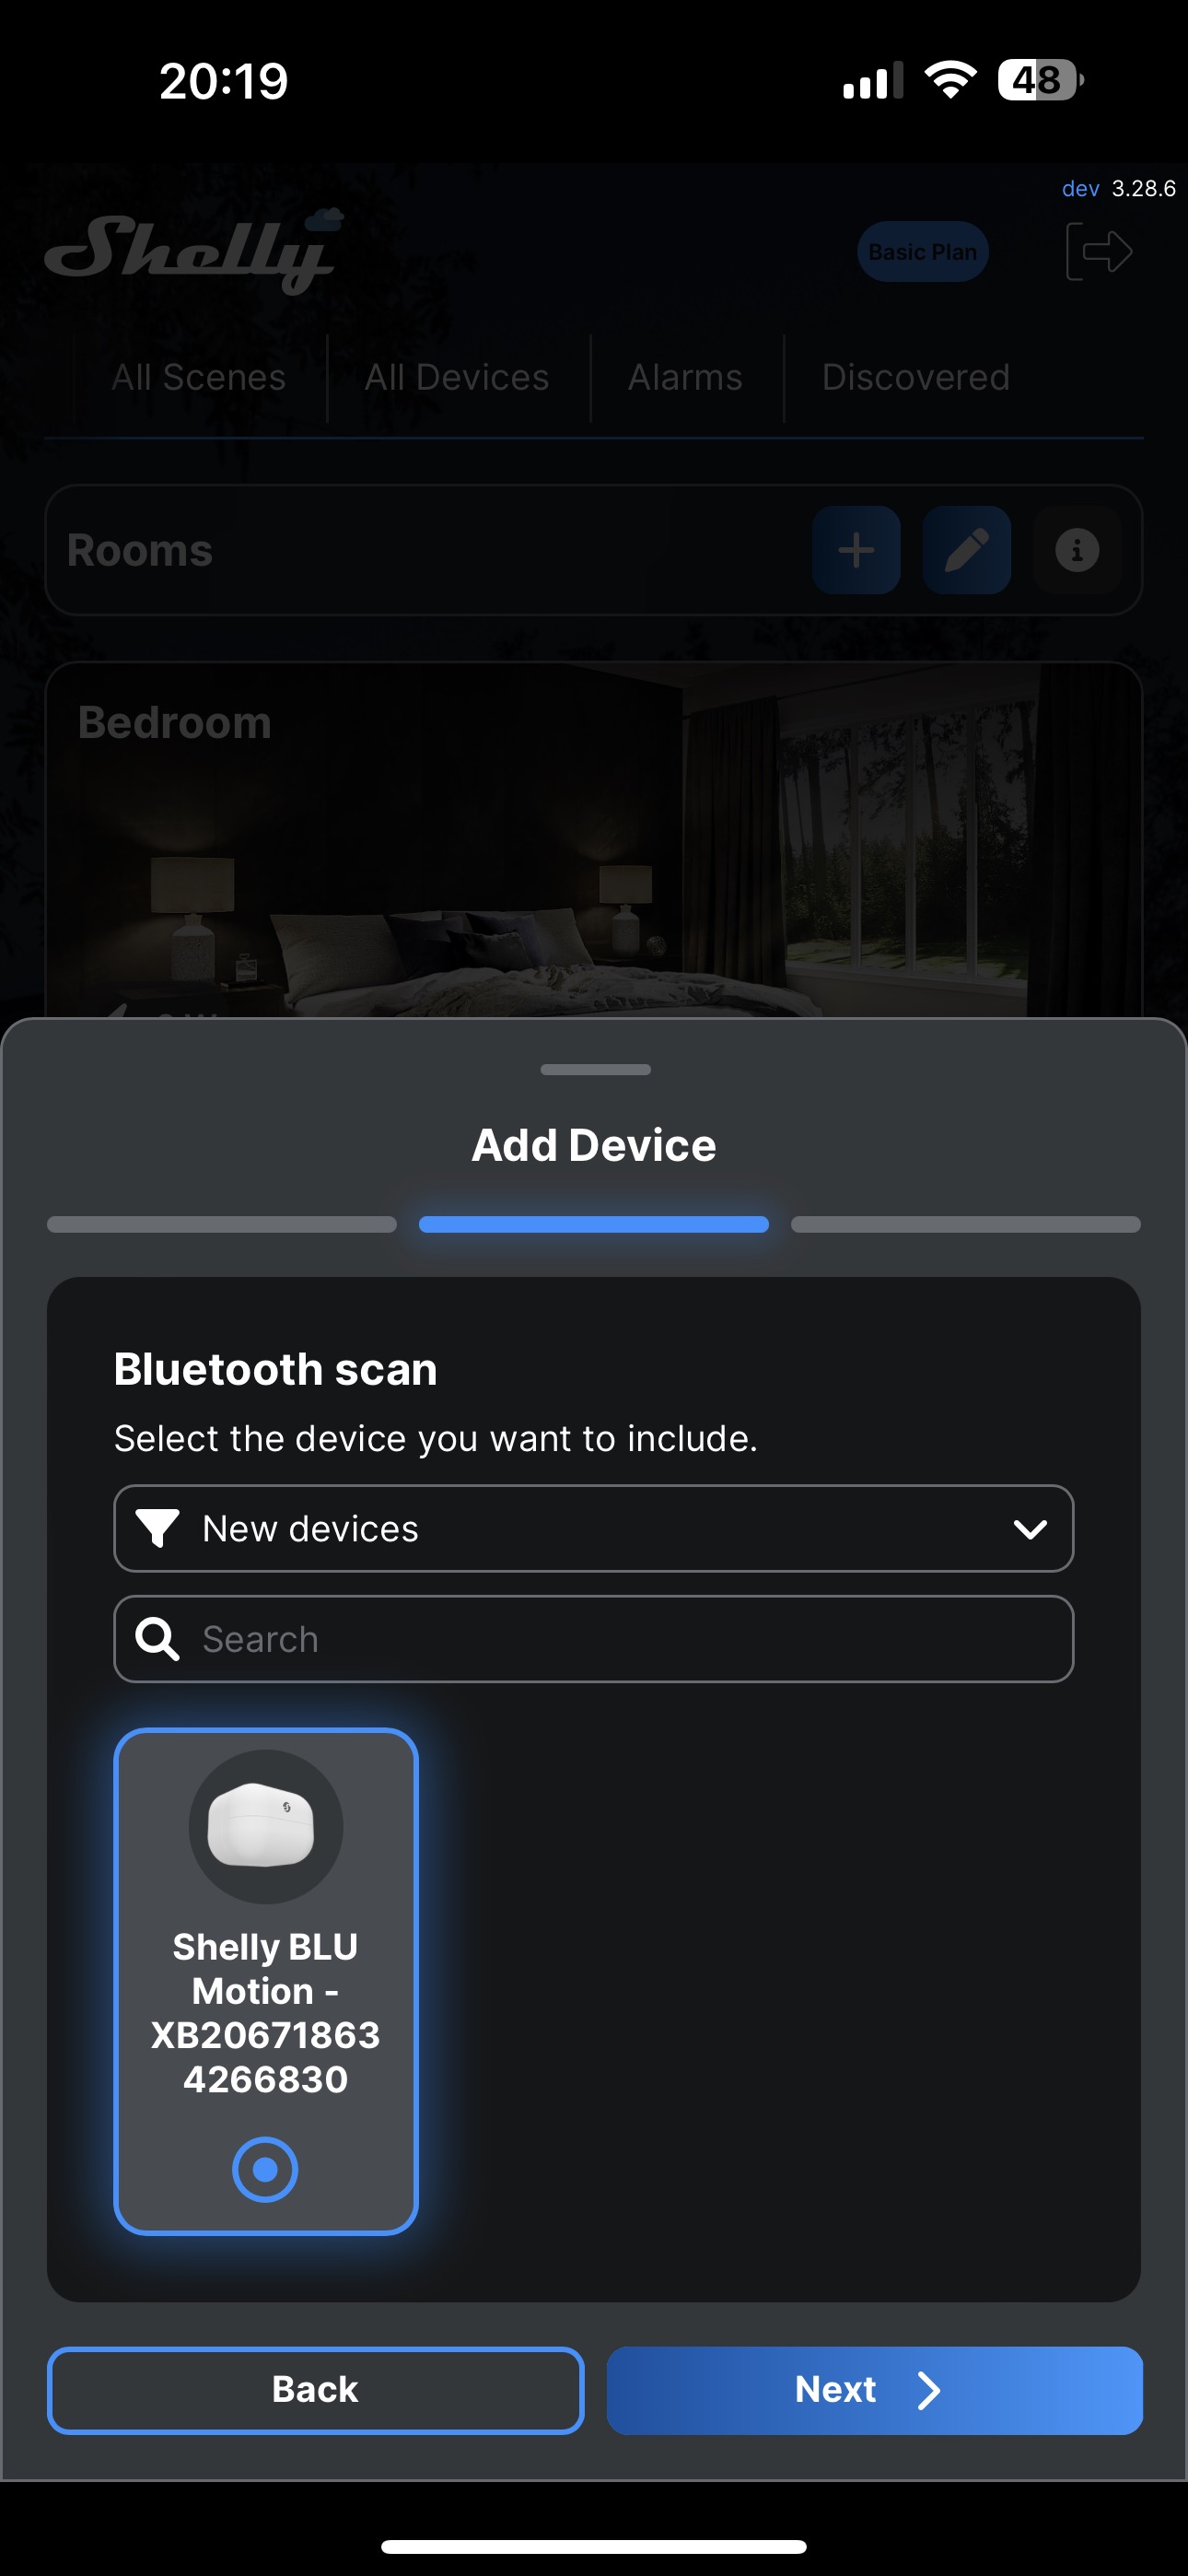
Step 5: Click on the device you’d like to include once it has appeared in the list of devices.
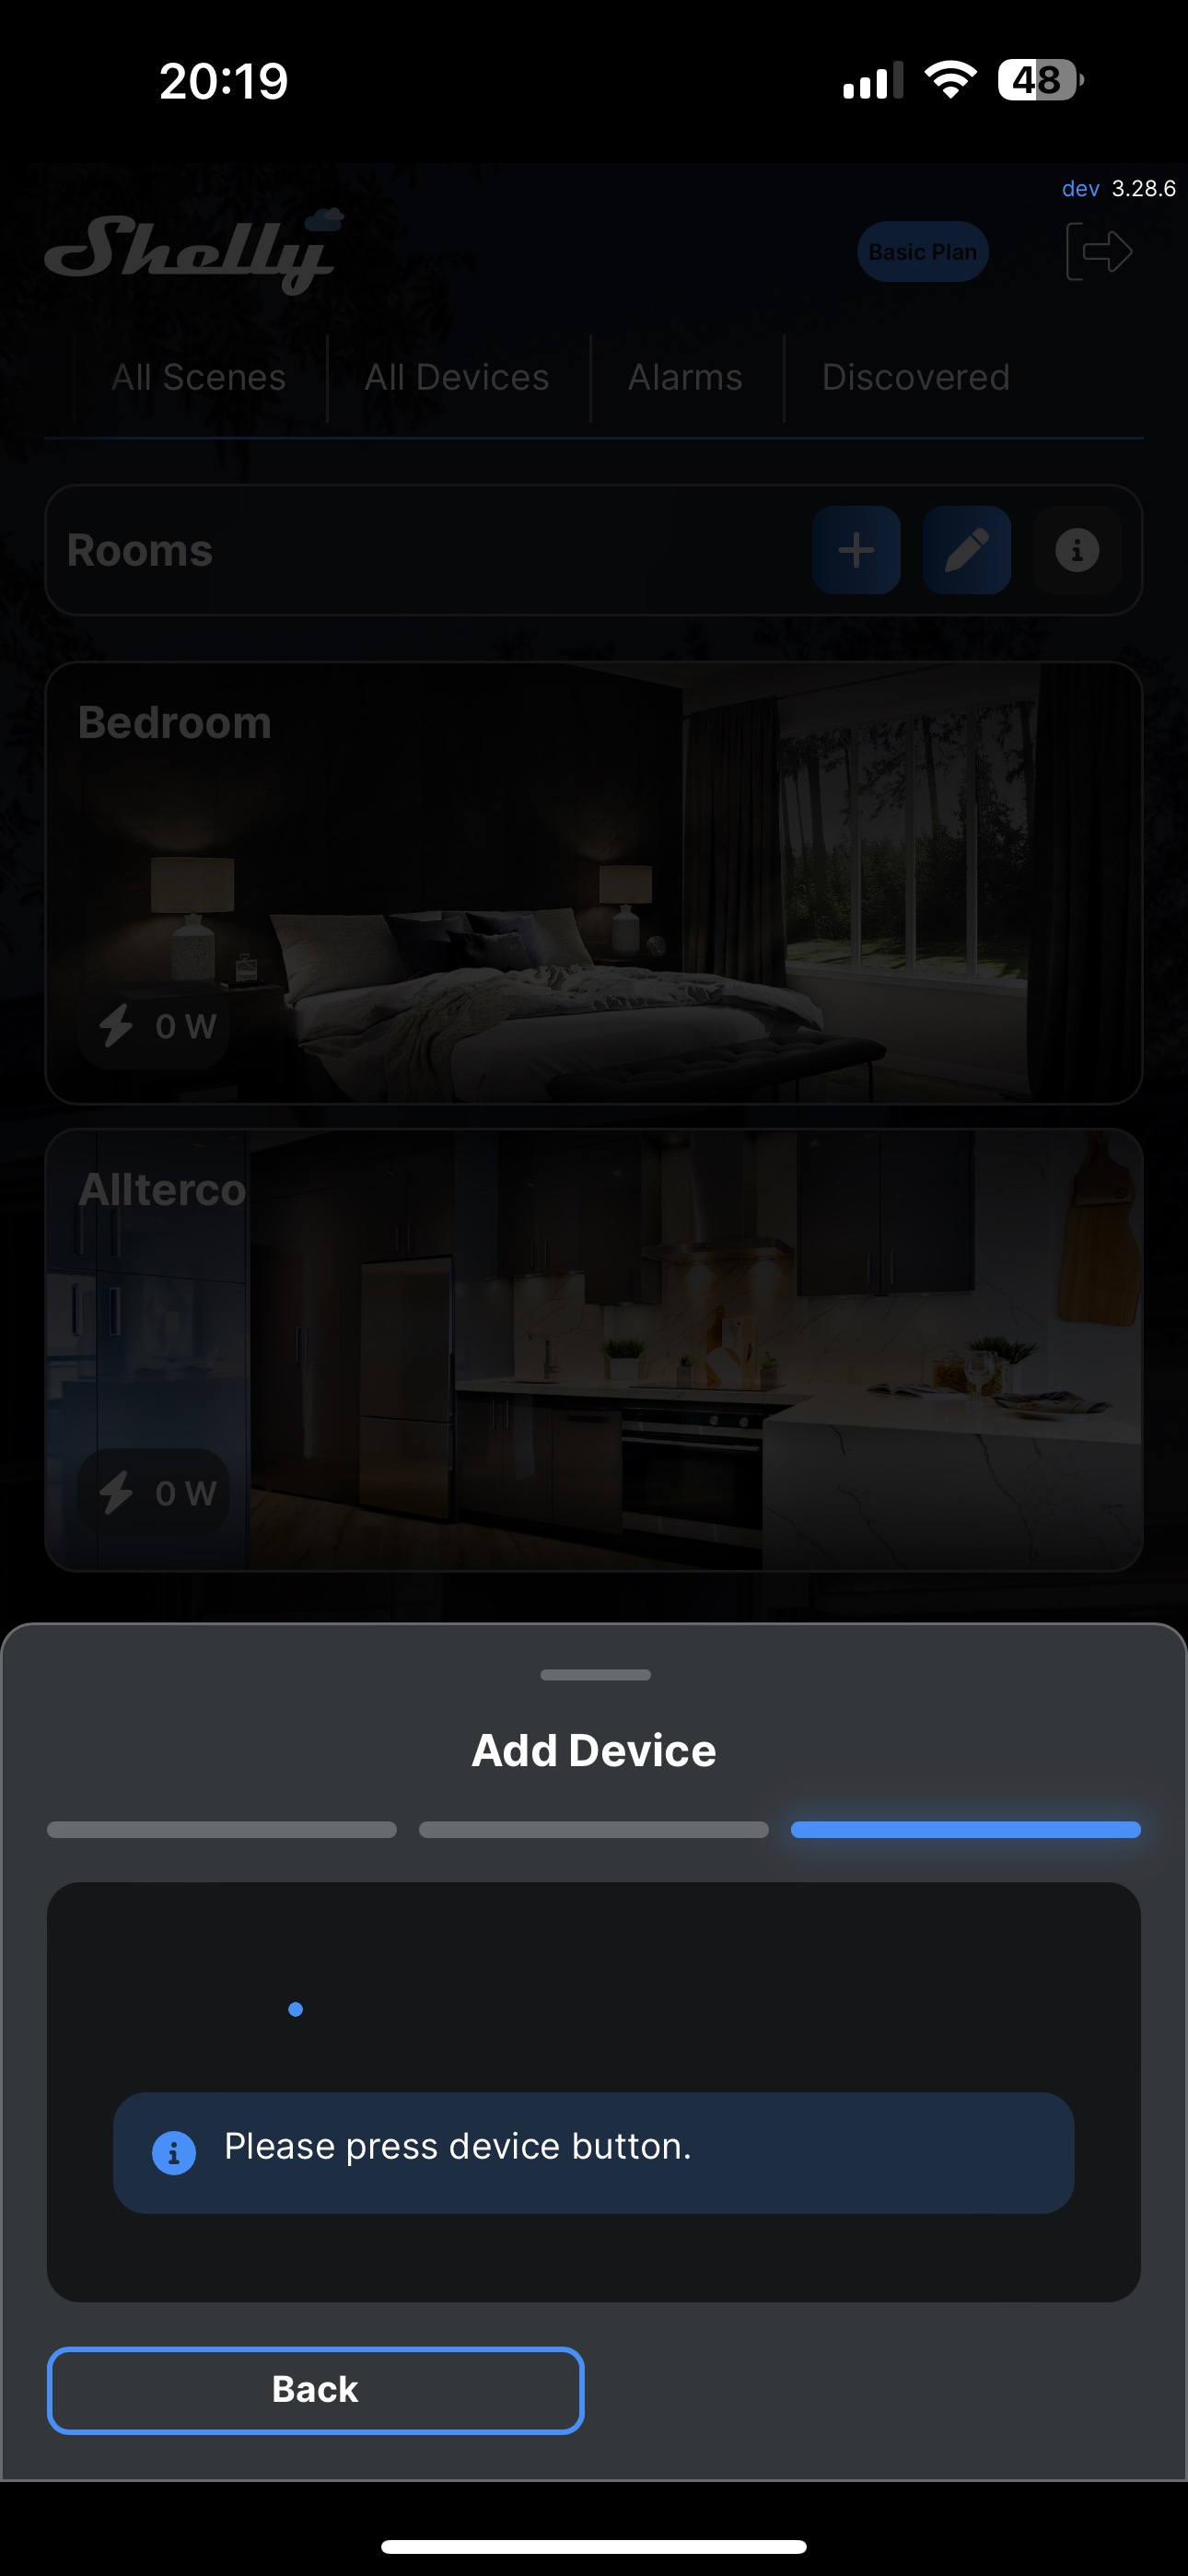
Step 6: You will be prompted to press the device button.
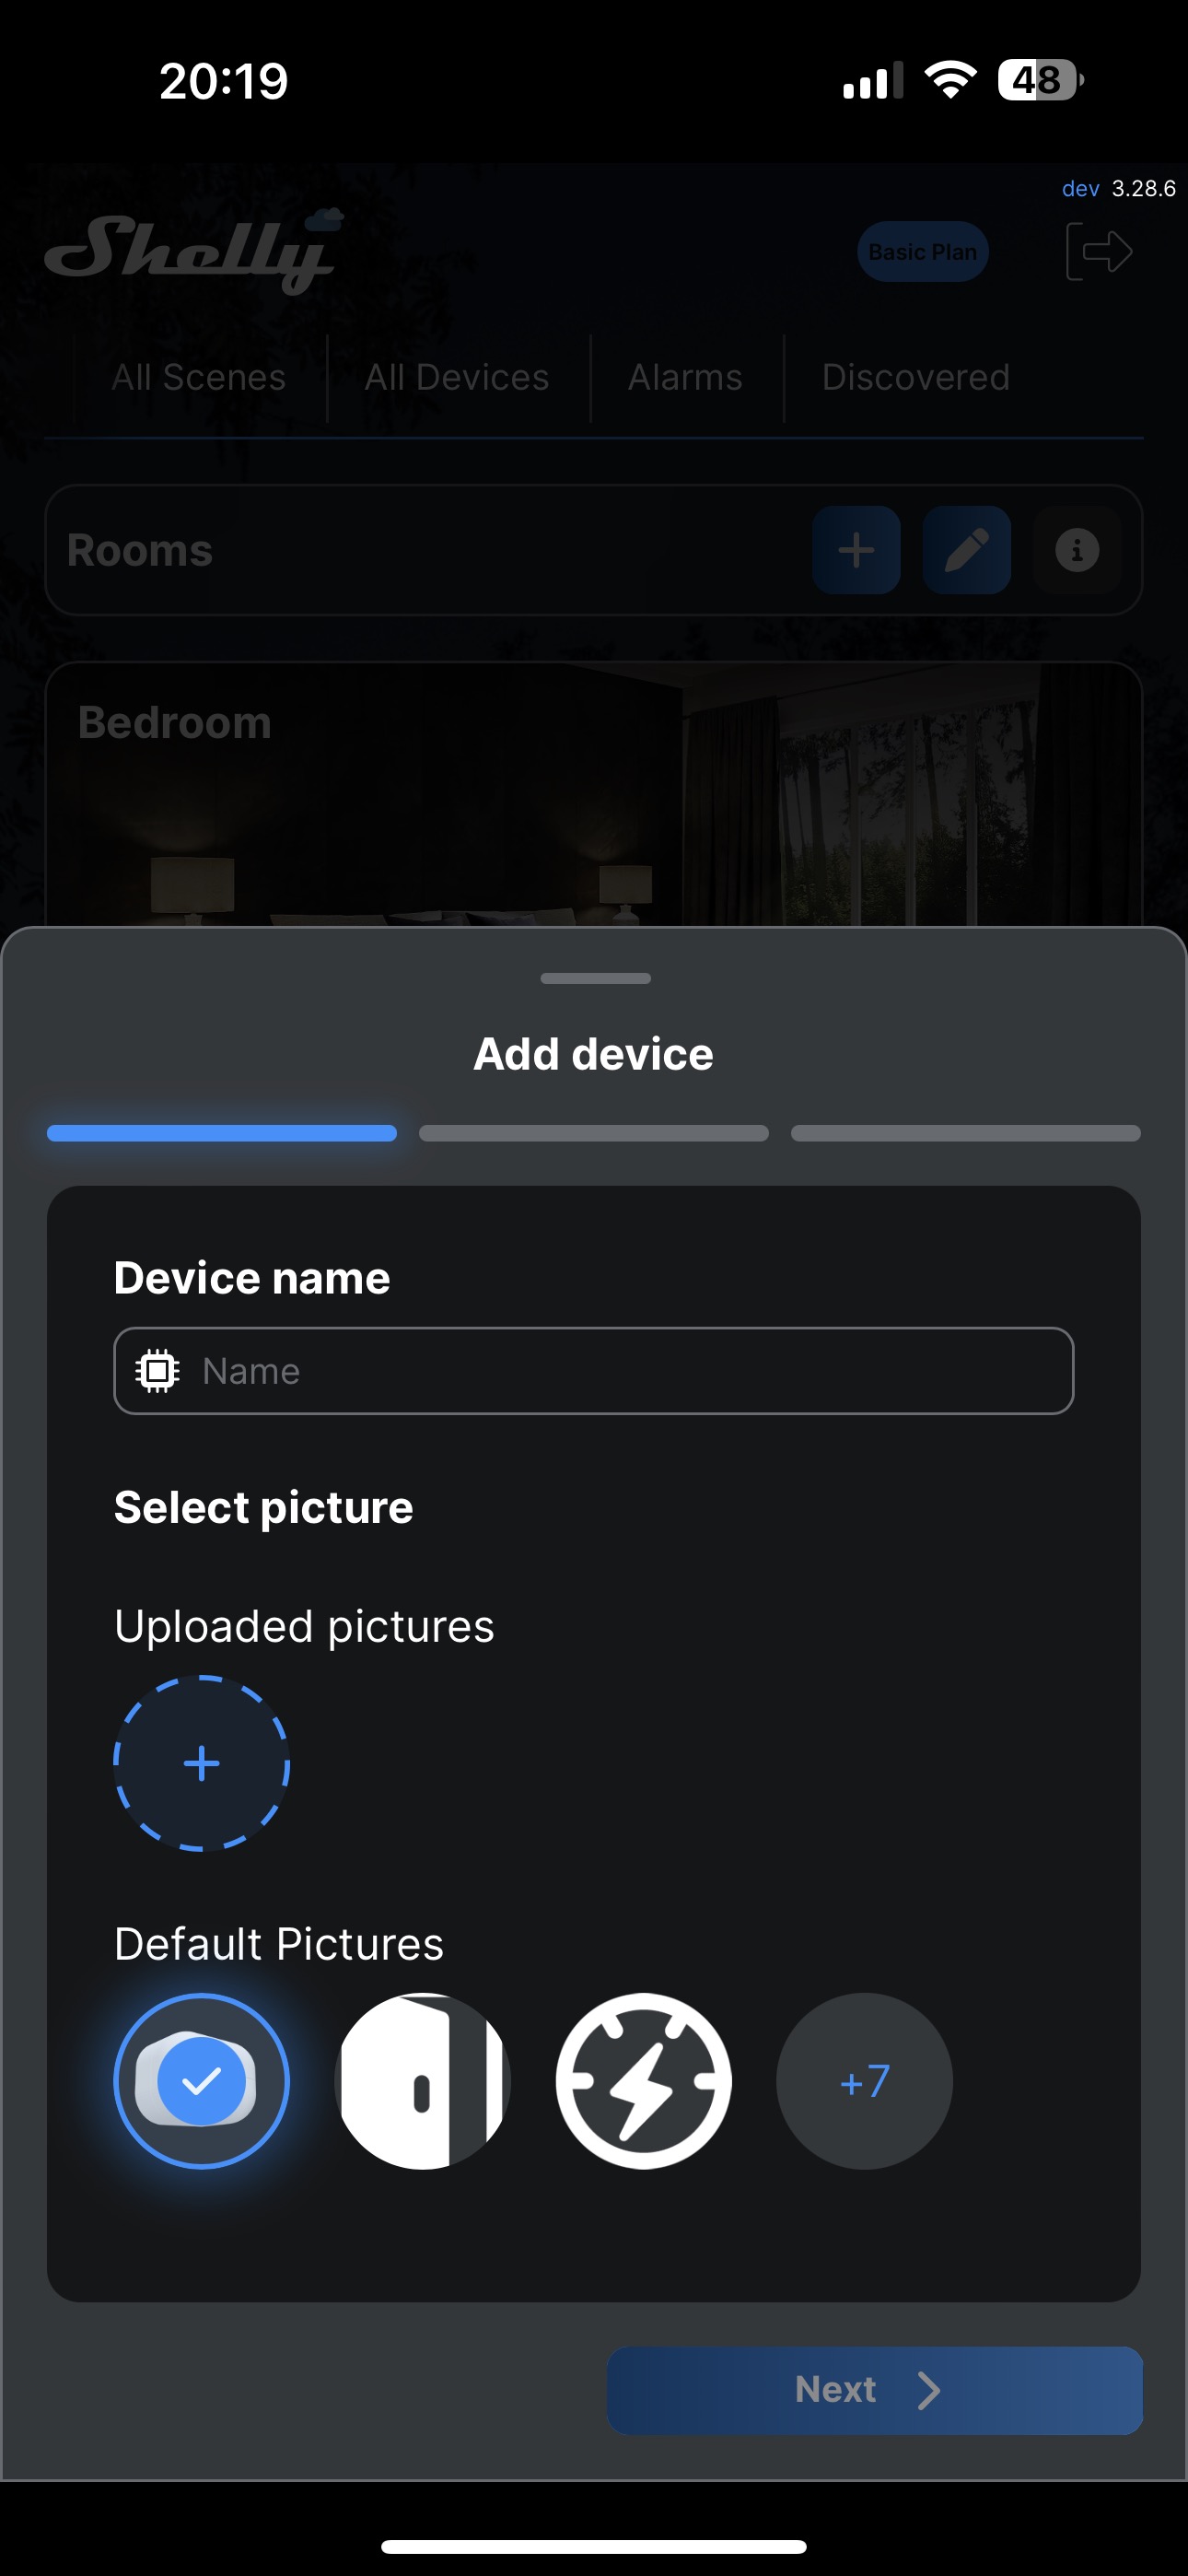
Step 7: Name your device and choose a photo.
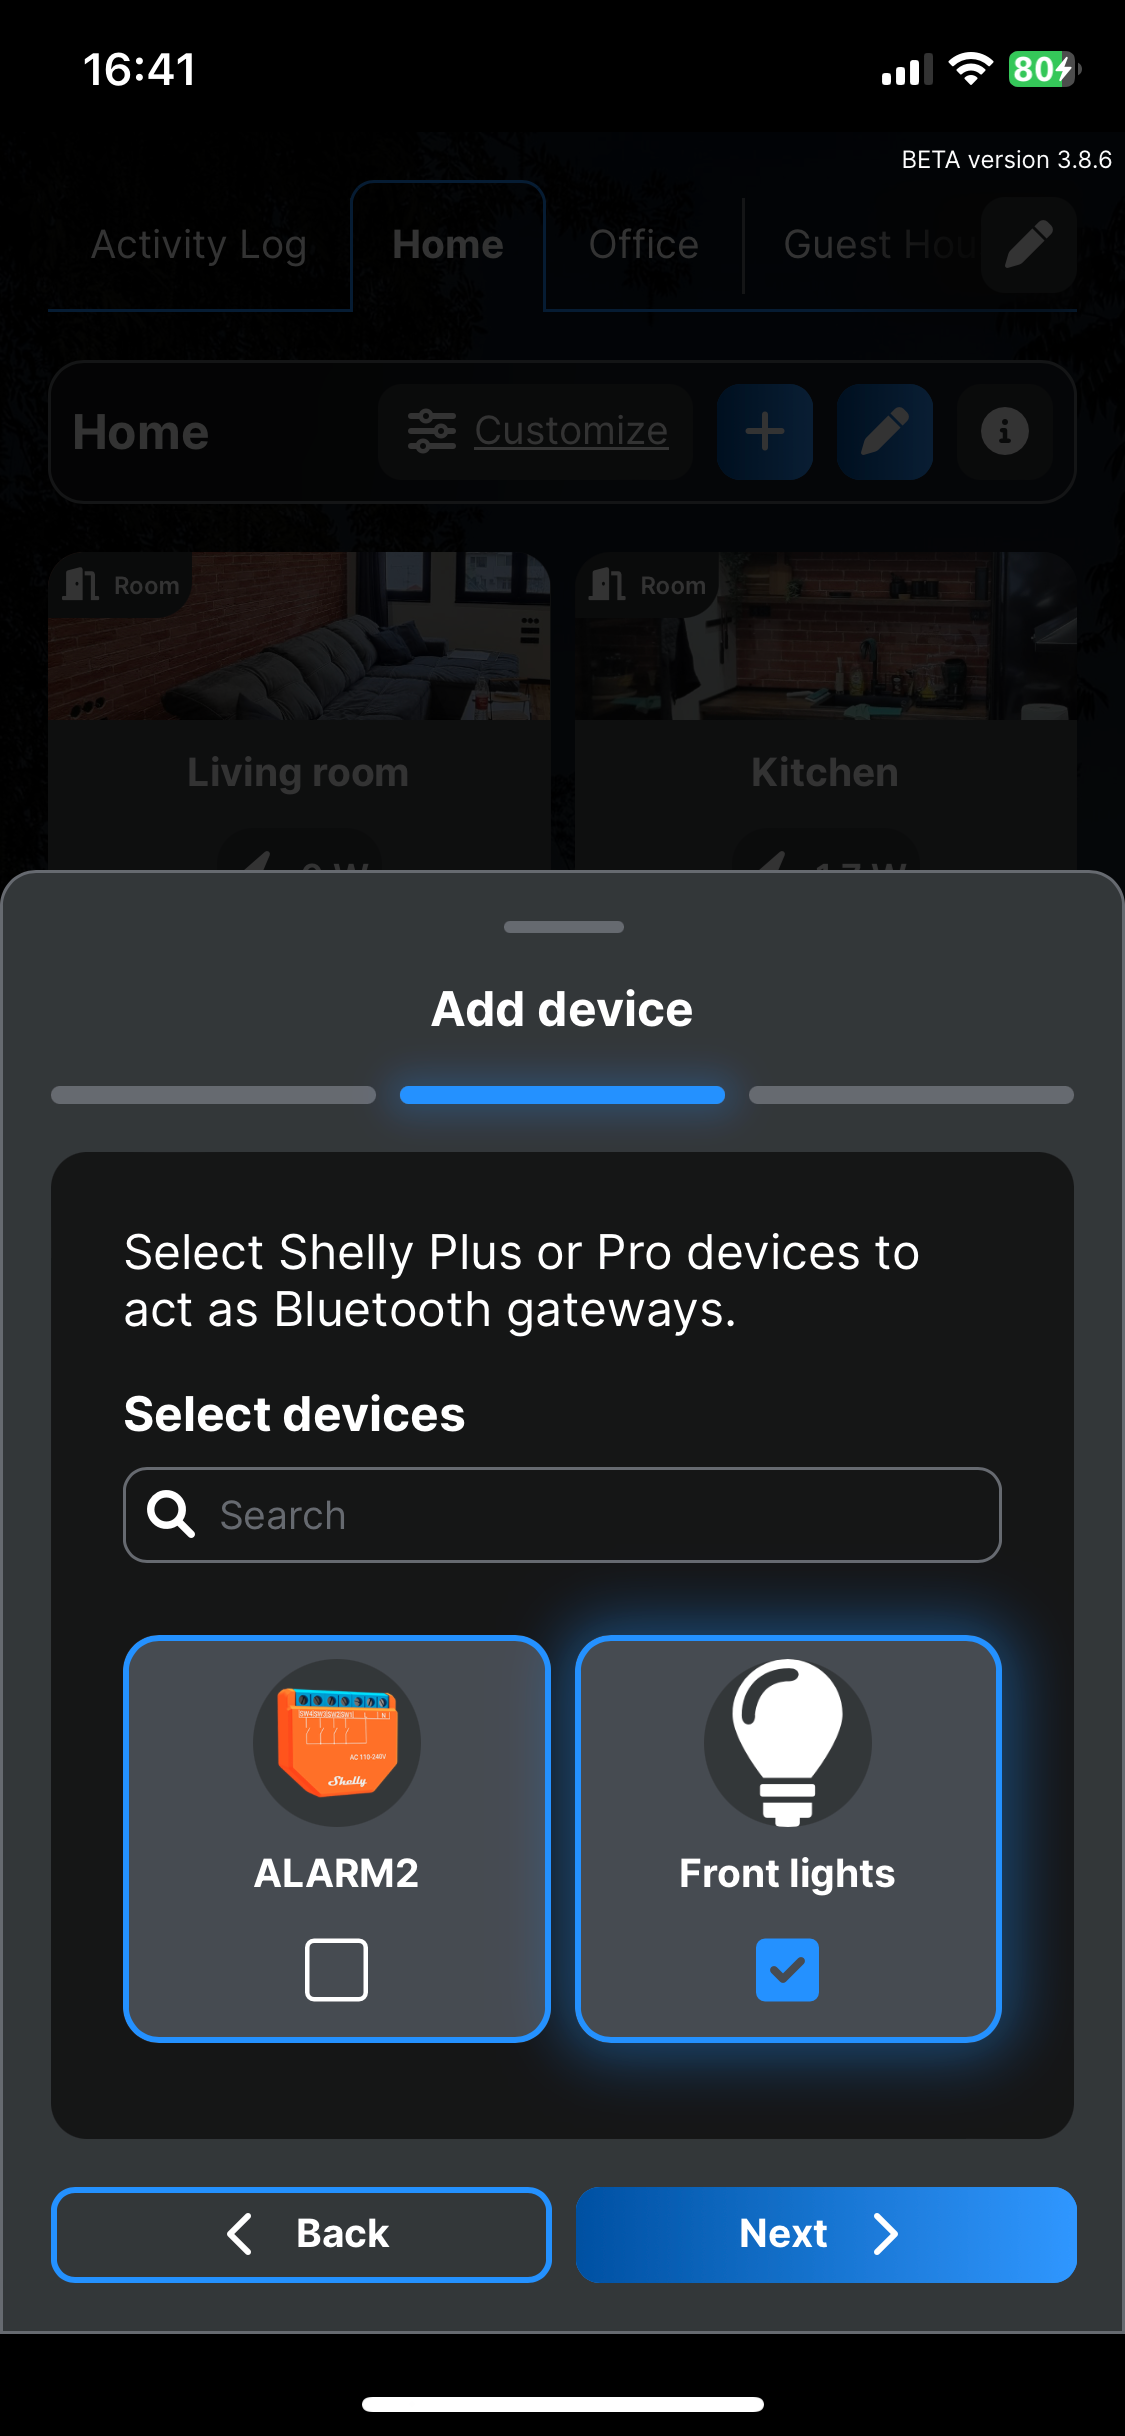
Step 8: Select Plus or Pro devices to act as BLE gateways. A list of all your compatible devices will show up. They will pick up the signal from the sensor when you use it and act as a gateway between Shelly BLU Motion and Shelly Smart Control. If you don’t see some of your Plus or Pro devices here, you might have to manually enable the Bluetooth gateway. To do this, go to each Plus or Pro device in the app, click the 🌐 icon, then select Bluetooth and mark the Enable Bluetooth and Enable Bluetooth gateway boxes. We recommend having at least one BLE gateway in every room.
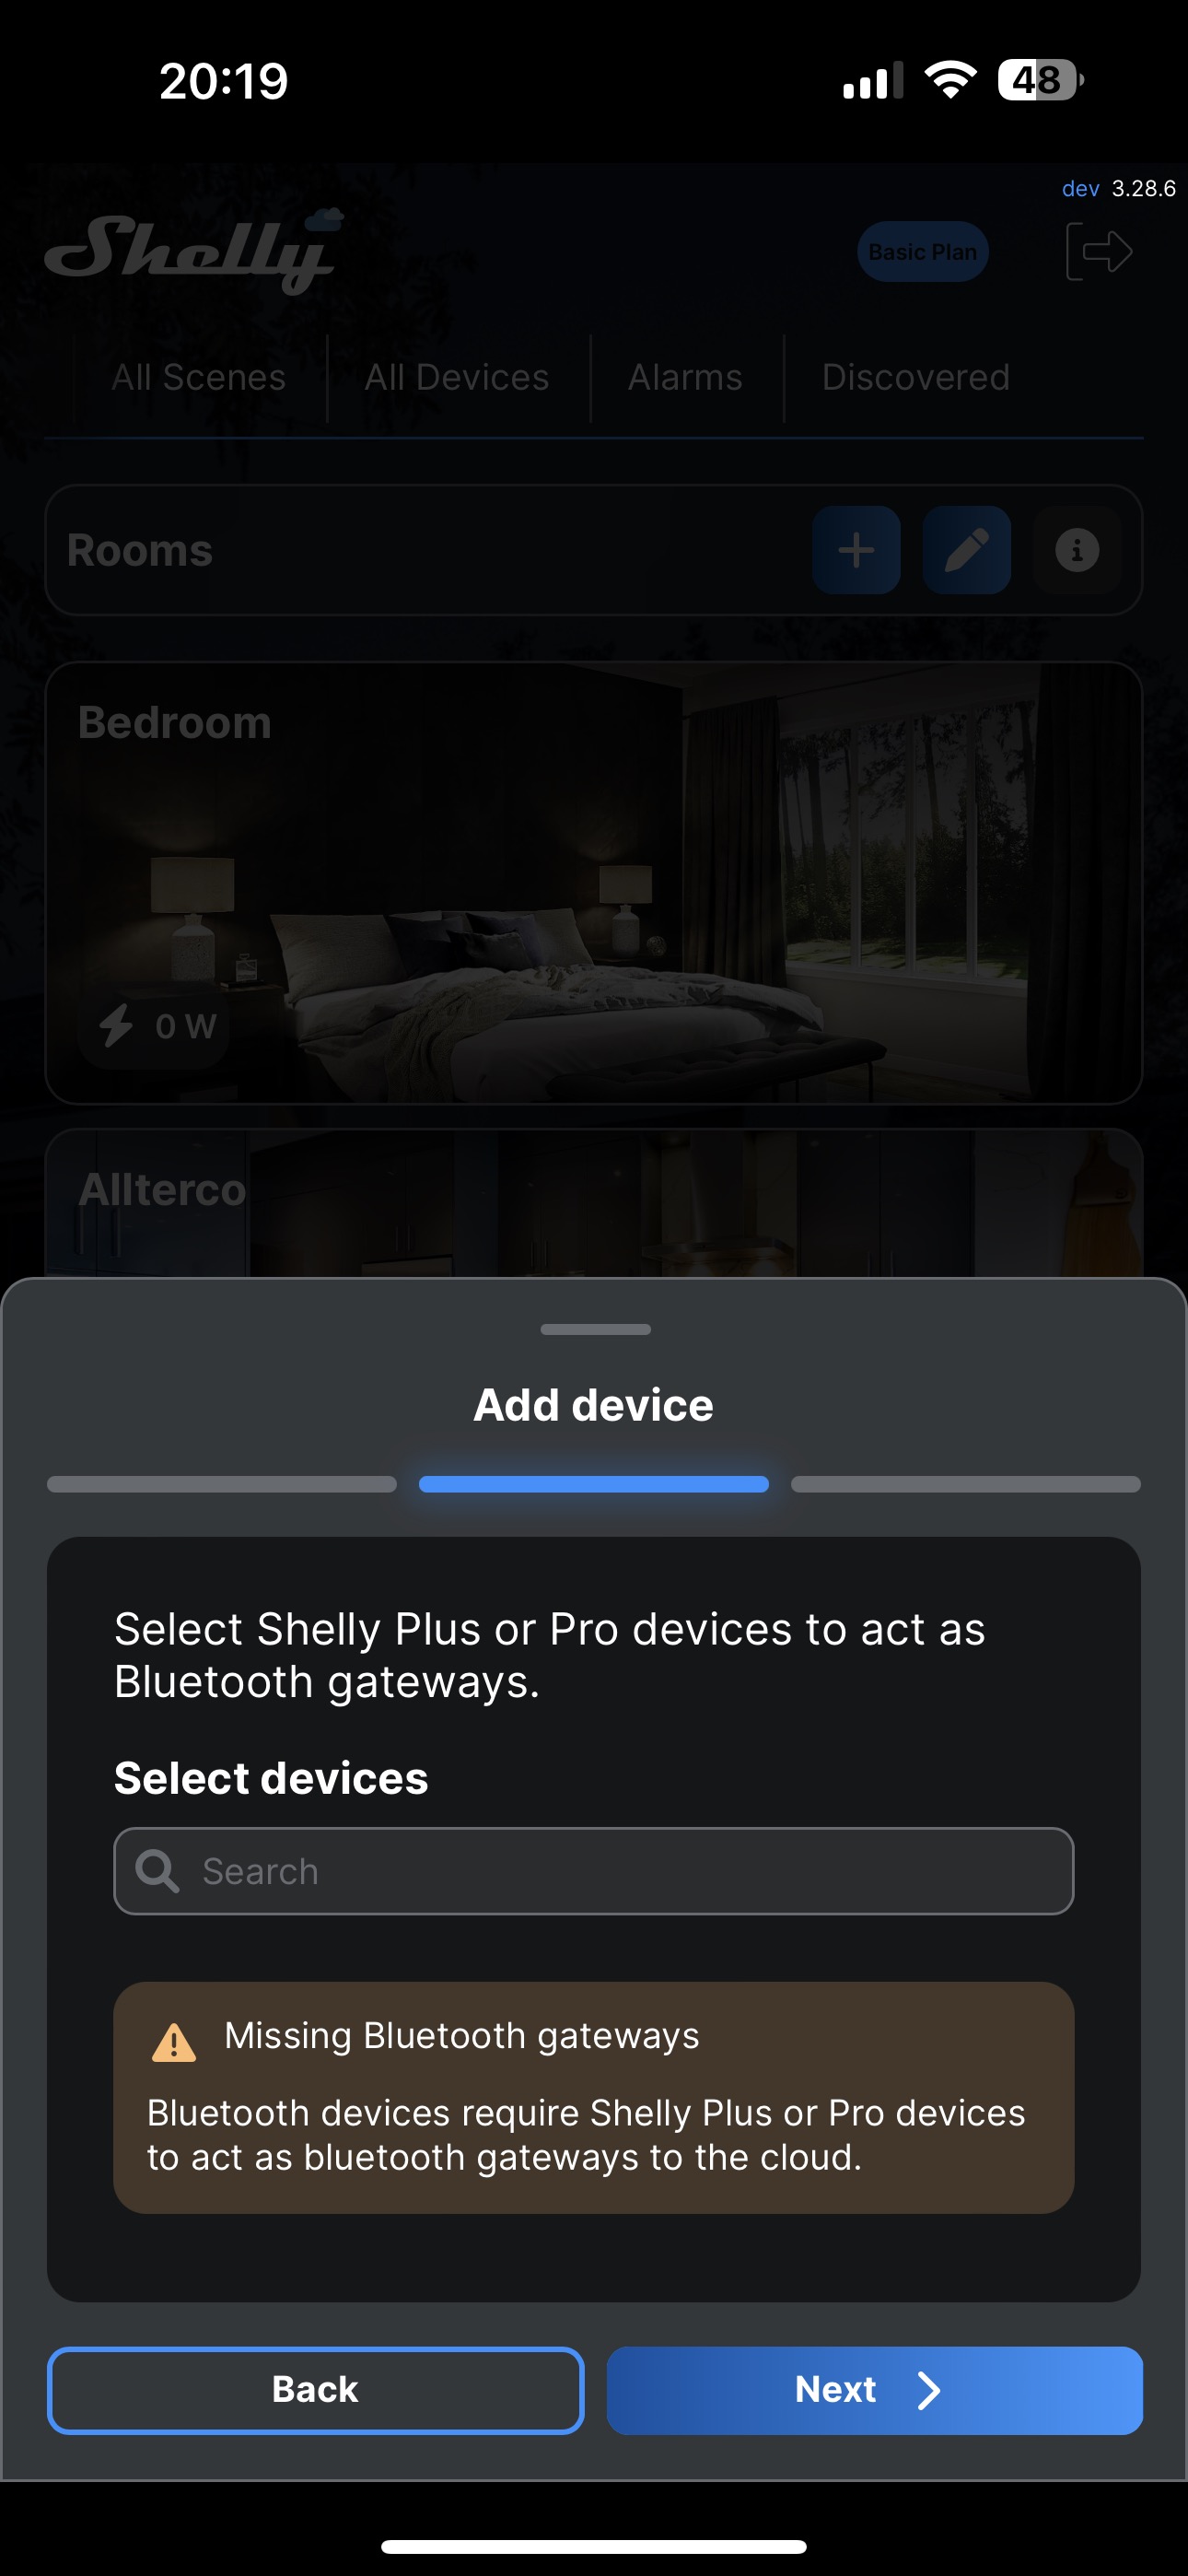
A message like this will appear if no Plus or Pro devices were detected.
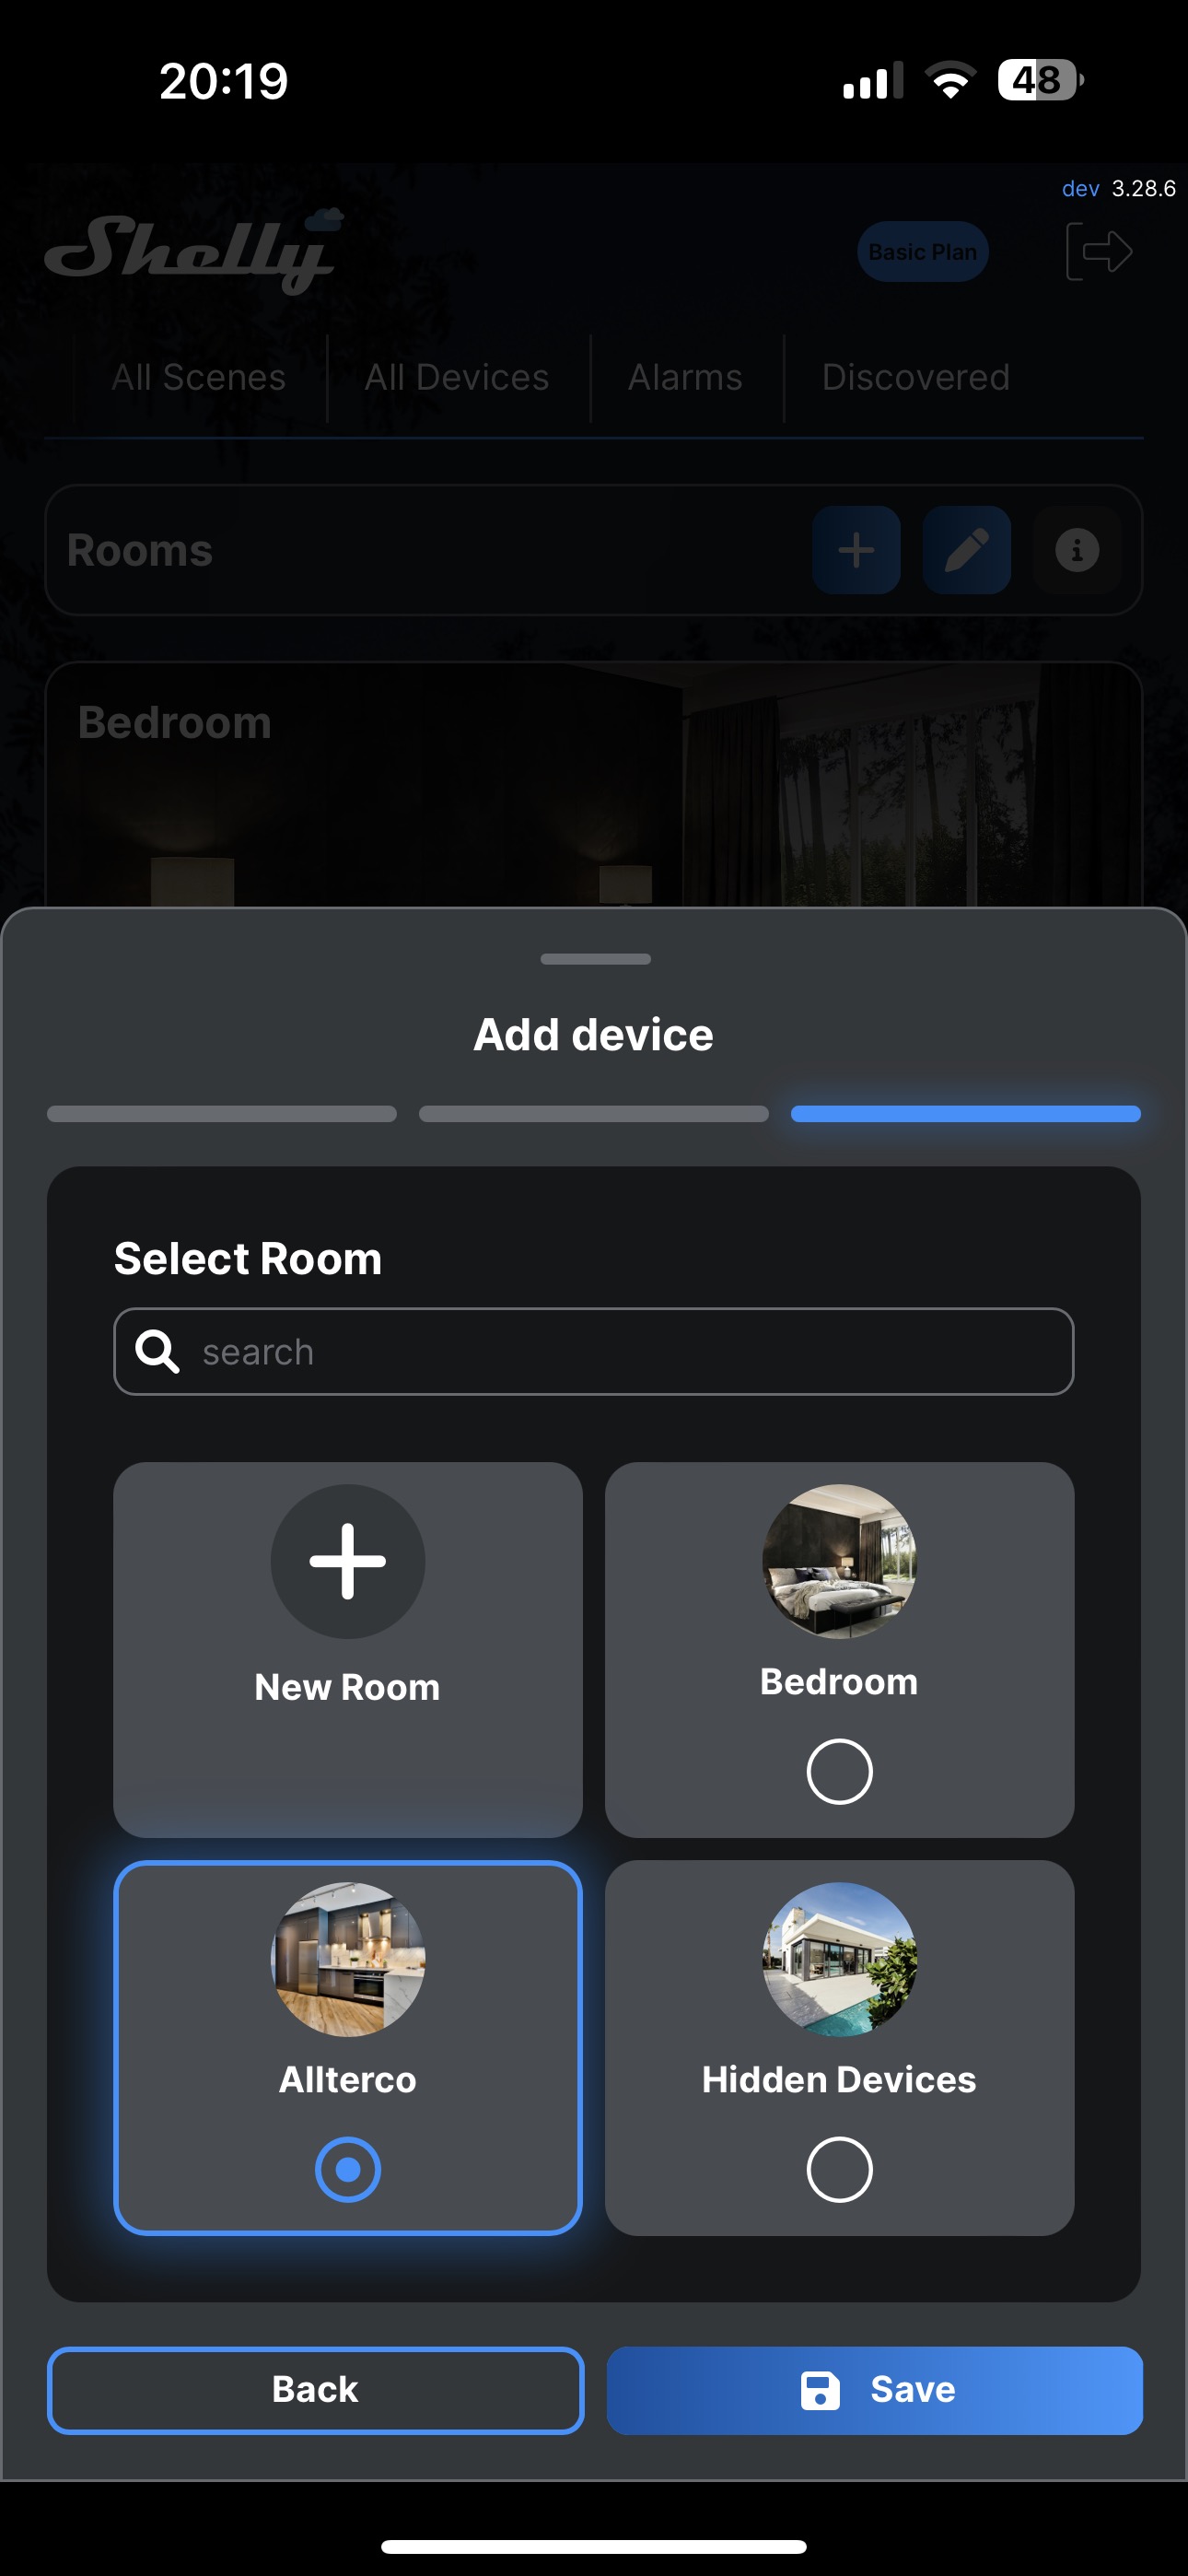
Step 9: Include the sensor in an existing room, or create a new one, then save the changes. Your device is now successfully added to the app and can be found in its designated room.
