Connect Shelly H&T sensor to Home Assistant
Overview
These guidelines will help you add a Shelly device Shelly H&T sensor to Home Assistant. Please keep in mind that the process of connecting Shelly to Home Assistant is very similar and for other type of devices, but the steps slightly differs, that’s why on this article the focus is on Shelly H&T device only.
Follow these instructions to ensure your device is connected properly.
Prerequisites
Home Assistance instance
A Shelly H&T Gen3
Ensure your Shelly device has the latest firmware installed.
4хAAA batteries for the device if there are no already batteries inserted
Step-by-Step Instructions
1. Batteries installation
First you need to open the Shelly H&T sensor and insert the batteries
2. Device setup - connecting to WiFi, Firmware update and settings configuring
Go to the laptop WiFi, select the Shelly H&T WiFi and connect to it
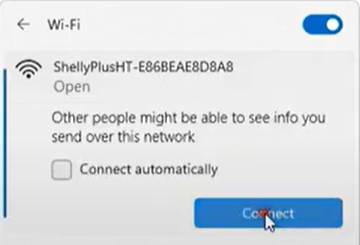
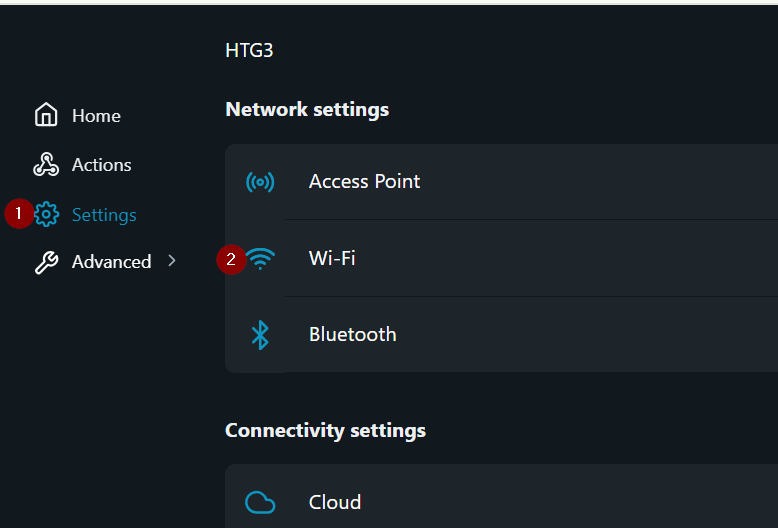
Go to device default IP 192.168.33.1 and then go to Settings and then Wi-Fi
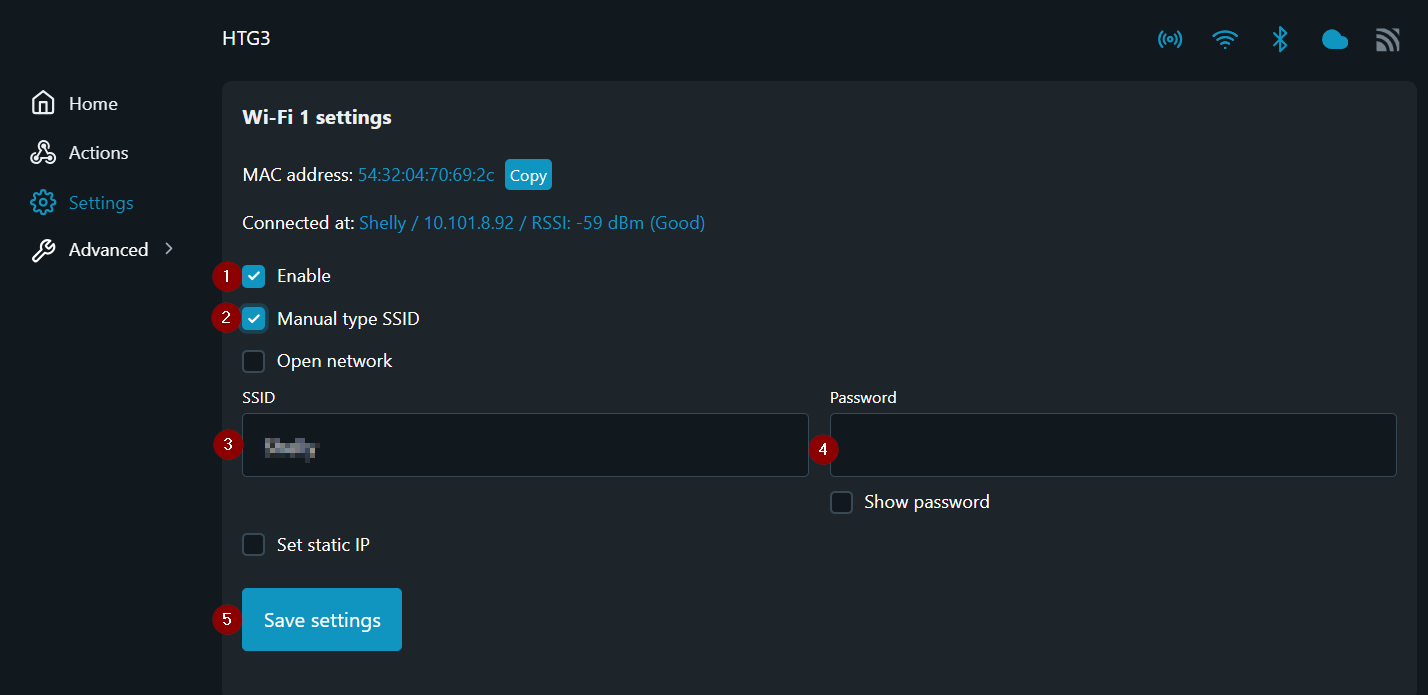
Then Enable Wi-Fi network and tick Manual type SSID, enter your network SSID and Password and Save the settings.
If you know your device IP you can skip this informational step, else from Settings go to Wi-Fi section. There you can see your IP
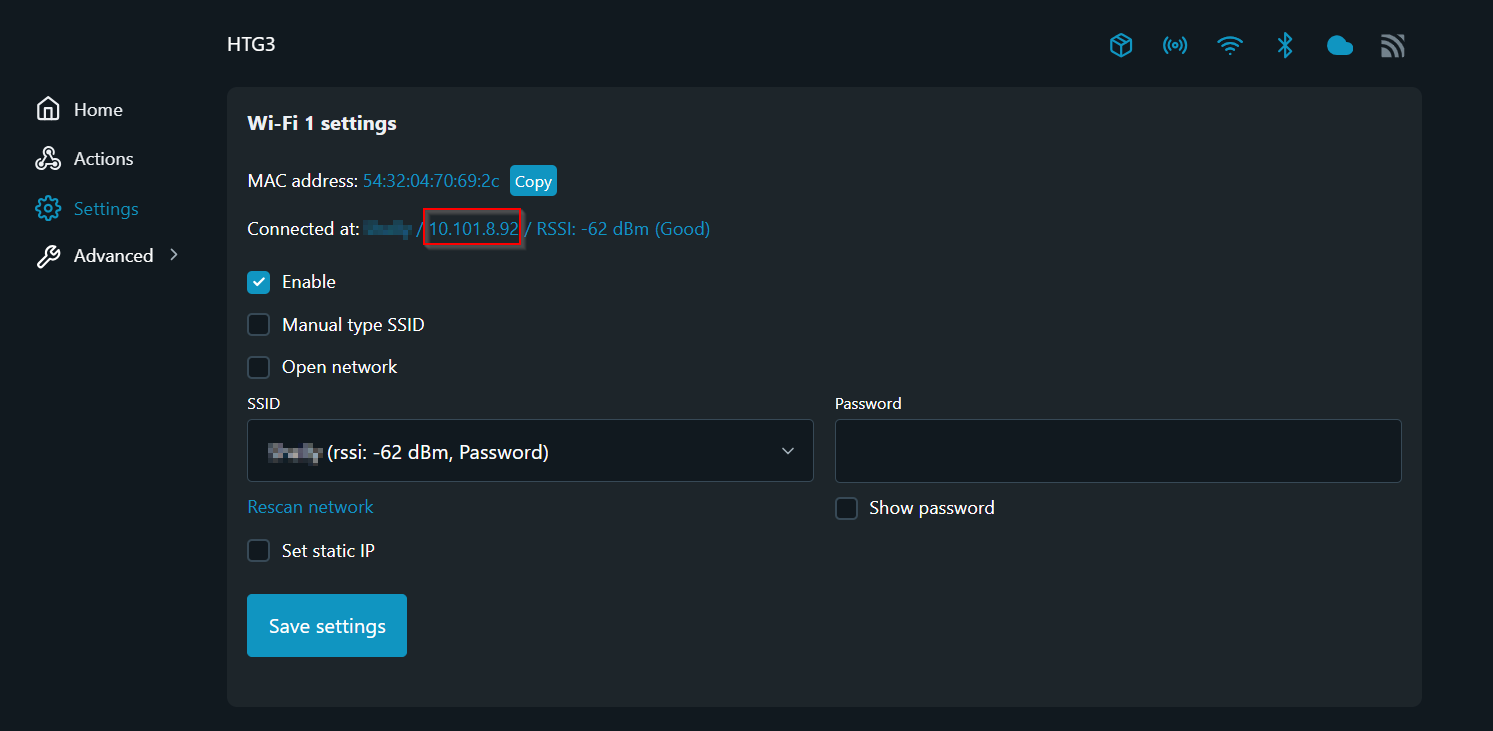
Note - if the device is already connected to a network you need to enter device IP address in order to access its settings. In addition the device case needs to be opened and you need to press the button so device can be accessed. This access will be for limited time - with 60 seconds idle time, after that you need to press the button again to access the web interface.
Make sure the device is updated to latest stable firmware version
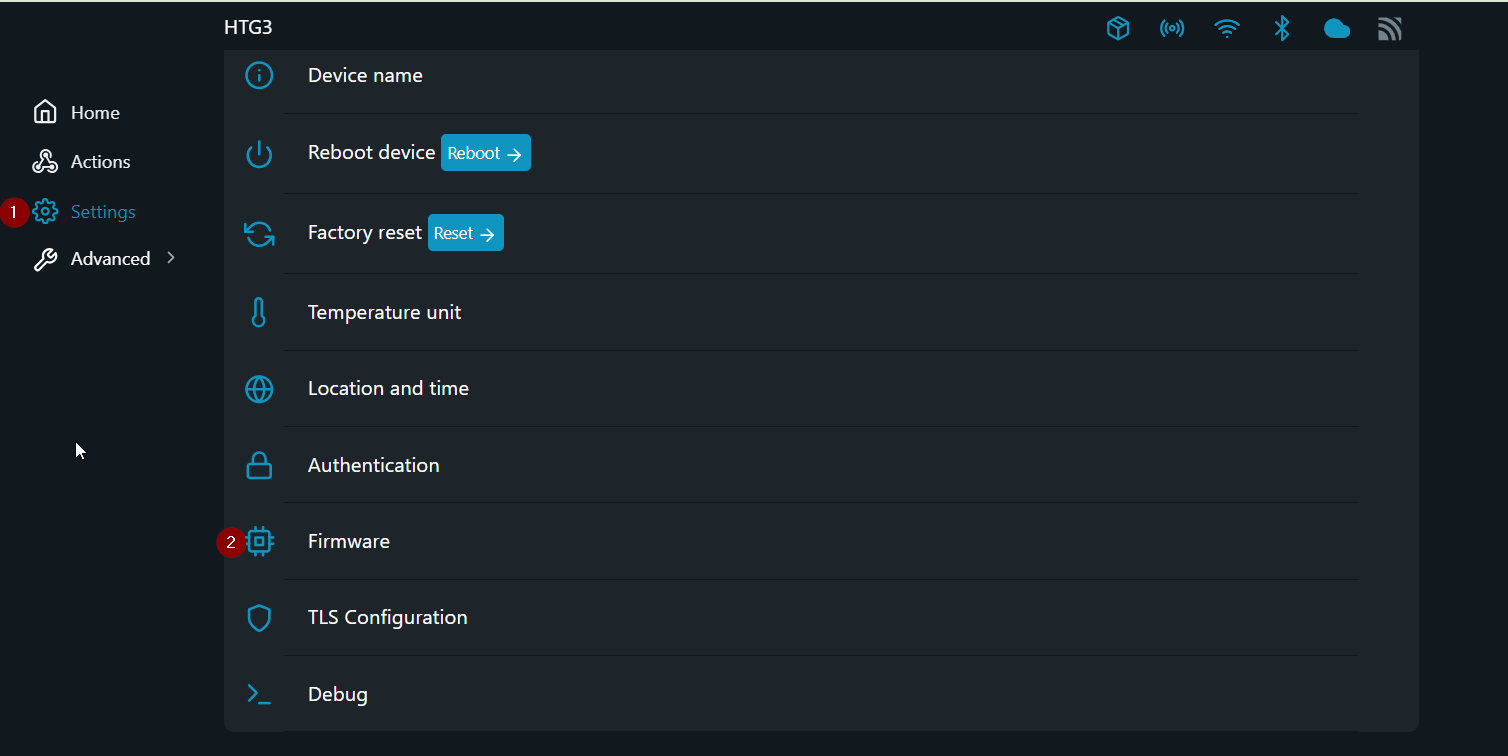
Go to Settings - Firmware
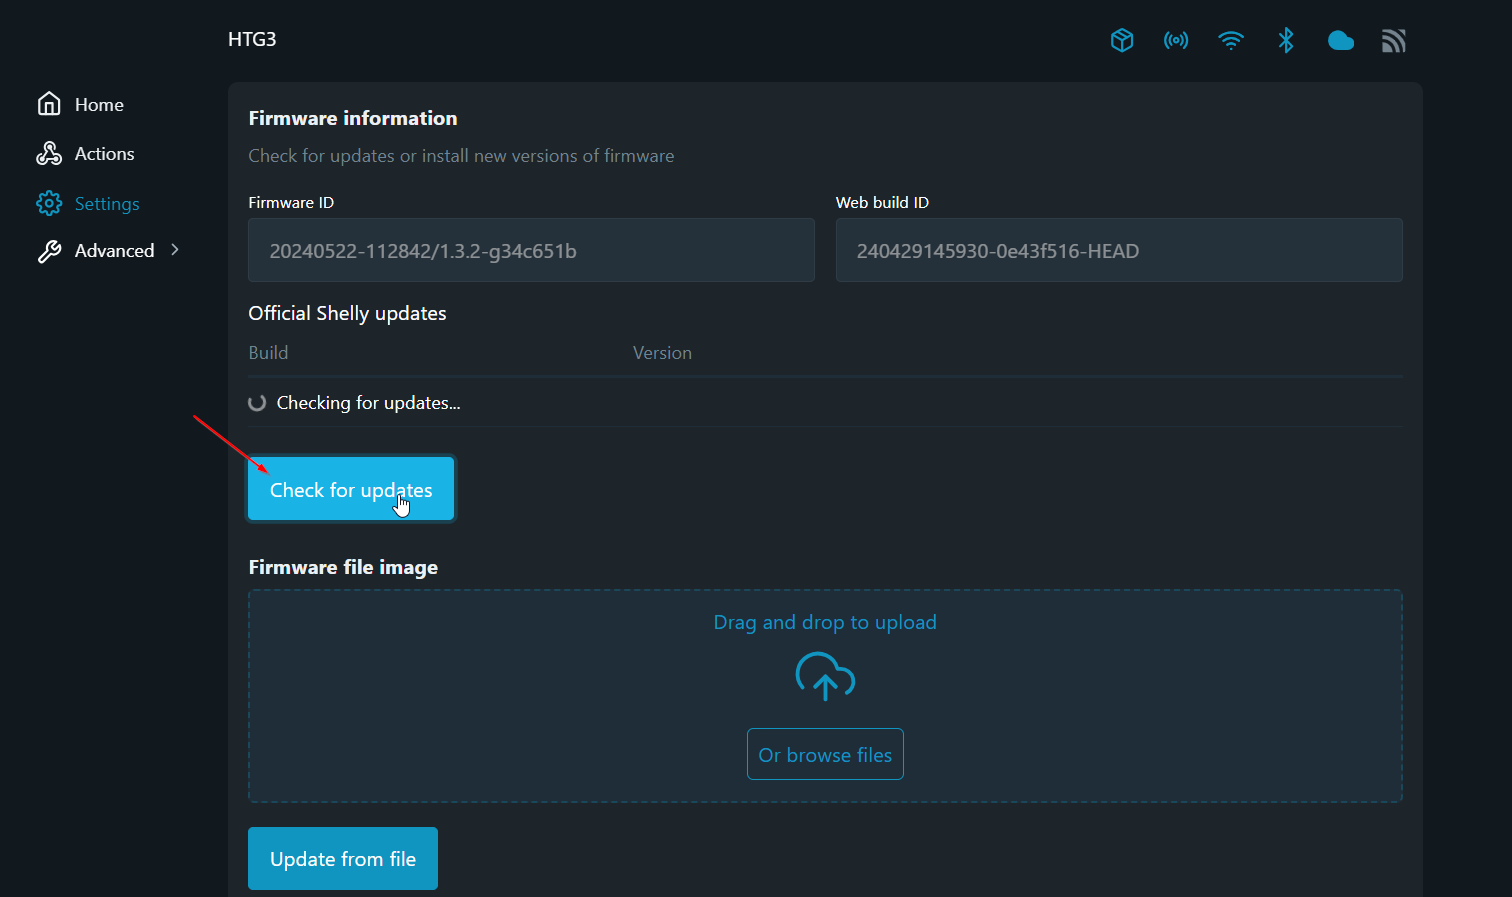
Check for updates
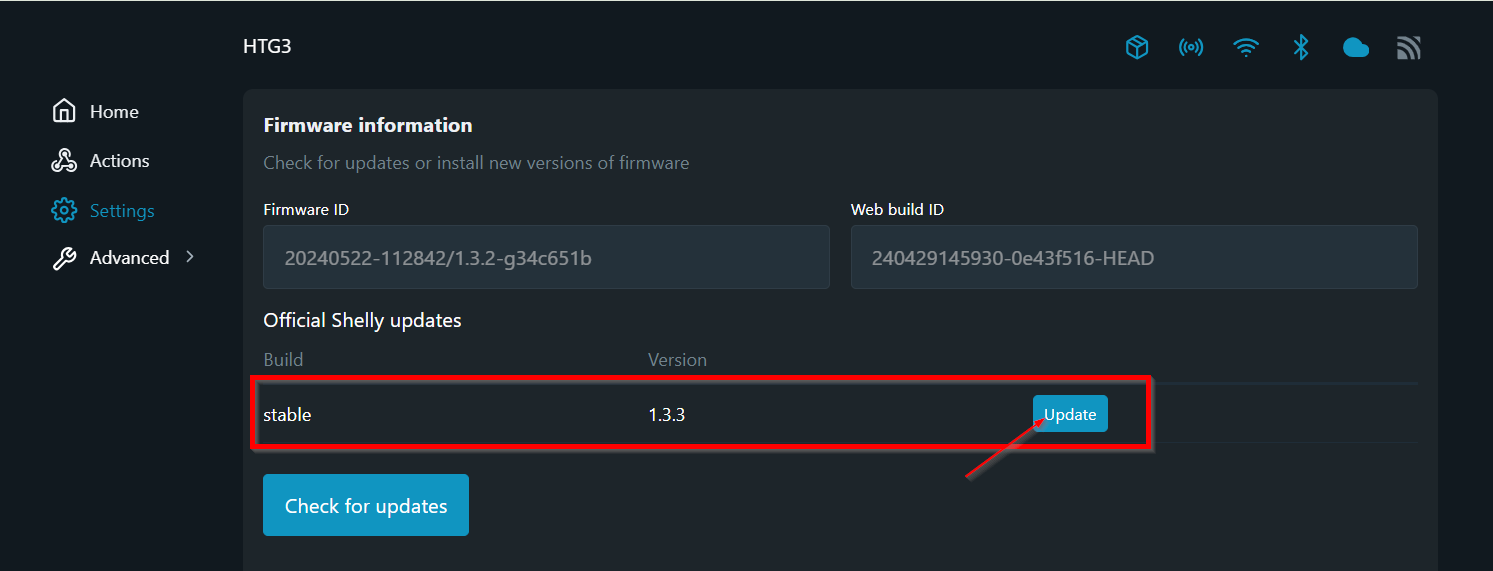
Update the device if required
Next go to Settings and Outbound websocket
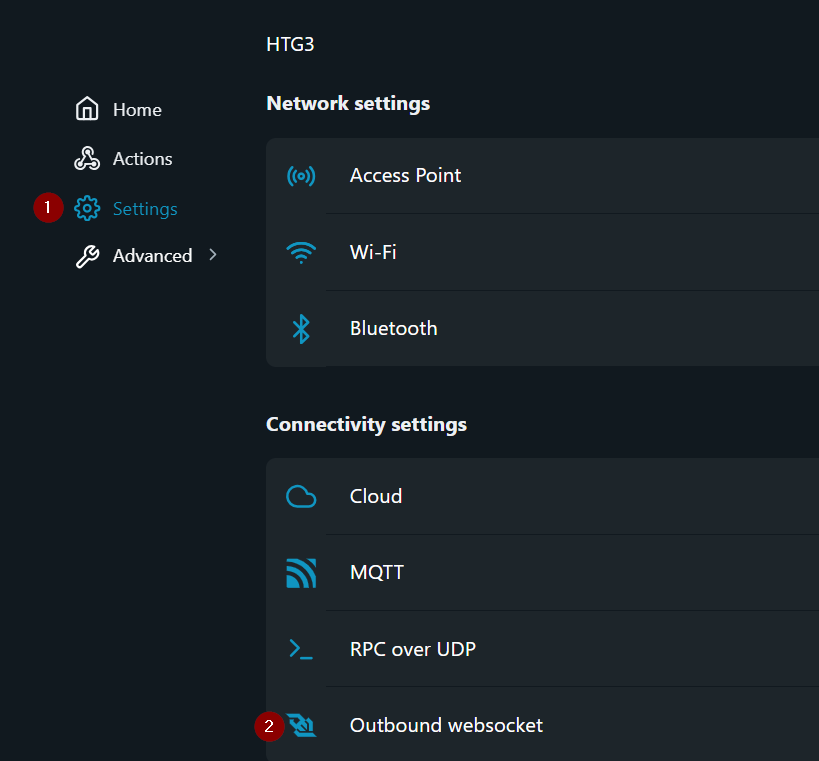
In the Outbound websocket settings click to Enable and enter the Server details (the URL in the 2nd screenshot below is example)


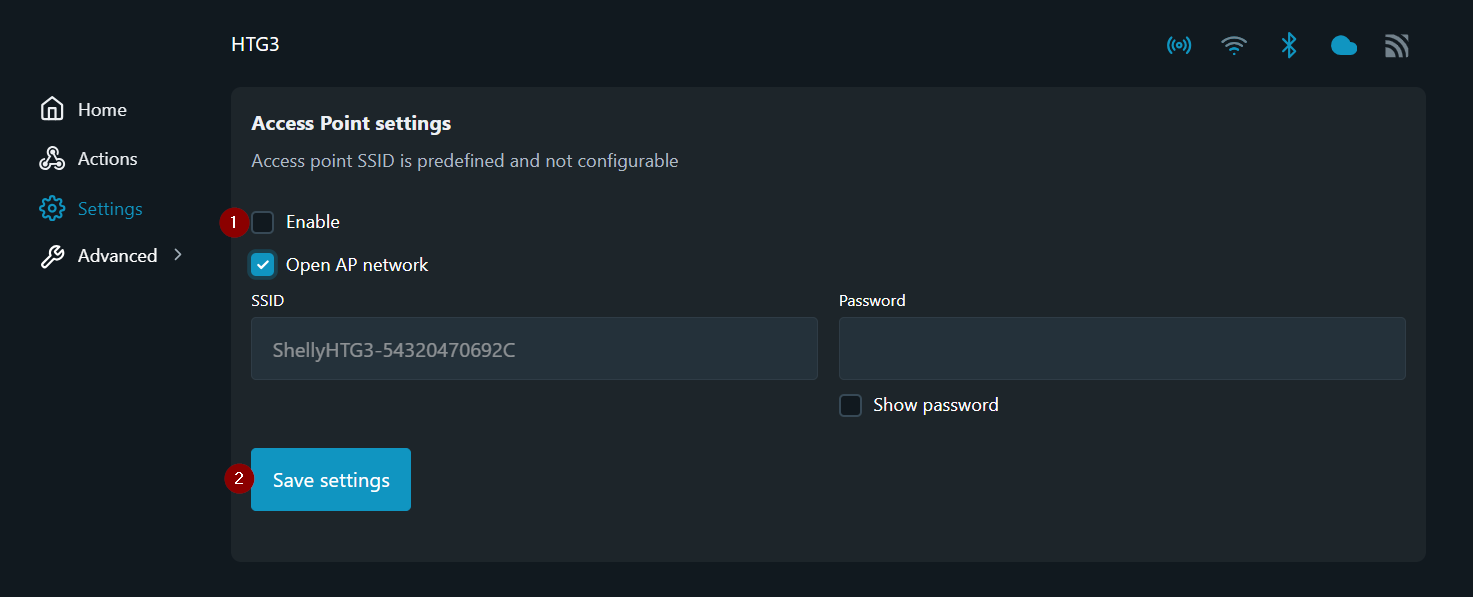
Next step is to disable Access Point - go to Settings and then Access Point
Disable the access point and Save
3. Home Assistance device inclusion
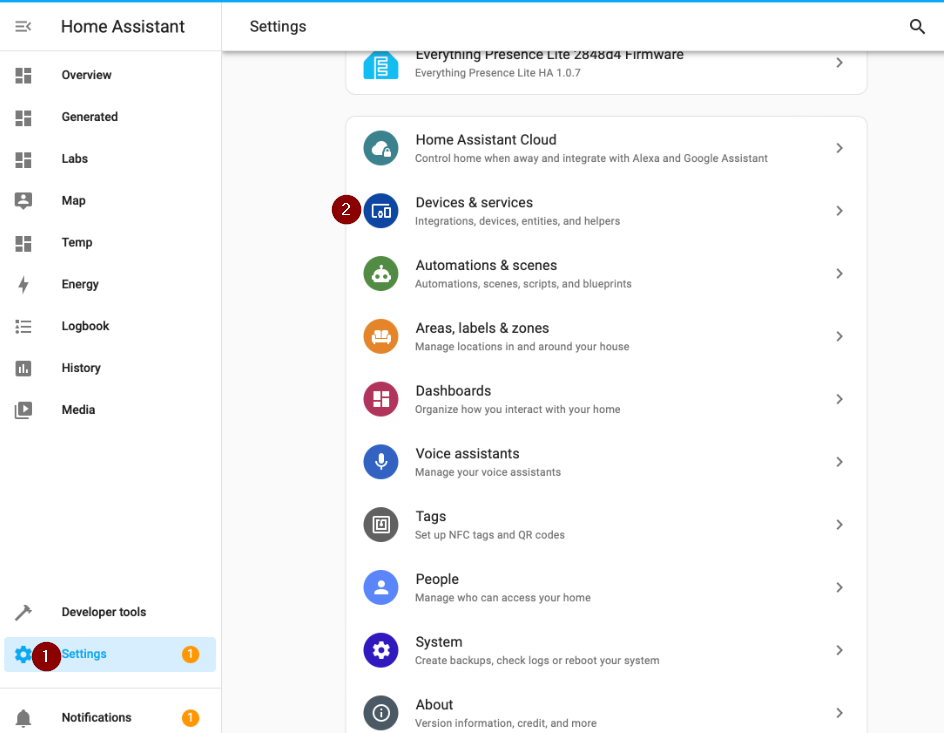
Go to your Home Assistant instance then Settings and Devices & Services
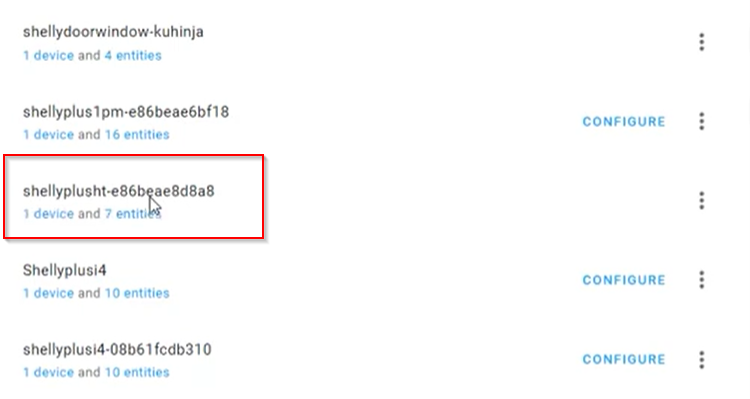
Find your Shelly Device
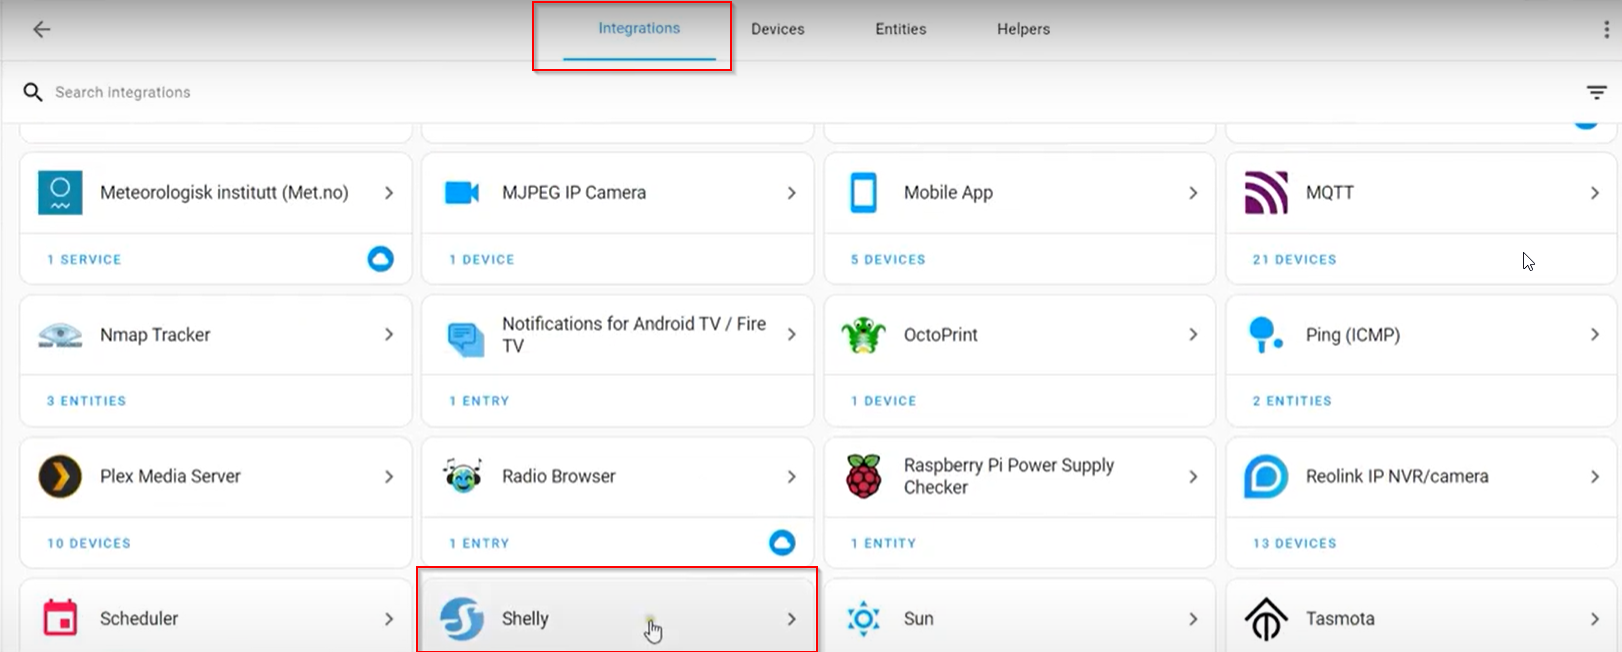
Add it to Home Assistant
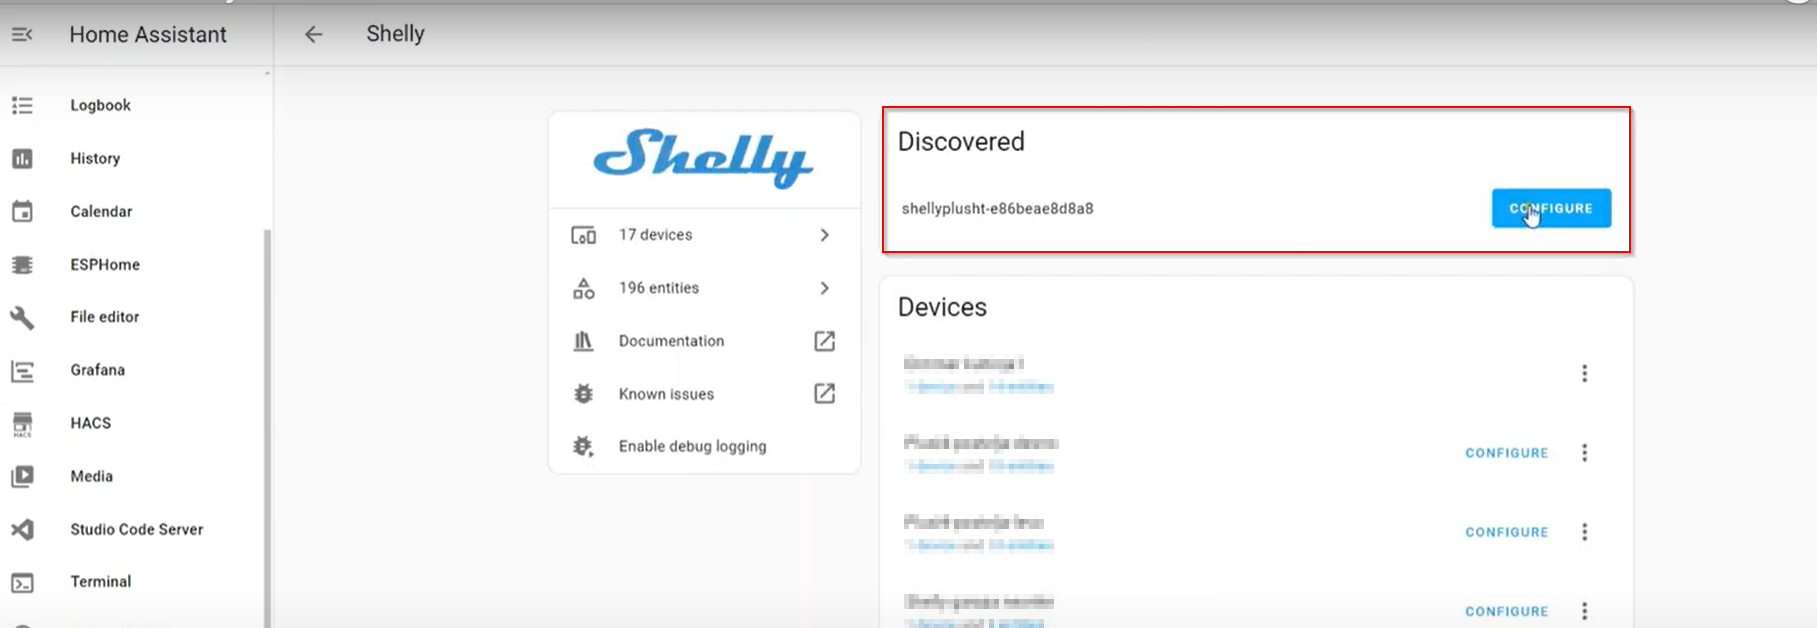
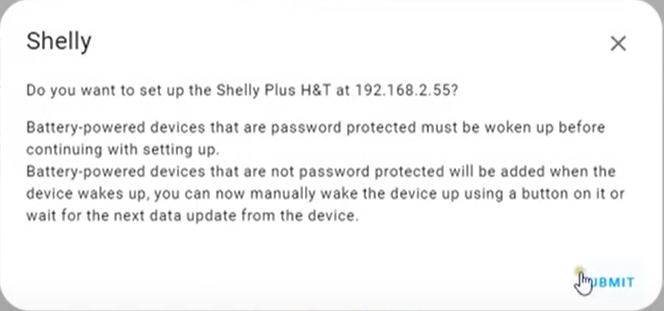
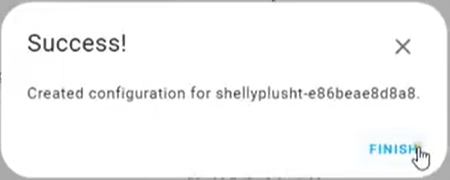
In order to see entities - press the Shelly device button (Screenshot below shows the devices without entities)
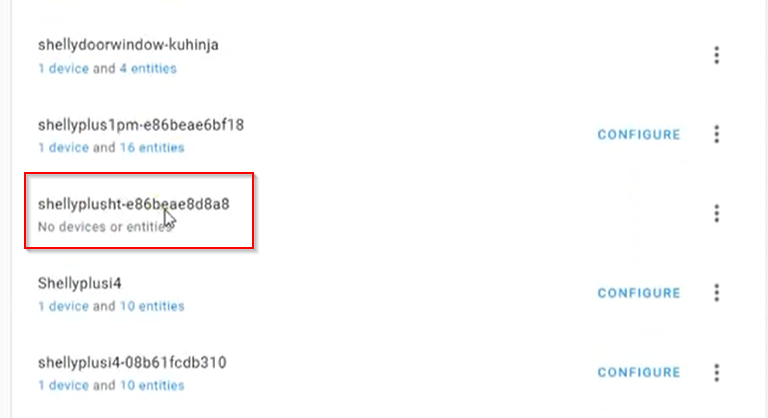
Entities should appear
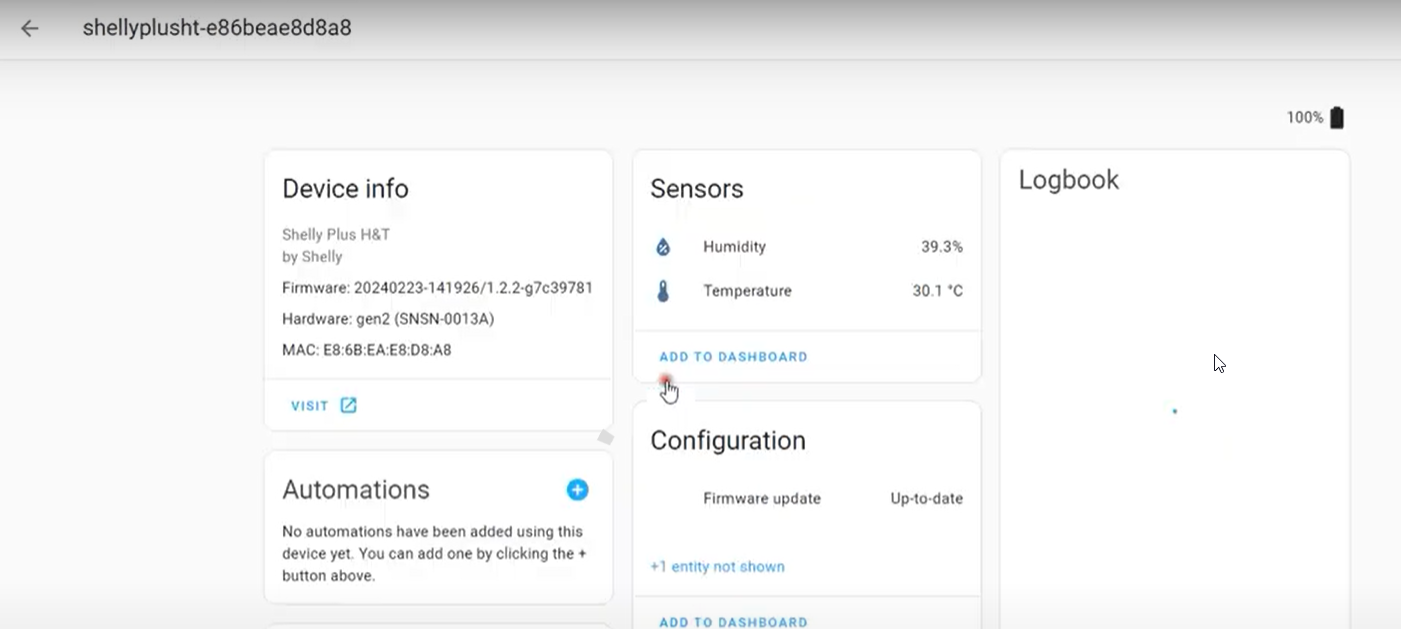
With that the process of adding your device to HA is complete.
Home page of Home Assistant - https://www.home-assistant.io/
We Value Your Feedback!
Thank you for taking the time to read our article! Was it helpful or interesting?
Your insights can help us improve. We’d be grateful for any feedback. If you have a moment,
please share it with us at the following email:
