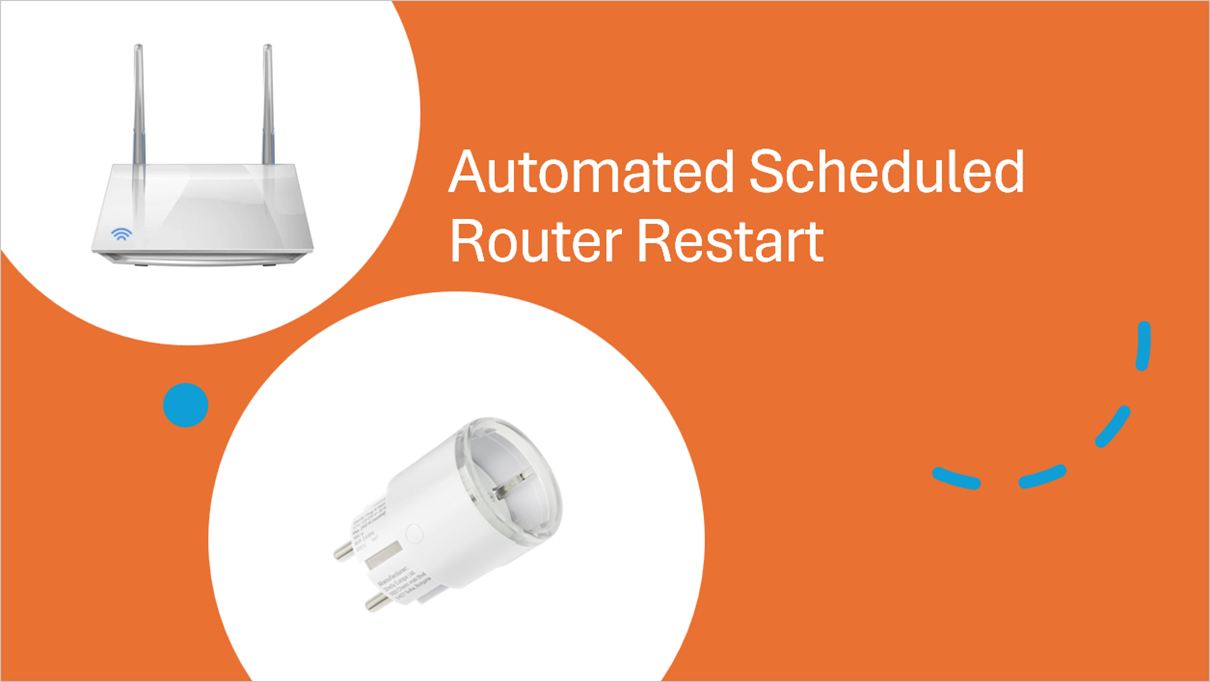
Automating Home Router Restarts Using Shelly Plug
Overview
Keeping your home network running smoothly can sometimes require a router restart (also known as “power cycling”). This can improve connectivity and help resolve or prevent minor issues. Automating this process with the Shelly plug provides a hassle-free way to restart your router remotely or on a set schedule.
The solution explains how the shelly plug can be used to schedule restarts (power cycling) of your home router or manually trigger the restart remotely, helping to improve your internet performance.
As a side note, this is also applicable to any other network equipment for which you want to schedule restarts.
Prerequisites
To implement this solution, you will need:
Shelly Plug S MTR Gen3: A Wi-Fi-capable smart plug already set and added to your Shelly Smart Control app account.
Shelly Smart Control app: Available for iOS and Android.
Optional: A PC or laptop connected to a network same with the shelly plug and a browser installed on the PC or Laptop. This is needed if you plan to set up a local Schedule on the device using its integrated web interface instead of the Shelly Smart Control app.
Step-by-Step Instructions
Step 1. Connect router power supply to shelly plug
Once you have added the shelly plug to your Shelly account, simply plug it into any outlet and connect the router’s power supply to the shelly plug.
Step 2. Configure the schedules on your shelly plug
There are two options to configure the schedules:
Cloud triggered configuration.
Locally triggered action.
If you choose the second option, the configuration will be saved locally on the device and the command will be executed locally without needing to go through the cloud.
Option 1 - Cloud triggered configuration
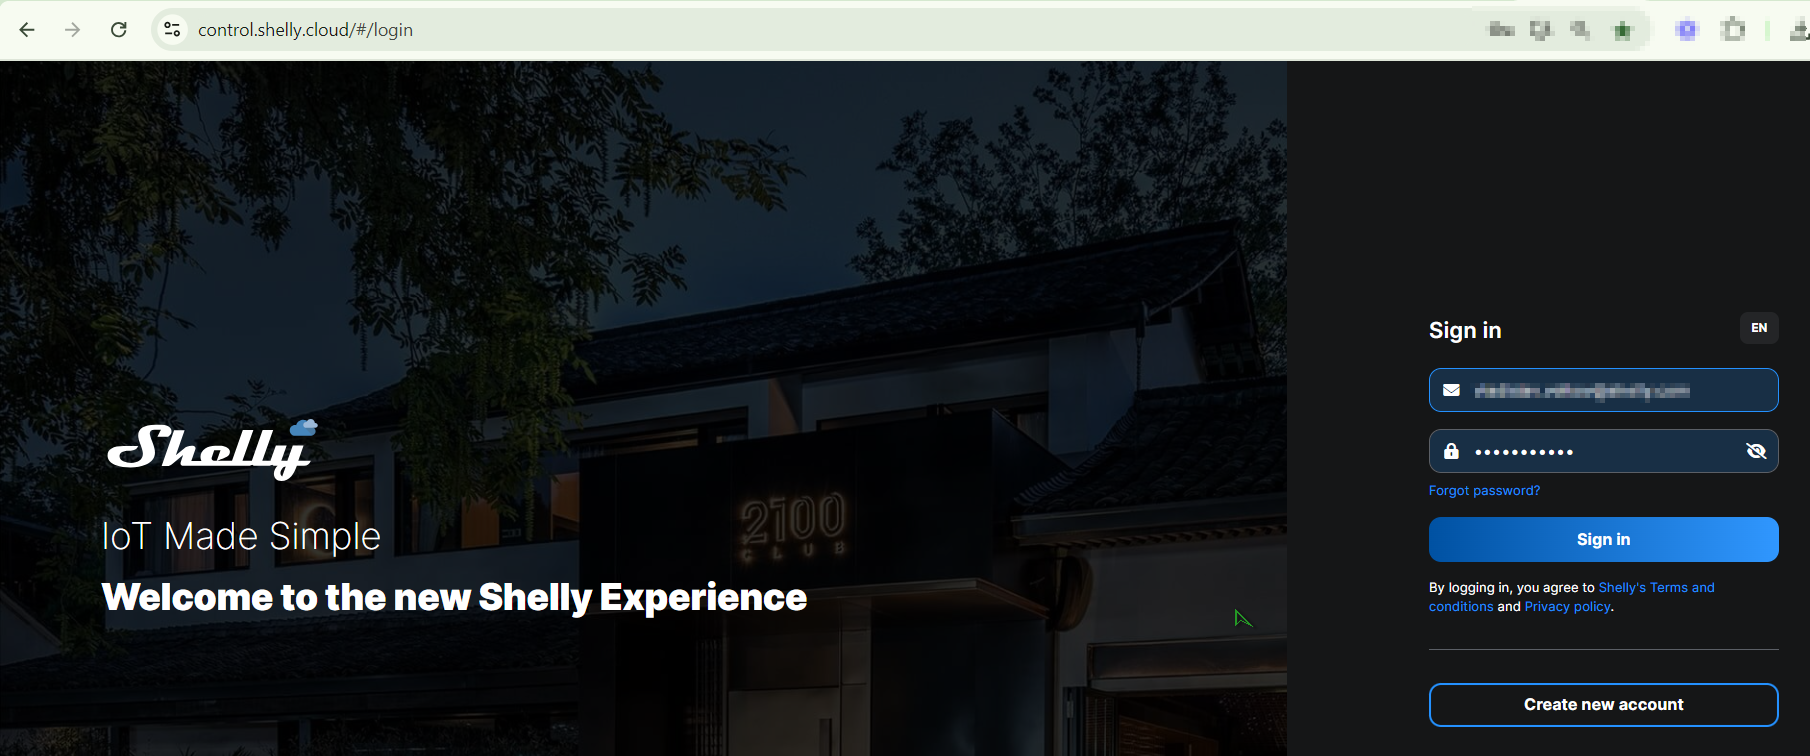
You can set a schedule in the Shelly Smart Control app. This way, the commands will be sent via the cloud. In order to do that, follow the steps below. The screenshots below are from the web UI https://control.shelly.cloud/ , but the steps in the Shelly Smart Control Mobile app are similar.
Go to your Shelly Control App or log in via browser to your account.
Locate your device and click on it to open the additional settings on the right panel.
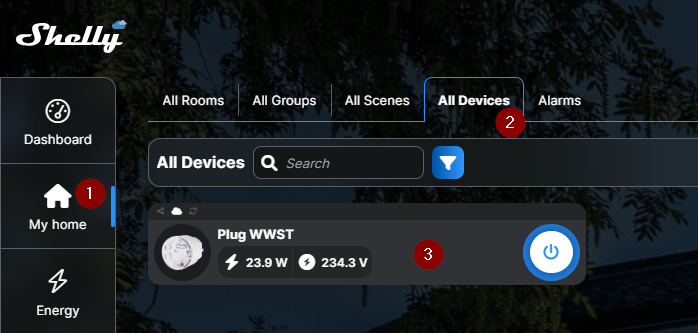
Go to Schedule section > Add Schedule.
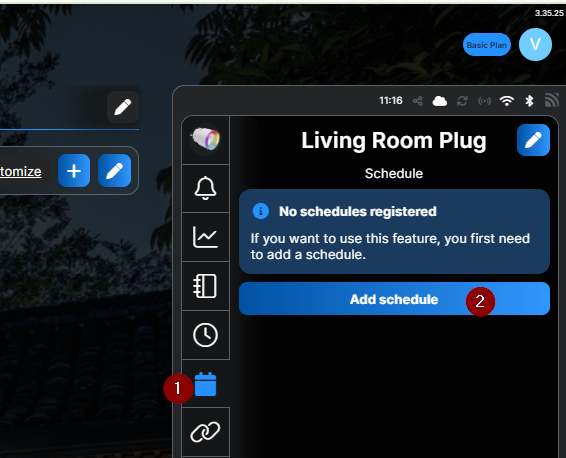
Configure the Schedule.
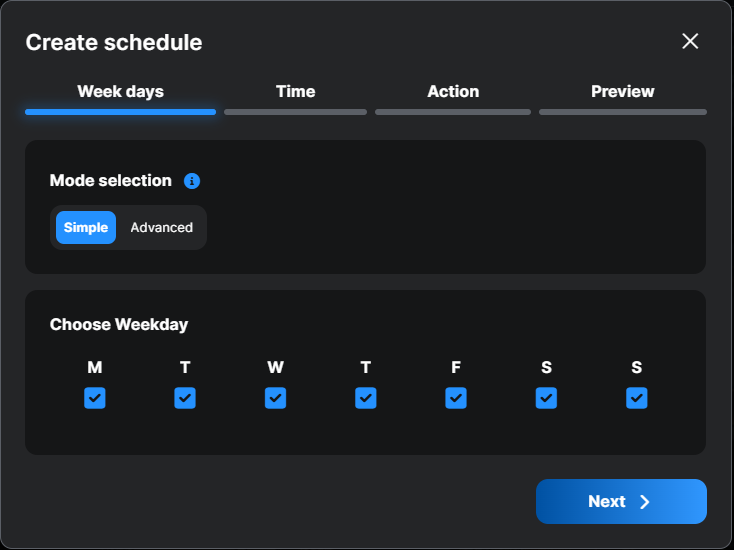
Set Week Days: For example, if you want this to happen every day, select all days of the week.
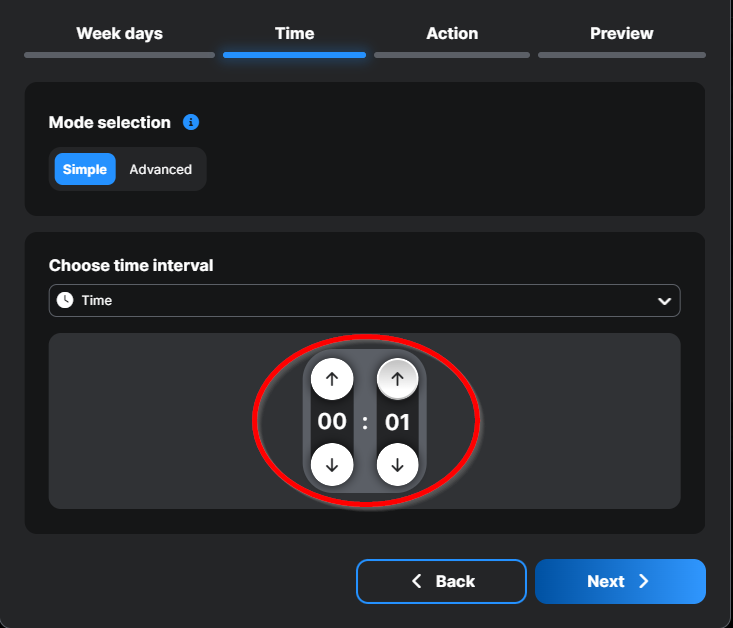
Set the time: Choose the time you want the router to reboot. For example, the screenshot below shows 1 AM, but you can select any time based on your preference.
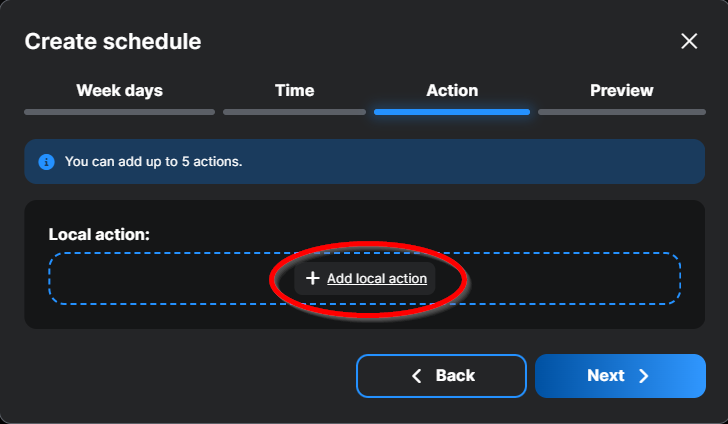
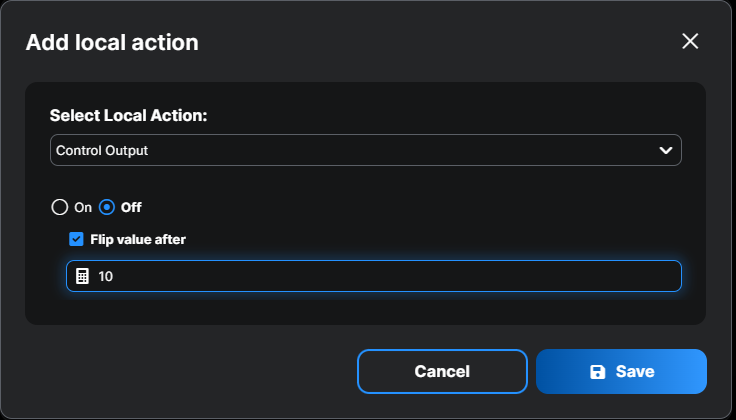
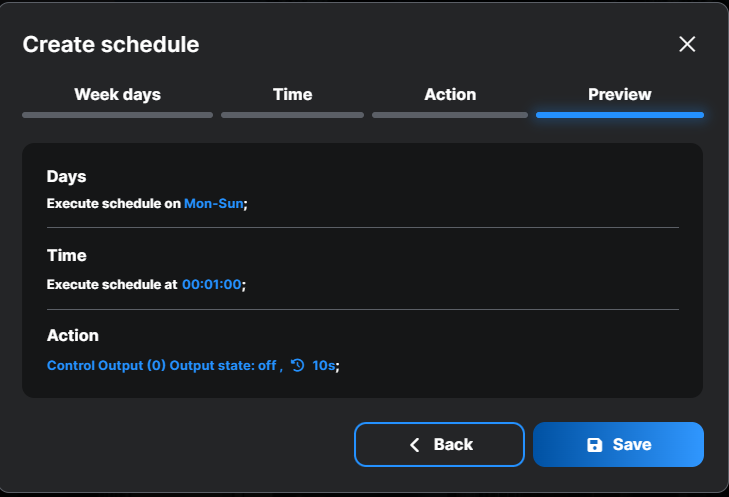
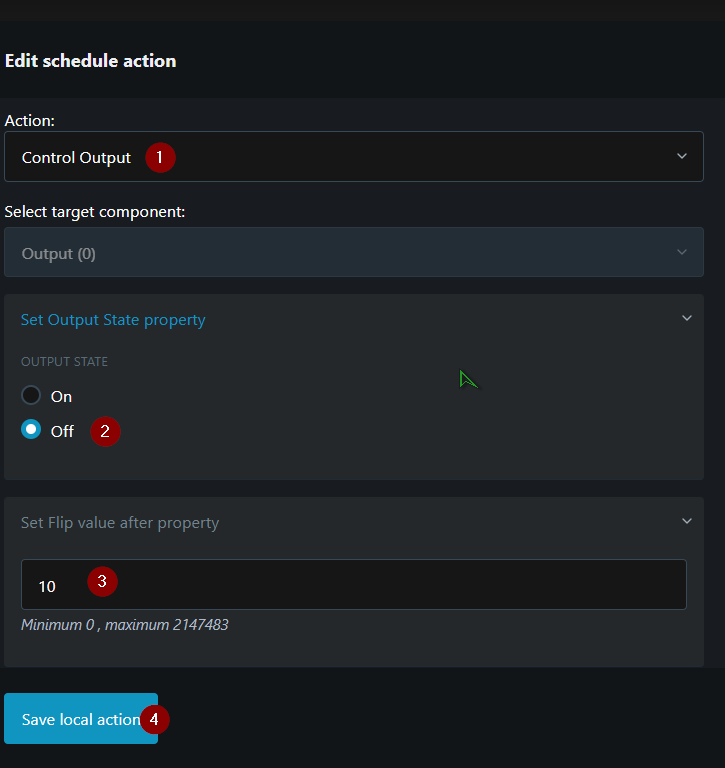
Add the schedule: In the Action tab, first click on Add local action, then configure the local settings action. The Flip value after is the time after which the shelly plug will restore the power supply to the router once it has been turned off. After saving your configuration, click Next to go to proceed to the final step, the Preview.
Preview and Save: Review your schedule settings and click Save to activate the schedule.
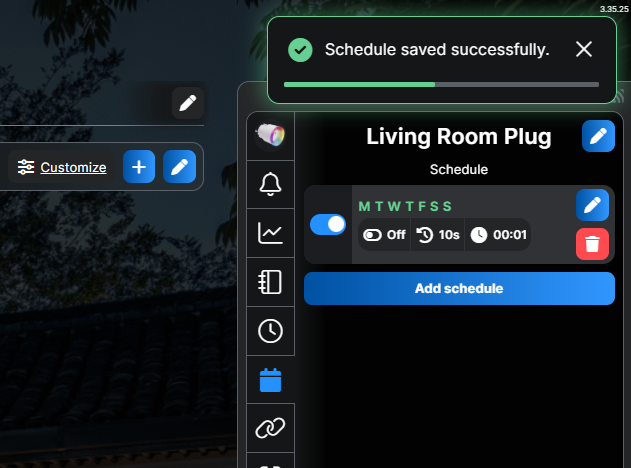
Once saved, the schedule will appear in the Schedules section under the specific device.
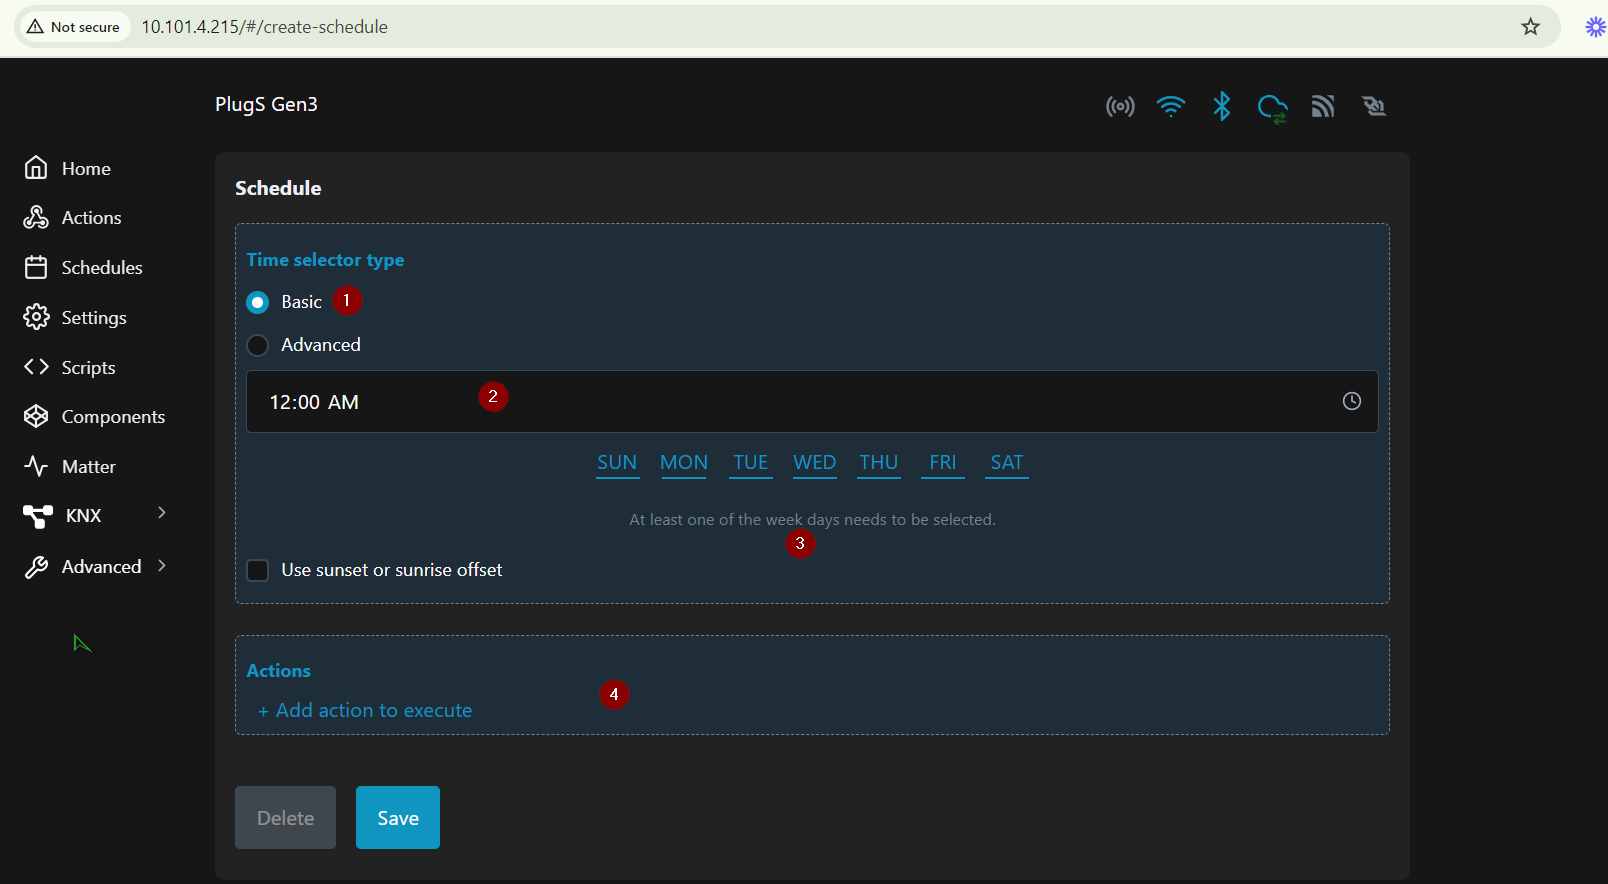
Option 2 - Locally triggered action
You can set schedule locally on the device itself. This allows the schedule to execute directly on the device without requiring an internet connection or sending commands through cloud servers.
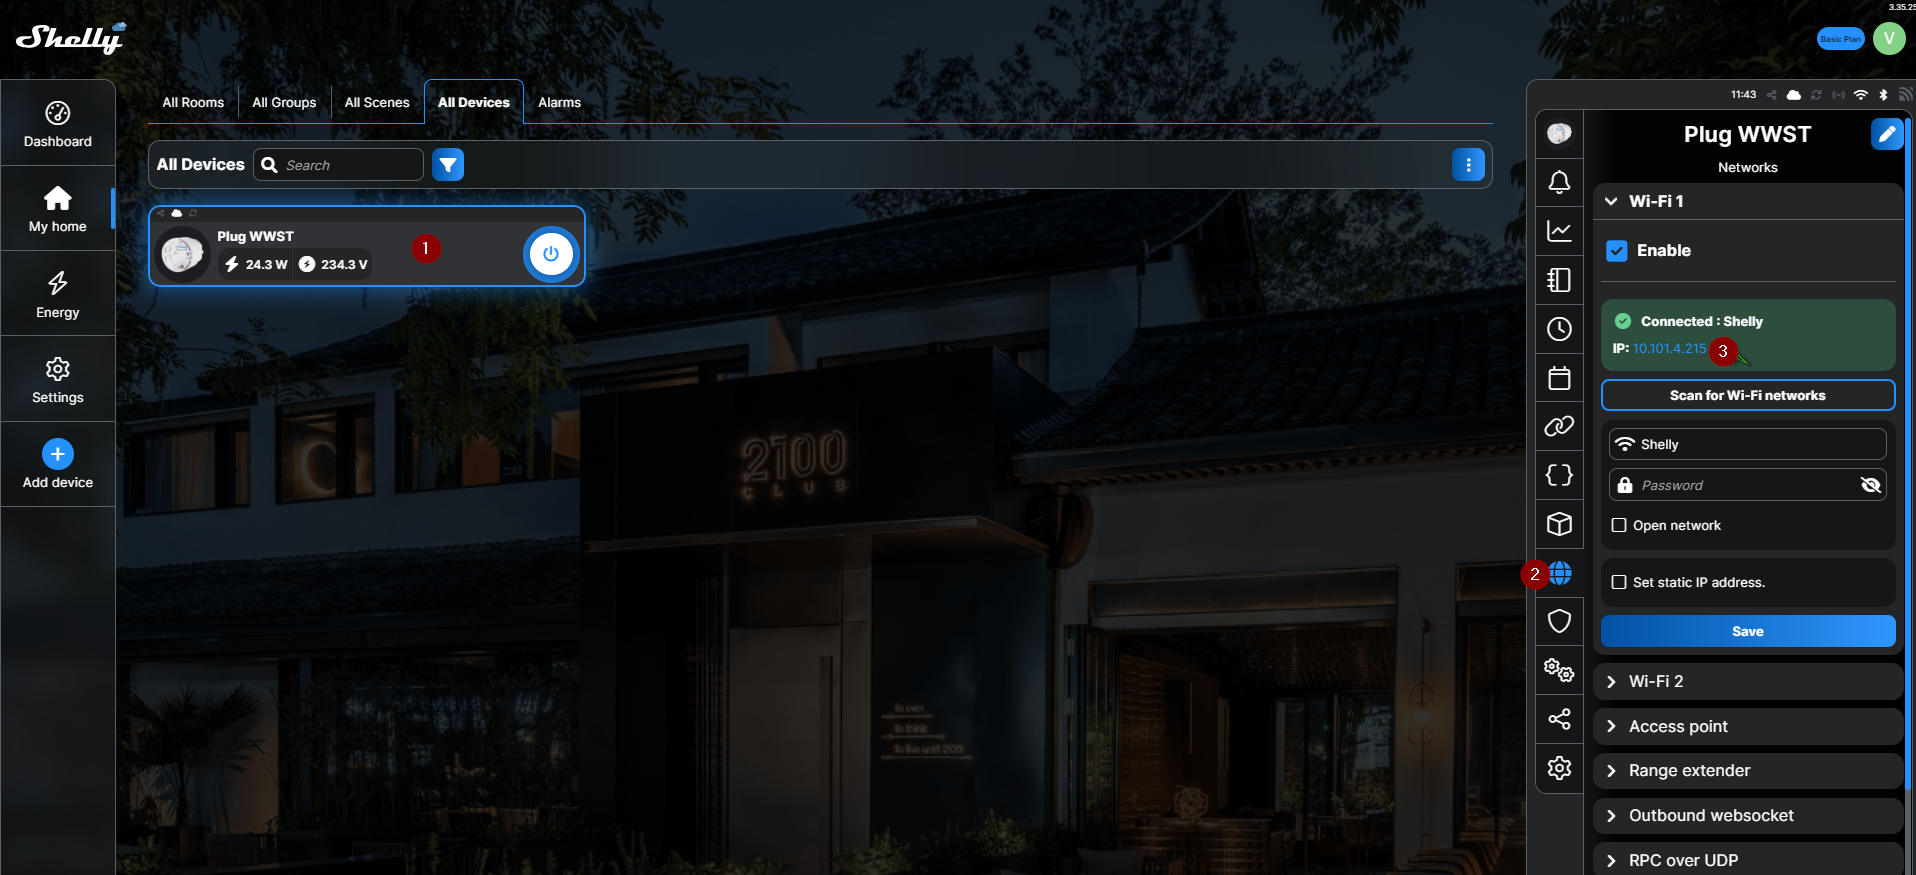
Locate your device, click on it and go to Network section of your device. Then click on the IP address of your device to invoke the integrated web interface so you can initiate the local schedule configuration.
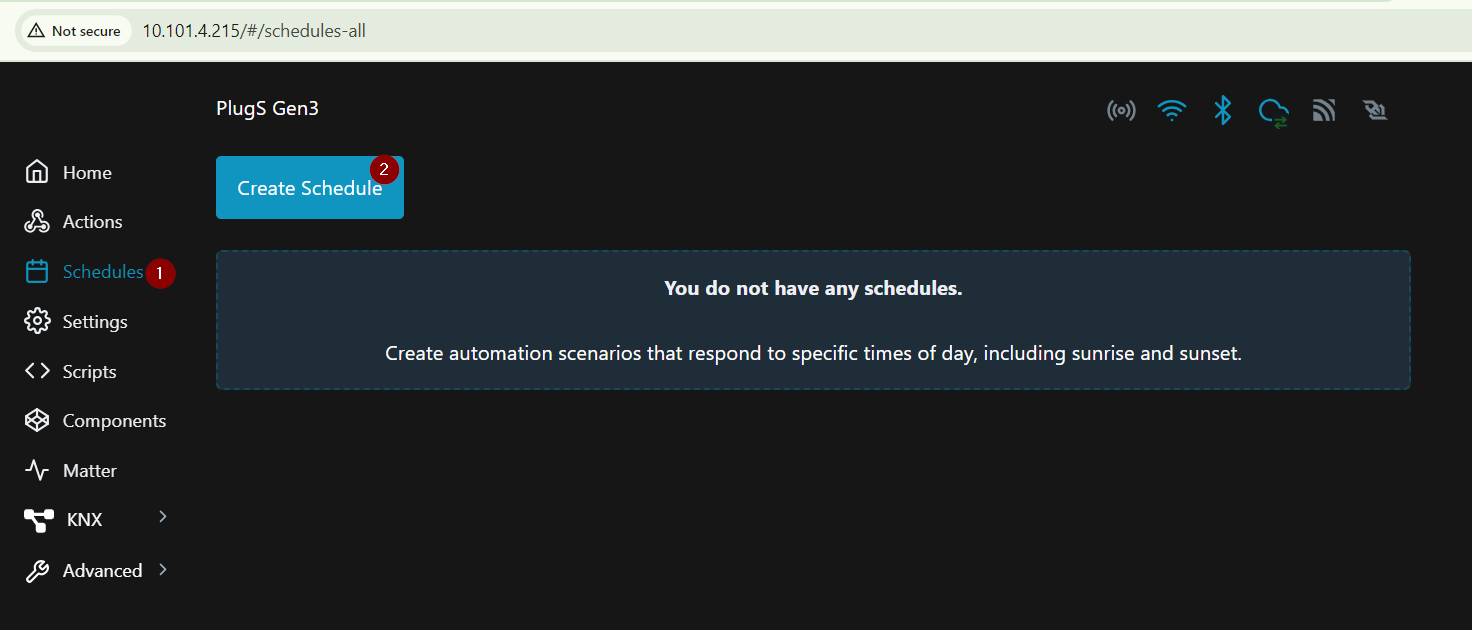
Initiate Configuring the Schedule via the web interface by clicking on Schedules > Create Schedule.
Configure the Schedule and the Action it will execute.
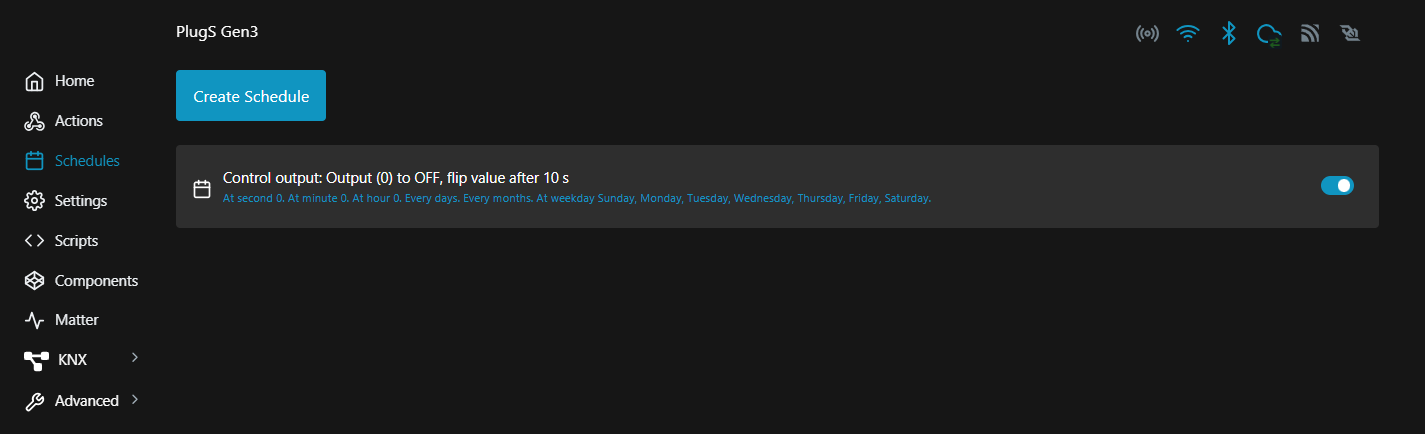
Review and save.
This is how the configured scheduled reboot will look under the Schedules section.
Tips
Firmware Compatibility: Ensure that the device is updated to the latest firmware version.
We Value Your Feedback!
Thank you for taking the time to read our article! Was it helpful or interesting?
Your insights can help us improve. We’d be grateful for any feedback. If you have a moment,
please share it with us at the following email:
Devices Used:
Note: The example for this solution is made with the above mentioned Shelly Plug S MTR Gen3.
However, any plug from Gen2 or newer can be used for this purpose. Note that the name of the Shelly Plug may vary across different markets, but as long as it is Gen2 or newer, it will be compatible.